Showing posts with label face. Show all posts
Showing posts with label face. Show all posts
Adding real Tattoo on face
Final view
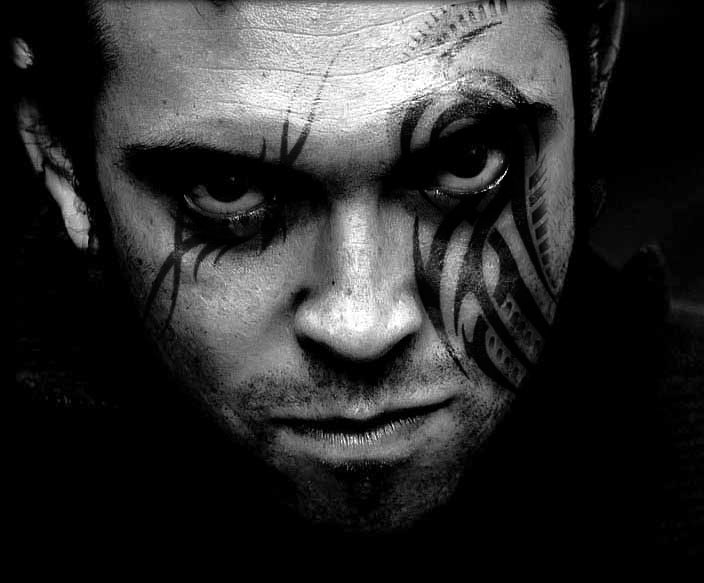
Step 1:
take the image in photoshop to edit and make it black-white.
(I took one of the image from Google)
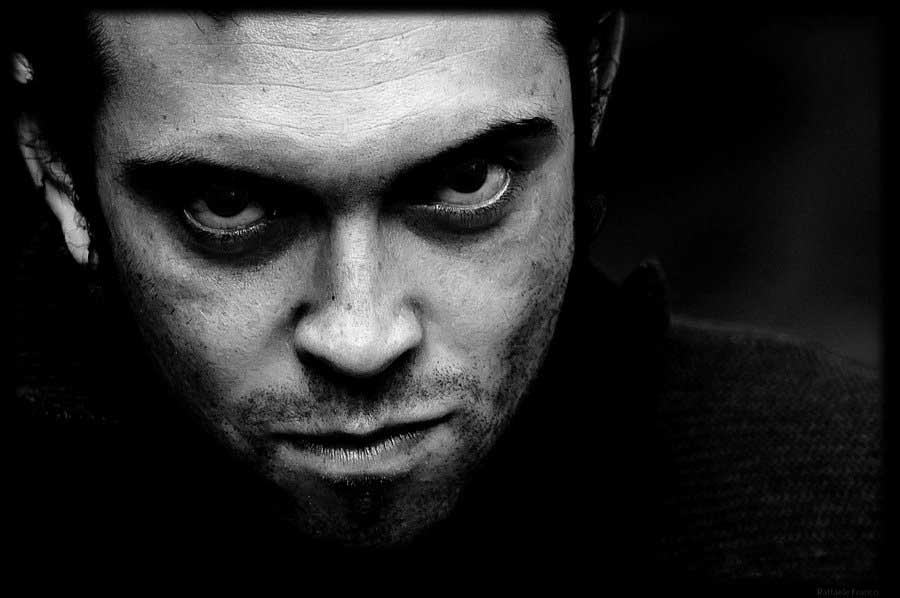
Step 2:
Crop the image so that object is in the middle.
Adjust the images brightness using curves (Ctrl + M) and Level(Ctrl + L).
Burn the shadows of the image by burn tool. (Keep Range=Shadows and Exposure=15-20).
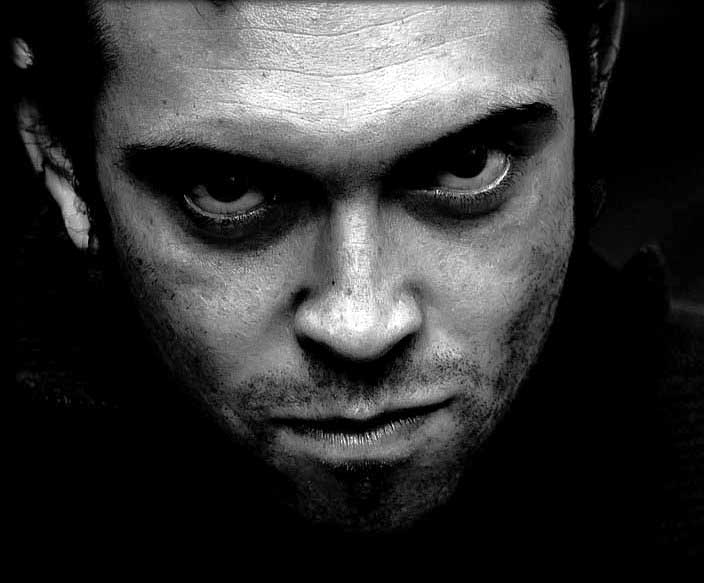
Step 3:
Create new blank layer (ctrl+shft+n), name it layer1.
Now select Brush tool and the tattoo brush of your choice. Click on the layer, where you want a tattoo.
(f you dont have Tattoo brush set, the download the set and copy it in to Adobe --> ps--> presets --> brushes).
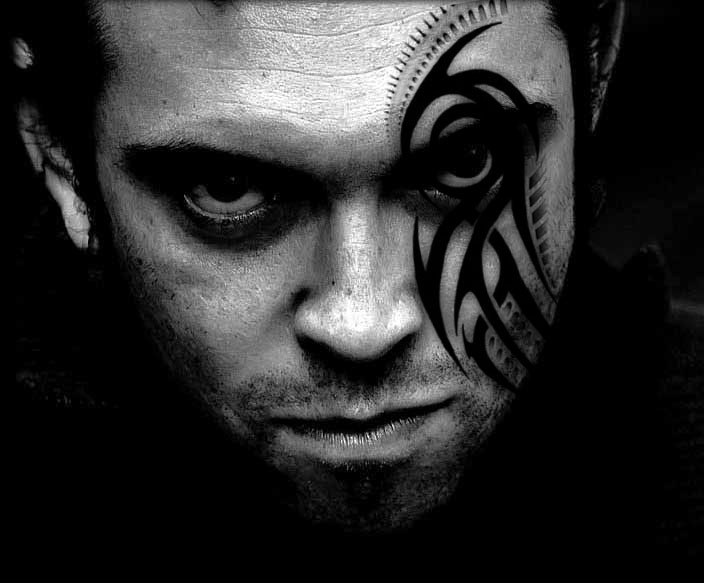
Now make a duplicate layer of the layer1 by right clicking on the layer (Ctrl+J).
the name of the layer is layer1 copy.
Step 4:
Set the property of the layer1 to overly 88%,
Set the property of the layer1 copy to soft light 70%.
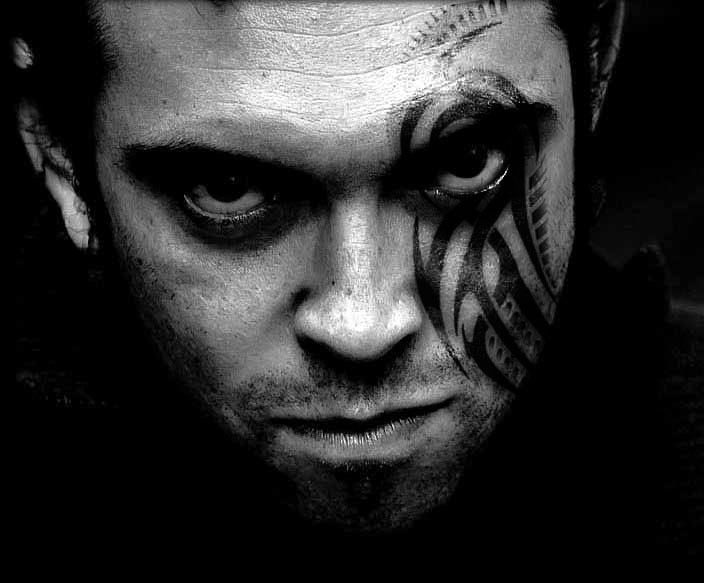
Step 5:
Same like this you can add more tattoos..
create new layer(ctrl+shft+n) name it layer2
select the another brush and set the position of tattoo.
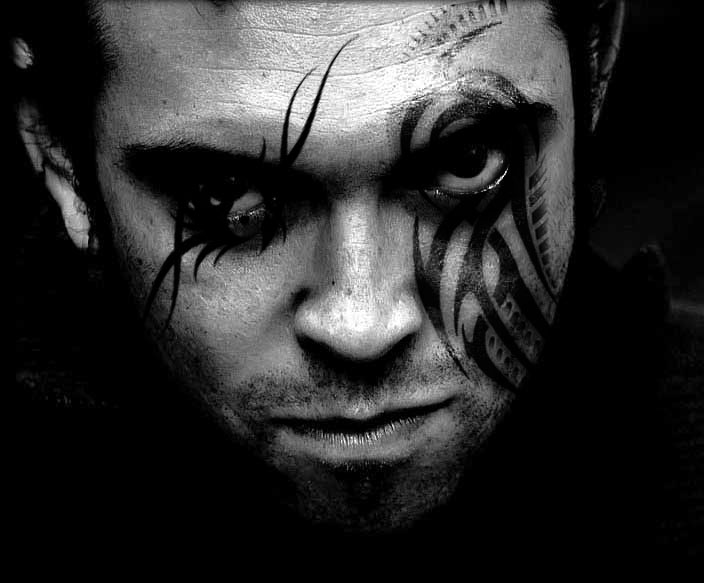
Step 6:
Make a duplicate layer of it.. name will be layer2 copy.
set layer2 property to overly 88%, and layer2 copy property to soft light 70%;
You will get the final real tattoo.
Done..!!

Wednesday, March 18, 2015
convert,
face,
how,
normal,
photogenic,
to
0
comments
How to convert Normal Face to Photogenic Face
In this Photoshop Tutorial we will be learning a technique in which you will be able to convert a Normal face into Photogenic face. You must have found a lot of tutotials regarding this, but here we will discuss a different technique. We will also learn How to clean any picture by using a different and very simple technique. This would be really helpful for those who are in photography field.
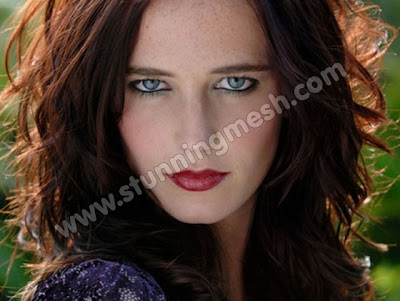
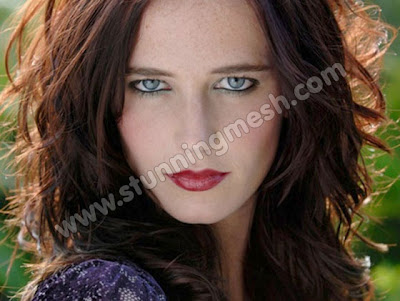
We have chosen this picture on which we would be working on, after opening this picture, press Ctrl+J to duplicate it so we will be saving the original for comparing it with our final result in the last:
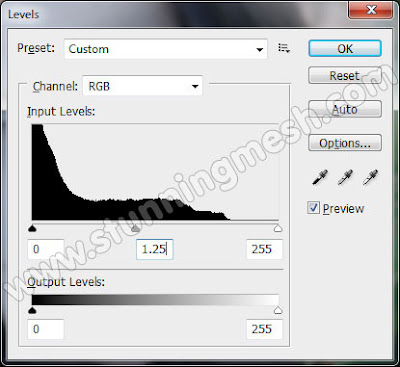
1. First of all we would be cleaning the skin by removing stains and wrinkles using some different and easy techniques. Run the command Image > Adjustment > Levels command or simply press Ctrl+L to open Level box and give the following settings:
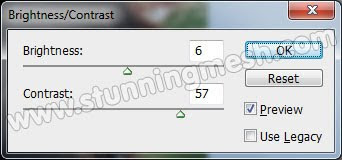
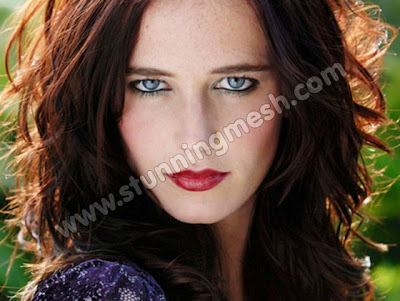
3. Its time to pick Pen tool and select different parts of Forehead, Cheeks, Nose and Chin but before converting the path into selection, don’t forget to give 10px in the radius so you should have selection like this:
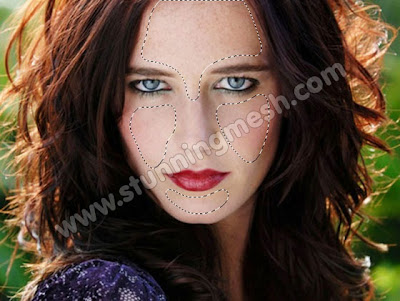
4. Run the command Filter > Blur > Gaussian Blur and give 2 in the radius (don’t give number greater than 2) and hit OK but don’t un-select it, remain the selection on:
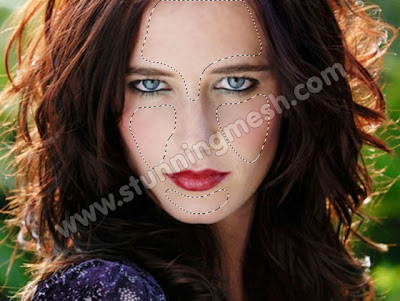
5. Here is the technical part which requires your skills, you now have to pick Smudge tool and change the Strength (from top Property Panel) to 10%, now you have to use Smudge tool on different parts of the face but don’t use more than twice on same place so you should have picture like this:
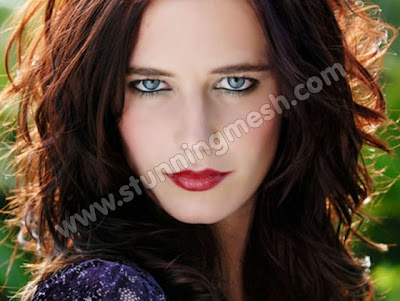
6. Press Ctrl+J 3 times to duplicate the picture, leave the original picture and select the first duplicated layer, go to Layer Panel and change the blending mode from Normal to Soft light and reduce the opacity of the layer to 25%:
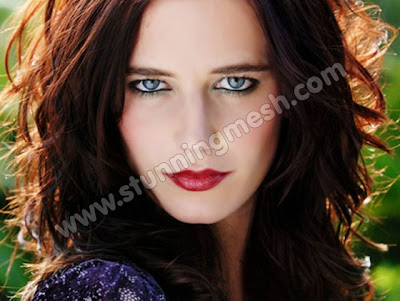
7. Select the second duplicated layer and change the blending mode from Normal to Soft Light, but don’t change the opacity of the layer this time, run the command Filter > Blur > Guassian Blur and give 10 in feather radius:
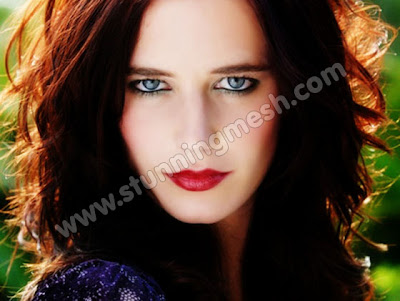
8. Now select the third duplicated layer and change the blending mode from Normal to Soft Light and reduce the opacity to 50% as:
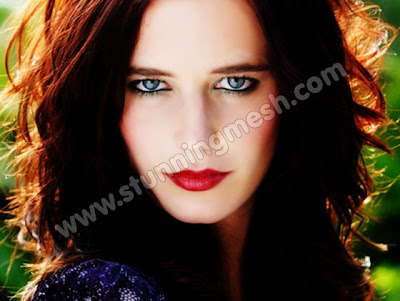
9. Now create new layer on top of all layers and fill it with #bead72 color and change the blending mode from Normal to Overlay and reduce the opacity to 32%, so picture will look like this:
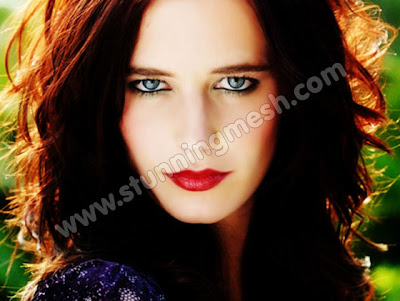
10. Create another new layer on top of all layers and fill it with #c6c0b7 color, the brighter color you will use the more bright the picture would be, change the blending mode of layer from Normal to Soft Light:
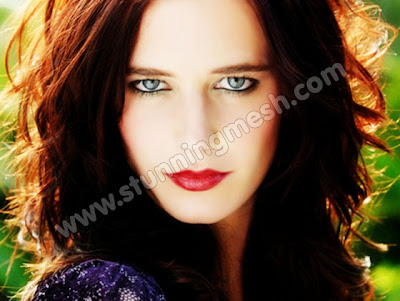
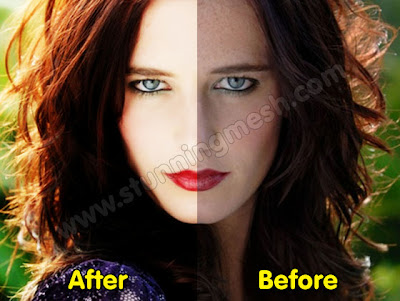
11. So here is our final image, I’ve pasted both images at a time so you may have better idea what was the quality of picture and what we have done it. Difference shows clearly on these two pictures. Hopefully you have learn some new techniques by using this tutorial and enjoyed it a lot.
This tutorial is taking from website www.stunningmesh.com
In this Photoshop tutorial I would like to invite your attention to the unique technique how to make realistic view tears effect.
So, in the beginning you should find a good picture to work with. You can try to find it on stock photo web sites or also can use this. Open up the picture. Then select the Pen Tool and try to make good form of the tear with black color.
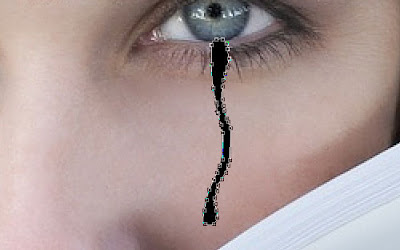
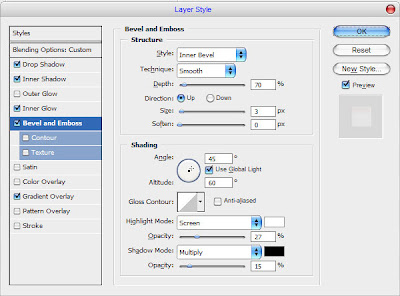
Pay your attention that the form must be how much more uneven to be similar to a real tear. When we are done with form, then change layer mode to Screen for the current layer and apply following Blending Options:
1. Drop Shadow
2. Inner Shadow
3. Inner Glow
4. Bevel & Emboss
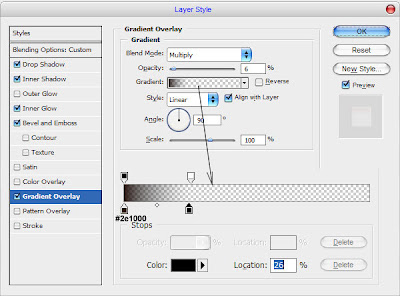
5. Gradient Overlay
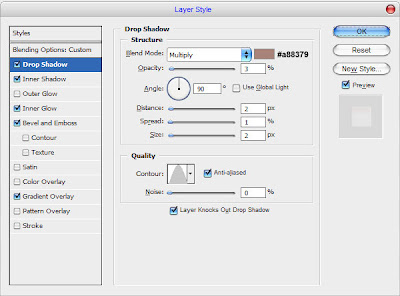
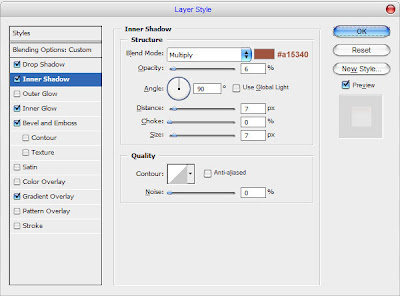
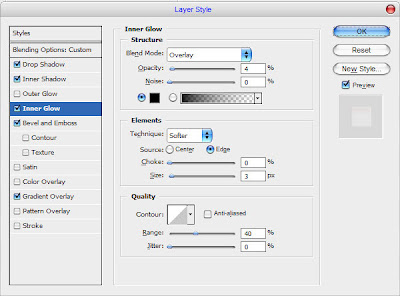
The result should be next:
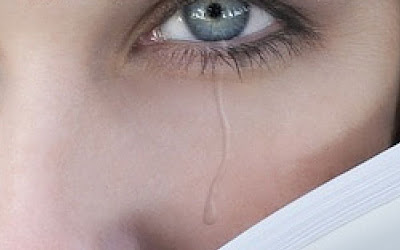
Looks good, but not so realistic for now. I would like to bring some white glare to this form. Select the Pencil Tool and brush about 1 pixel, then make a few dots with white color on the new layer like on my picture below.
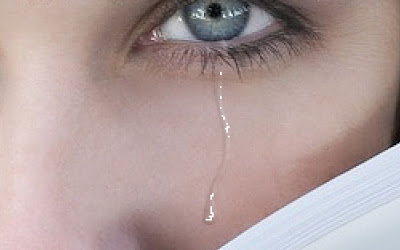
After that apply Blur Tool to current layer.
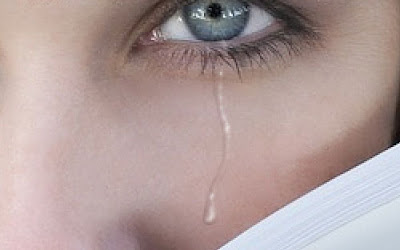
We got a nice realistic view result isn’t it? Don’t be afraid to experiment and you will get your own cool effects!

Read more »
So, in the beginning you should find a good picture to work with. You can try to find it on stock photo web sites or also can use this. Open up the picture. Then select the Pen Tool and try to make good form of the tear with black color.
Pay your attention that the form must be how much more uneven to be similar to a real tear. When we are done with form, then change layer mode to Screen for the current layer and apply following Blending Options:
1. Drop Shadow
2. Inner Shadow
3. Inner Glow
4. Bevel & Emboss
5. Gradient Overlay
The result should be next:
Looks good, but not so realistic for now. I would like to bring some white glare to this form. Select the Pencil Tool and brush about 1 pixel, then make a few dots with white color on the new layer like on my picture below.
After that apply Blur Tool to current layer.
We got a nice realistic view result isn’t it? Don’t be afraid to experiment and you will get your own cool effects!
Subscribe to:
Posts (Atom)


- Follow Us on Twitter!
- "Join Us on Facebook!
- RSS
Contact