Showing posts with label clouds. Show all posts
Showing posts with label clouds. Show all posts

 About The Writer
Hello! My name is Tommy. Im a blogger, I love graphics design and now i went to Architechture Technical Senior High School. | Facebook |

Wednesday, March 18, 2015
clouds,
photoshop,
tutorial,
vintage
0
comments
Vintage Clouds Photoshop Tutorial
Step 1
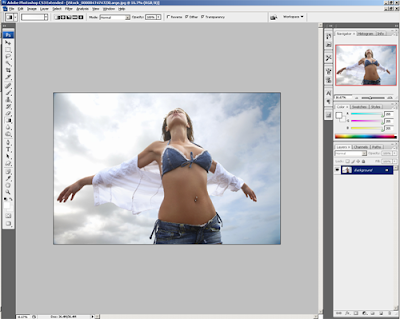
As usual, start by opening any photo into Photoshop. Of course, the photo should have a sky with some clouds.
Step 2
Create a selection of the sky. To do this, you can use any selection tools such as the Quick Select tool or the Magic Wand tool.

Step 3
With the selection still active, in the Layers palette, click on the button and choose Levels.
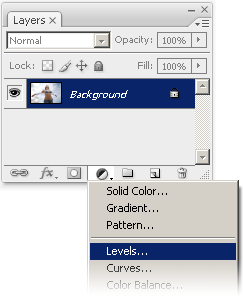
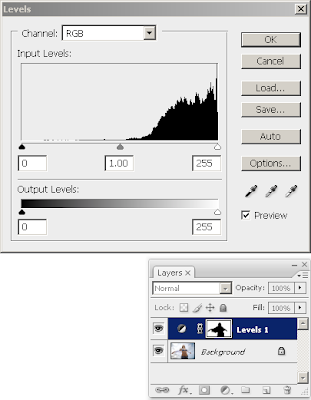
This should bring up the levels tools. You should also see in Levels adjustment layer that the selection applied to the layer mask.
Step 4
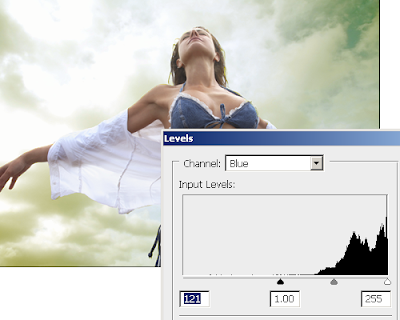
In the Levels tool, select Blue from the Channel drop down menu. Then, move the black input slider towards the right until the skies start turning yellow. Dont click OK yet!
Step 5
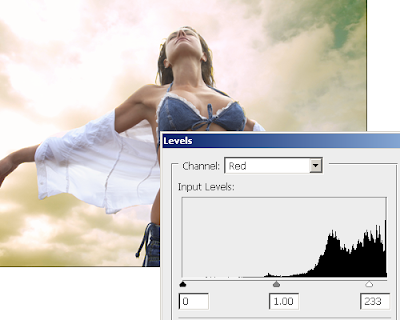
Then, select the Red channel from the Channel drop down menu and move the white input slider towards the left just a little. Dont click OK yet!
Step 6
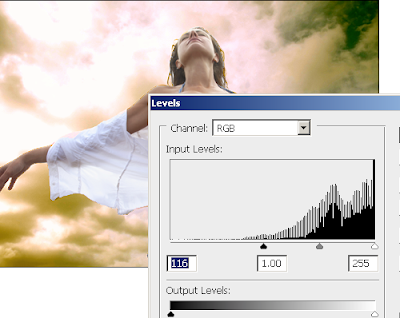
Finally, select back the RGB channel from the Channels drop down menu. Move the black input slider towards the right to increase the contrast of the clouds. Now you can click OK when youre done.
Step 7
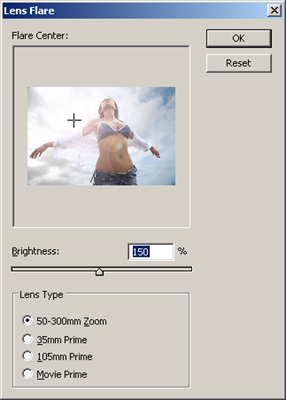
If you want, you can also add a lens flare. Select the Background layer then choose Filter > Render > Lens Flare.
Final Results
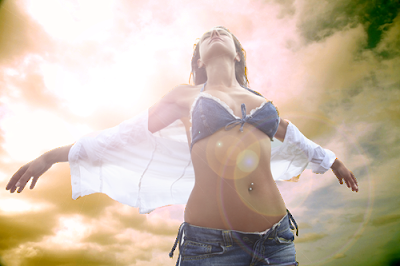
Before and After
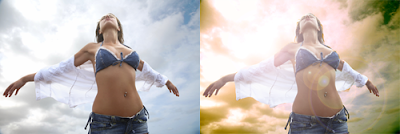
Read more »
As usual, start by opening any photo into Photoshop. Of course, the photo should have a sky with some clouds.
Step 2
Create a selection of the sky. To do this, you can use any selection tools such as the Quick Select tool or the Magic Wand tool.
Step 3
With the selection still active, in the Layers palette, click on the
button and choose Levels.This should bring up the levels tools. You should also see in Levels adjustment layer that the selection applied to the layer mask.
Step 4
In the Levels tool, select Blue from the Channel drop down menu. Then, move the black input slider towards the right until the skies start turning yellow. Dont click OK yet!
Step 5
Then, select the Red channel from the Channel drop down menu and move the white input slider towards the left just a little. Dont click OK yet!
Step 6
Finally, select back the RGB channel from the Channels drop down menu. Move the black input slider towards the right to increase the contrast of the clouds. Now you can click OK when youre done.
Step 7
If you want, you can also add a lens flare. Select the Background layer then choose Filter > Render > Lens Flare.
Final Results
Before and After
Subscribe to:
Posts (Atom)


- Follow Us on Twitter!
- "Join Us on Facebook!
- RSS
Contact