Showing posts with label freezing. Show all posts
Showing posts with label freezing. Show all posts
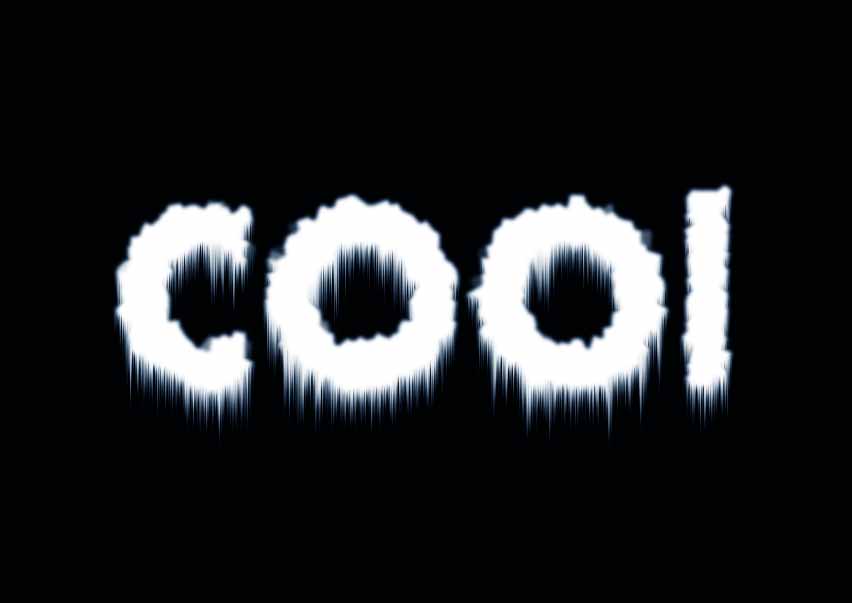
Freezing Text Effect
Final View
Step 1
Create new file..Ctrl+N
Paint Background with Black.. (Shft+f5)---> color.
Step 2
Now select Horizontal type text tool and and add text "COOL" with suitable font.

- Right click on the text layer and rasterise the layer..
- merge both the layers by pressing Ctrl+E, or right click on the text layer and select "Merge Down".
Step 3
Now go to filter ---> Pixelate ---> Crystallize
set the cell size as it is (1.8).
press OK.

Step 4
Now go to filter ---> Blur---> Gaussian Blur
Set radius to 2.0 and press OK.

Step 4
Go to Image ---> Rotate Canvas --> CW90 (clock wise).

Now go to filter ---> Stylize ---> Wind.
elect Method "Wind" and direction "From the right".
Press OK.
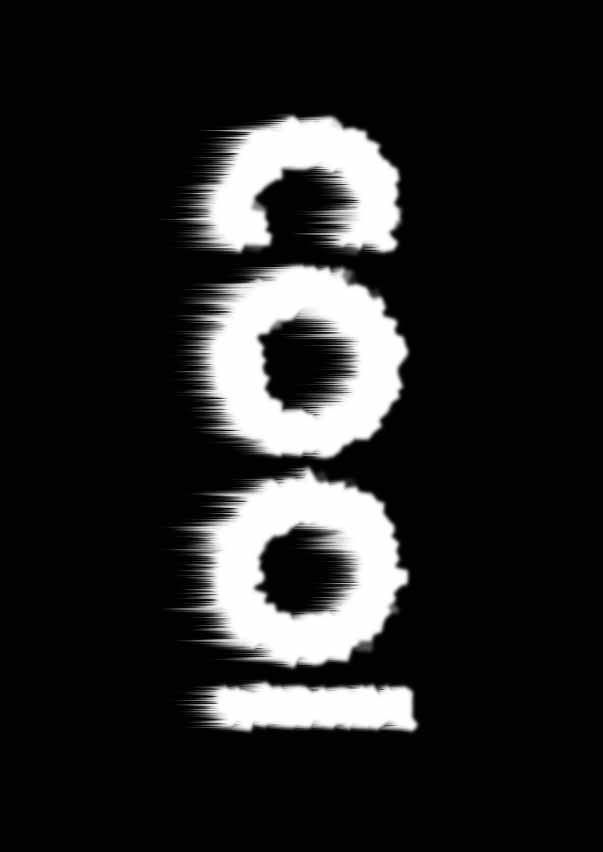
Rotate the image to the original position Image ---> Rotate Canvas ---> CCW90.
Press Ctrl+B (color balance) and increse the colors blue and cyan as suitable..
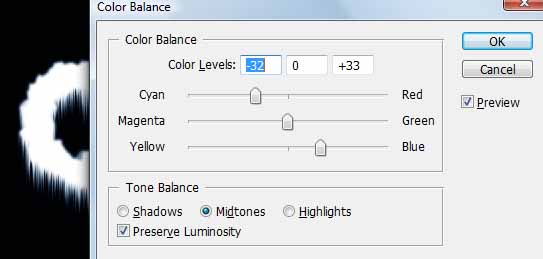
Press OK..
Youll get cool text effect.
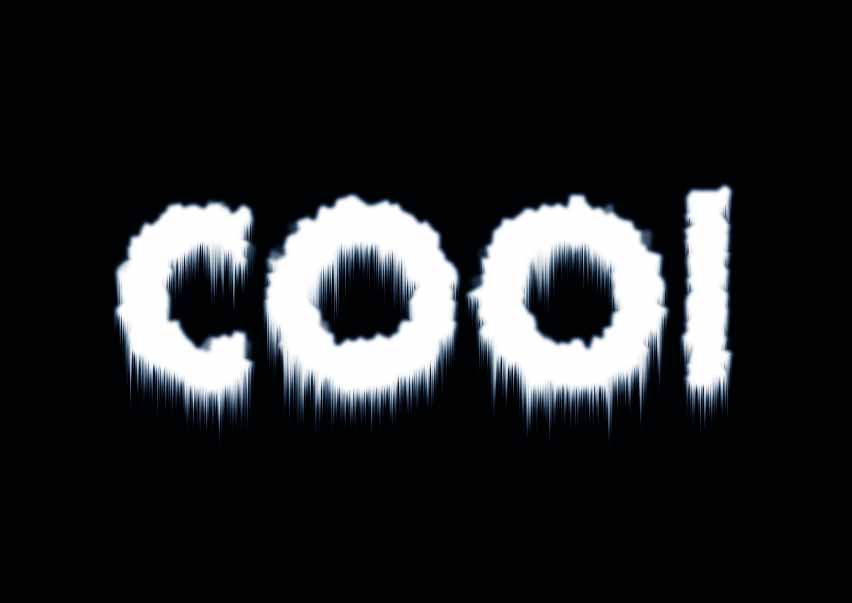
Done... :-)

Hello all today we are going to make a Icy text effect in adobe photoshop:

First make a canvas ( I used 400 x 200 px ) and fill it with black:

Second we need to type in our text ( I used “Icy” with Ariel Black at 72pt ):

Now rasterize the text layer by right clicking the layer and click Rasterize Type:

Right click the Icy layer and click Merge down:

Goto Filter > Pixelate > Crystallize:

Enter 3 as the Cell Size:

Now goto Filter > Blur > Gaussian Blur:

Enter 1 pixel and click ok:

Now goto Image > Rotate Canvas > 90 CW:

Goto Filter > Stylize > Wind:

Make sure From the Right is ticked and click ok:

Now goto Image > Rotate Canvas > 90 CCW:

Then Image > Adjustments > Hue/Saturation:

Enter Hue: 215 Saturation: 50 Lightness: 0 and make sure Colorize is checked:

And here is your final result:
Thanks for looking at this tutorial and hope you learned from this.
Read more »
First make a canvas ( I used 400 x 200 px ) and fill it with black:
Second we need to type in our text ( I used “Icy” with Ariel Black at 72pt ):
Now rasterize the text layer by right clicking the layer and click Rasterize Type:
Right click the Icy layer and click Merge down:
Goto Filter > Pixelate > Crystallize:
Enter 3 as the Cell Size:
Now goto Filter > Blur > Gaussian Blur:
Enter 1 pixel and click ok:
Now goto Image > Rotate Canvas > 90 CW:
Goto Filter > Stylize > Wind:
Make sure From the Right is ticked and click ok:
Now goto Image > Rotate Canvas > 90 CCW:
Then Image > Adjustments > Hue/Saturation:
Enter Hue: 215 Saturation: 50 Lightness: 0 and make sure Colorize is checked:
And here is your final result:
Thanks for looking at this tutorial and hope you learned from this.
Subscribe to:
Posts (Atom)


- Follow Us on Twitter!
- "Join Us on Facebook!
- RSS
Contact