Showing posts with label change. Show all posts
Showing posts with label change. Show all posts
Wednesday, March 18, 2015
change,
color,
hue,
saturation,
with
0
comments
Change Color with Hue Saturation
1. Open your image and duplicate its background layer.

2. Staying in the layer copy go to Image > Adjustment > Hue/Saturation
3. Check Colorize in the Hue/Saturation panel and adjust Hue and Saturation until you have the color you want in the desired place of the image (Hue will change color, Saturation - its intensity). Dont bother about the rest of the image, we will deal with it in the next step.

4. Add a layer mask to the layer with modified color and choose a round soft brush. With the foreground color set to black start masking the parts of the image you dont want to be colorized.

5. You can correct what you are doing at any time by changing the foreground color to white and revealing the masked part.

6. After masking is done you can regulate the intensity of the color by changing the layer opacity. I set it to 66%.


If the layer is retained for further use in a .psd file you can change the color of your object to any other at any moment.
Read more »
2. Staying in the layer copy go to Image > Adjustment > Hue/Saturation
3. Check Colorize in the Hue/Saturation panel and adjust Hue and Saturation until you have the color you want in the desired place of the image (Hue will change color, Saturation - its intensity). Dont bother about the rest of the image, we will deal with it in the next step.
4. Add a layer mask to the layer with modified color and choose a round soft brush. With the foreground color set to black start masking the parts of the image you dont want to be colorized.
5. You can correct what you are doing at any time by changing the foreground color to white and revealing the masked part.
6. After masking is done you can regulate the intensity of the color by changing the layer opacity. I set it to 66%.
If the layer is retained for further use in a .psd file you can change the color of your object to any other at any moment.

Tuesday, March 17, 2015
change,
color,
hair,
in,
photoshop
0
comments
Change hair color in photoshop
In this tutorial Ill Show how you can easily change someone hair color.
Step 1
Open your photo.
I chose this one:
 Use quick mask to select the hair: press Q to start using quick mask.
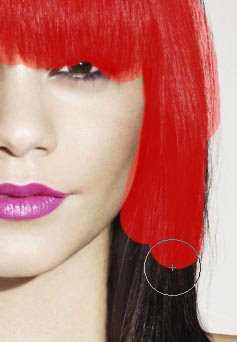
Take a big hard brush (hardness and Opacity set to 100% ) with the color black, And paint with it over the hair. Dont worry about getting out of lines a little, well take care for that later. When you paint with black using quick mask anything youll paint will be red.
 Step 2
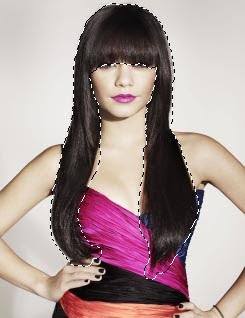
When you finished masking all the hair Press Q again, and youll get a selection of anything except the masked area.
Press Ctrl + Shift + I To select Inverse, and youll have a selection of the hair.
 Step 3
Make a New layer By pressing Ctrl + Shift + N or going to Layer > New Layer.
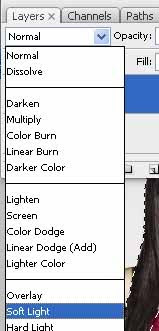
Set the layers Blend mode to Soft light
 Choose the color you want to use and go to Edit > Fill To fill your selection with the color.
The color you choose at this point doesnt matter much because you can easily change it later, But try to choose a color similar to the one you want in the end result.
I want to make her blond so I chose this color: #aca177
After you filled in the layer press Ctrl + D To Deselect.
 Step 4
Zooming in the photo you can see that there are many places that shouldnt be colored.
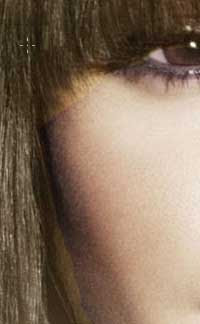 Take the Eraser Tool
Choose a brush with its Hardness Set to O, and Opacity about 50%
And delete or soften all the areas that shouldnt be colored
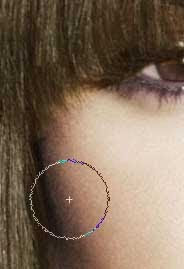 Step 5
After you finished deleting all the unwanted areas,
Right click on the color layer and choose Duplicate Layer
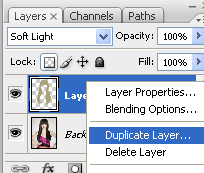 Zoom in, and youll see some new parts that should be cleaned,
Remove them with the Eraser Tool
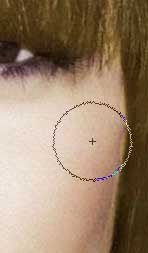 This is my result:
 Step 6
If you dont like the color of your end result, you can easily change it.
In the layer menu, Click on the Lock Transparent Pixels Icon.
Do it on both hair color layers.
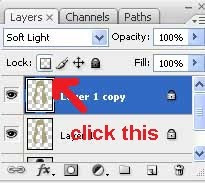 Now all the transparent pixels cant be colored.
Choose a color, and go to Edit > Fill.
Do it on both layers.
You can also choose different color for each layer for a better result, I think when coloring a dark hair its better you use a darker color on the first layer and a brighter color on the second layer.
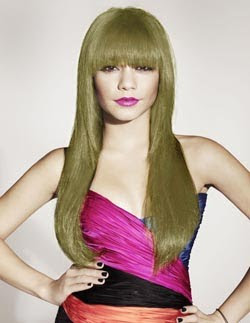
Here some examples I made, Along with the colors I used.
Step 1
Open your photo.
I chose this one:
Take a big hard brush (hardness and Opacity set to 100% ) with the color black, And paint with it over the hair. Dont worry about getting out of lines a little, well take care for that later. When you paint with black using quick mask anything youll paint will be red.
When you finished masking all the hair Press Q again, and youll get a selection of anything except the masked area.
Press Ctrl + Shift + I To select Inverse, and youll have a selection of the hair.
Make a New layer By pressing Ctrl + Shift + N or going to Layer > New Layer.
Set the layers Blend mode to Soft light
The color you choose at this point doesnt matter much because you can easily change it later, But try to choose a color similar to the one you want in the end result.
I want to make her blond so I chose this color: #aca177
After you filled in the layer press Ctrl + D To Deselect.
Zooming in the photo you can see that there are many places that shouldnt be colored.
Choose a brush with its Hardness Set to O, and Opacity about 50%
And delete or soften all the areas that shouldnt be colored
After you finished deleting all the unwanted areas,
Right click on the color layer and choose Duplicate Layer
Remove them with the Eraser Tool
If you dont like the color of your end result, you can easily change it.
In the layer menu, Click on the Lock Transparent Pixels Icon.
Do it on both hair color layers.
Choose a color, and go to Edit > Fill.
Do it on both layers.
You can also choose different color for each layer for a better result, I think when coloring a dark hair its better you use a darker color on the first layer and a brighter color on the second layer.
Here some examples I made, Along with the colors I used.
First layer color: #bfbf81
Second layer color: #ebebcd

First layer color: #092336
Second layer color: #6692b0

First layer color: #5e2e11
Second layer color: #eaaa87
This tutorial will explain how to change the eye color in 5 steps.
After this tutorial for beginners, you can create a really cool effect in just a few minutes.
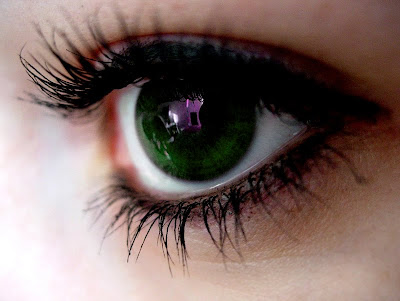
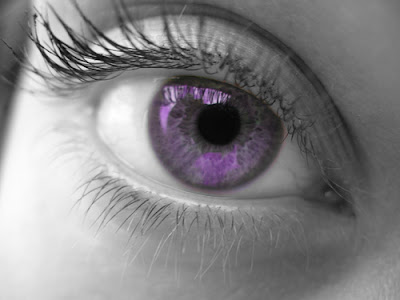
End Result:
STEP 1:
Start with opening the picture you would like to change.
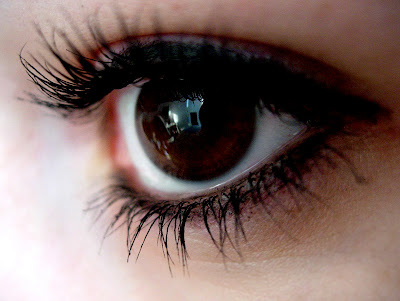
These are the pictures i used for this example.
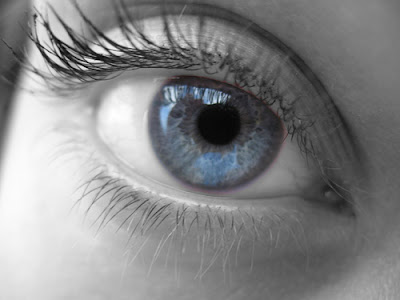
Zoom in to the eye by pressing (Z) and clicking the eye.
STEP 2:
Click (Q) to open up the “Quick Mask Mode”, and press (B) or click the brush tool brush.
Now fill the eye area you would like to change.
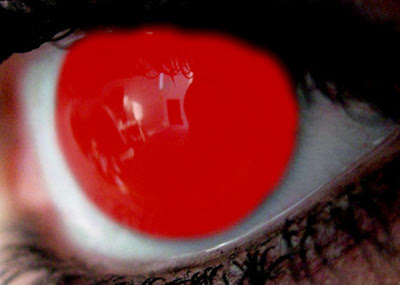
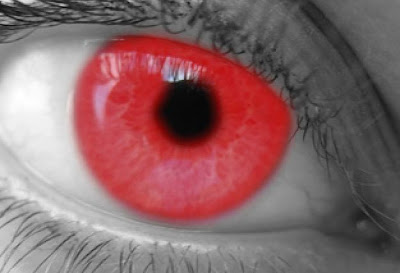
STEP 3:
When you are done Press (Q) again and then Press (M) or click eye_icon_2 to open the “Rectangular Marquee Tool”.
Right click the area you have painted and click “Select Inverse”, Right click again and click “Layer Via Copy”.
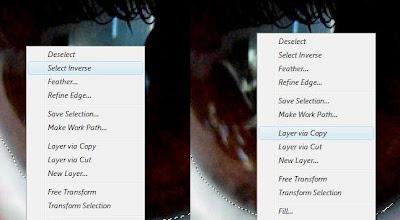
STEP 4:
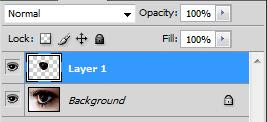
Now you have 2 layers. Select the new layer “Layer 1″.
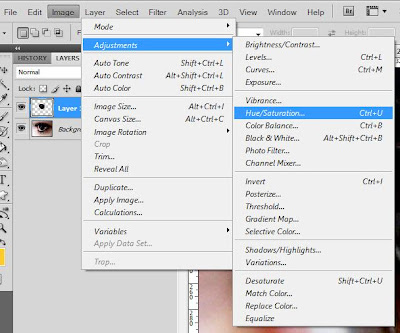
Press (Ctrl + U) or go to Image -> Adjustments -> Hue/Saturation…
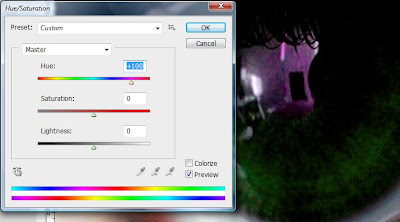
Now move the “Hue” to get the desired color. You can play a little by changing the Saturation and Lightness, but mostly you dont need to edit them.
STEP 5:
When you are happy with the color click OK, Save the image and you will have a picture that looks something like this:
I Hope you enjoyed folowing this tutorial, please leave a comment.
Read more »
After this tutorial for beginners, you can create a really cool effect in just a few minutes.
End Result:
STEP 1:
Start with opening the picture you would like to change.
These are the pictures i used for this example.
Zoom in to the eye by pressing (Z) and clicking the eye.
STEP 2:
Click (Q) to open up the “Quick Mask Mode”, and press (B) or click the brush tool brush.
Now fill the eye area you would like to change.
STEP 3:
When you are done Press (Q) again and then Press (M) or click eye_icon_2 to open the “Rectangular Marquee Tool”.
Right click the area you have painted and click “Select Inverse”, Right click again and click “Layer Via Copy”.
STEP 4:
Now you have 2 layers. Select the new layer “Layer 1″.
Press (Ctrl + U) or go to Image -> Adjustments -> Hue/Saturation…
Now move the “Hue” to get the desired color. You can play a little by changing the Saturation and Lightness, but mostly you dont need to edit them.
STEP 5:
When you are happy with the color click OK, Save the image and you will have a picture that looks something like this:
I Hope you enjoyed folowing this tutorial, please leave a comment.
Subscribe to:
Posts (Atom)


- Follow Us on Twitter!
- "Join Us on Facebook!
- RSS
Contact