Showing posts with label with. Show all posts
Showing posts with label with. Show all posts
Friday, May 1, 2015
cs6,
design,
drop,
illustrator,
shadow,
tutorial,
vector,
with
0
comments
Design Vector Drop Shadow with Illustrator CS6 Tutorial
In today’s quick tip tutorial, I’m going to show you how to use one of the great new features of Adobe Illustrator CS6, gradient on stroke, to create a 100% vector Drop Shadow and Inner Glow.
So let’s get to it straight away.

So you’ve drawn a random object, in this case I’ve used the Star Tool and you want a drop shadow on it. To get this go to Effect > Stylize > Drop Shadow and you’ll get the blow dialogue box to modify your drop shadow as you wish.
 However if you were to apply this effect and then Object > Expand it and drill down into the group it produces, you’d notice that it contains a raster element. This is the object labeled "Image" which you can see below.
 In fact if you hide the "Image" you’ll just be left with the original shape. So what actually happens?
 What actually happens when you apply the effect is Adobe Illustrator duplicates the shape and then changes the fill color to say black in this case. It then rasterizes the object, blurs it and offsets it. Then the shape is combined with the original to produce Live Effect Drop Shadow. This means you can go back into the options of the Drop Shadow via the Appearance panel to modify anything from the drop shadow fill color, blur and so on. The same is true when you create an Inner Glow effect.
 You can apply a similar process to create an inner glow effect, just by using "Align Stroke Inside".

There are a couple things you need to keep in mind. You can’t "Align Stroke Outside" with a gradient. To get around this you’ll need to ensure your Drop Shadow color, in this case black, is the most central Gradient Slider and at 100% Opacity. Other than that, you’ll find you can increase the Drop Shadow "blur" by playing with the Stroke Weight and even the Gradient Sliders along the top.
 Let’s just look at this a little more closer and Object > Expand our Gradient on Stroke. When you do this, you’ll notice the Gradient on Stroke is just a Gradient Mesh! So not a raster element as the Live Effect Drop Shadow uses. This makes it a vector Drop Shadow.
 To prove furthermore it’s a Gradient Mesh and one you can actually edit, I’ve used the Direct Selection Tool (A) to select all the points in the corner of our mesh and changed the color to blue.

 Use the duplicate of the original shape to then create a Clipping Mask (Command + 7) and there you’ll have your Inner Glow.

Read more »
Introduction Design Vector Drop Shadow with Illustrator CS6 Tutorial
In today’s quick tip tutorial, I’m going to show you how to use one of the great new features of Adobe Illustrator CS6, gradient on stroke, to create a 100% vector Drop Shadow and Inner Glow.So let’s get to it straight away.
Taking Apart the Drop Shadow
Before we get into how to achieve this drop shadow, we need to understand what actually happens when we use a Drop Shadow effect in Adobe Illustrator at present and why it isn’t completely vector.So you’ve drawn a random object, in this case I’ve used the Star Tool and you want a drop shadow on it. To get this go to Effect > Stylize > Drop Shadow and you’ll get the blow dialogue box to modify your drop shadow as you wish.
100% Vector Drop Shadow – CS5 Style
If you’re a regular reader of VectorTuts+, you may have seen a similar tutorial title a couple of years back. In fact I did a video quick tip tutorial on how to create a 100% vector drop shadow in Adobe Illustrator CS5. This is done by making use of "Align Stroke Outside" in the Appearance panel.100% Vector Drop Shadow – CS6 Style
So how can we achieve a Drop Shadow in CS6? Simple, by duplicating your shape and giving it say a black fill and then a black transparent linear gradient stroke set to "Apply gradient across stroke".There are a couple things you need to keep in mind. You can’t "Align Stroke Outside" with a gradient. To get around this you’ll need to ensure your Drop Shadow color, in this case black, is the most central Gradient Slider and at 100% Opacity. Other than that, you’ll find you can increase the Drop Shadow "blur" by playing with the Stroke Weight and even the Gradient Sliders along the top.
100% Vector Inner Glow – CS6 Style
If only you could use "Align Stroke Inside" with Gradient on Stroke, because creating an Inner Glow would be a lot easier. However as you can see from the below, the option is greyed/nulled out. So to create an Inner Glow first duplicate your original shape. Then put your fill on as normal and then "Apply gradient across stroke" with the previously used transparent linear gradient. Give the stroke only a Blending Mode and Opacity.Conclusion
Why would you want to do this? Well if you’re a vector freak like me, the thought of having any raster elements in your work makes your skin crawl and you’d like to go that extra mile to ensure every part of your work is vector. Maybe I’ve just confessed to some bizarre vector OCD. Anyway other than that, it’s just a bit of an exercise for those who like to exercise their scalable brains. I hope you’ve enjoyed this tip!
Thursday, April 30, 2015
cs6,
document,
illustrator,
modifying,
tutorial,
with,
your
0
comments
Modifying your document with illustrator Cs6 Tutorial
This video teach you Modifying your document with illustrator cs6 tutorial
And Im take this one is just could want to them to move them to an arbitrary location. So lets start things off by centering the one, and you do that by going up to the Control panel at the top of the screen, go over here to the right-hand side, and youll see word Align, go ahead and click on it. And then well go and change is Align to Option from Align to Selection to Align to Artboard. And now Ill click on each one of these Middle Align Icons both Horizontal Align Center, and then Vertical Align Center. and then Vertical Align Center. So I am going to press Shift Down arrow--lets say two times--in order to nudge the number downward. Now Ill go up to the Edit menu, and Ill choose the Cut Command or press Ctrl+X, or
| Command+X on the Mac. In illustrator cs6 you To go ahead and move that one to the clipboard, and now Ill go up to the Edit menu and choose one of the coolest commands inside the software paste on all artboards which has a gigantic keyboard shortcut Ctrl+Shift+ Alt+V, or Command+Shift+Opt+V. And then well go ahead and paste that number onto every single page. And all you have to do is switch to the Type tool, which I can get by pressing the T key. But I should say here you may notice that on your toolbox the T is further down. Thats because youre working with a Single Column toolbox, and you can switch between them by clicking on this whole Double Arrow Icon. I have to work with a Double Column toolbox because my screens not tall enough to accommodate all of the tools otherwise. Now I am going to switch to the Type tool, and then its just a matter of selecting each one of these numbers and changing it to a different number. So Im selecting all the ones and changing them, of course, to 2 through 8. And now Ill just switch back to my Default tool which Illustrator CS6 with this tutorial calls the Selection tool
|
a,
arc,
cs6,
drawing,
heart,
illustrator,
in,
the,
tool,
with
0
comments
Drawing a heart with the Arc tool in Illustrator CS6
In this movie, Ill show you how to begin creating the heart outline using the Arc tool in Illustrator CS6 . Ive saved my changes as All guides.ai found inside the 04_line_art folder. Lets go ahead and switch to Arc tool, and its a pretty easy concept when you drag with a tool you can see that you create as I was saying before, a quarter ellipse. And you might imagine that this is going to serve as well for the first hump in our heart, but we are not going to start at this arbitrary location.
We are going to start right there at the intersection of the central vertical guide and the second horizontal guide down. So I will go ahead and press the Backspace key or the Delete key on the Mac, in order get rid of that bad arc. And now I will drag up on to the left, like so, while pressing the Shift key, and you want to drag until you snap to that guideline up there. And you kind of want to inch it back a little bit to the right so that the heads-up display says, a Width of 112 pts and a Height of 112 pts. And by virtue of the fact incidentally that we were pressing the Shift key were getting a perfect quarter circle. So you want to keep that Shift key down the entire time, and then you want to release your mouse button, and then release the Shift key.
In this Case Drawing a heart with the Arc tool in Illustrator CS6
Now you want to drag from that anchor point, so make sure that your cursor says the word Anchor on it. And you want to drag down into the left until you intersect with the first vertical guideline and the second horizontal guide. Now the arc will definitely go in the wrong direction just as you see on my screen. To flip it, what you do is you keep your mouse button down, and you just tap the F key. Then you go ahead and release the mouse button in order to create the second arc.
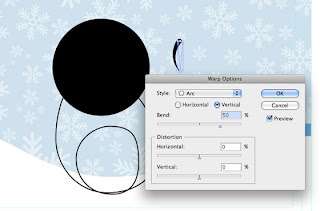
Next, we need to go ahead and draw the bottom portion of the heart, and you might be tempted to do one of these numbers, where you draw the outer lump here, and you press the F key in order to flip it, and then you draw a final arc, and you press F again, once to flip it, but that would result in one ugly looking heart. So thats not what we want. Lets go ahead and get rid of those path outlines by switching to the Black Arrow tool and notice, by the way, the Black Arrow has a keyboard shortcut of V, all you have to do is just tap the V key. And you might think of V as being an upside down arrow. So weve got the Black Arrow thats got an upside down arrow for a keyboard in Illustrator CS6 shortcut, that is the V key. And then weve got a White Arrow, Ill tell you how it works later, thats got a right side up arrow for its keyboard shortcut, which is the A key, which of course also happens to stand for arrow. All right, I am going to go ahead and switch to the Black Arrow, which allows me to select entire path outlines, which is what these things are called inside of Illustrator.
Notice that at this point Im seeing a bounding box around my selected arc. The bounding box extensibly makes it easy to scale and rotate a graphic. But in my experience it gets in the way of getting actual work done, and there are better ways to scale and rotate, as Ill show you in a future chapter. So I am going to advise that you turn the bounding box off, and Im definitely doing so. By going up to the View menu and choosing the Hide Bounding Box command. If you ever need the Bounding Box in the future just choose this command again and of course, its got a keyboard shortcut Ctrl+ Shift+B, or Command+Shift+B on a Mac.
Now I am going to draw this dotted marquee in order to partially select these two path outlines and that will select them both, and then Ill press the Backspace key or the Delete key on a Mac, to get rid of them. Instead what we want to do is go ahead and switch back to the Arc tool in Illustrator CS6 here, and you want to drag from the last anchor point there, all the way down to the intersection of the middle vertical guide and the fourth horizontal guide down.So its not the long guide, its the shorter one just above it. And you want to make sure you see the word Intersect, so youre intersecting those guidelines, and then tap the F key if necessary in order to send the arc in the other direction, and then release.
Now of course, Arc tool in Illustrator CS6 Tutorial where our heart concerned, that doesnt look any better than one I showed you before. We are going to make it look way better by manually modifying this arc in the very next movie.
Read more »
We are going to start right there at the intersection of the central vertical guide and the second horizontal guide down. So I will go ahead and press the Backspace key or the Delete key on the Mac, in order get rid of that bad arc. And now I will drag up on to the left, like so, while pressing the Shift key, and you want to drag until you snap to that guideline up there. And you kind of want to inch it back a little bit to the right so that the heads-up display says, a Width of 112 pts and a Height of 112 pts. And by virtue of the fact incidentally that we were pressing the Shift key were getting a perfect quarter circle. So you want to keep that Shift key down the entire time, and then you want to release your mouse button, and then release the Shift key.
In this Case Drawing a heart with the Arc tool in Illustrator CS6
Now you want to drag from that anchor point, so make sure that your cursor says the word Anchor on it. And you want to drag down into the left until you intersect with the first vertical guideline and the second horizontal guide. Now the arc will definitely go in the wrong direction just as you see on my screen. To flip it, what you do is you keep your mouse button down, and you just tap the F key. Then you go ahead and release the mouse button in order to create the second arc.
Next, we need to go ahead and draw the bottom portion of the heart, and you might be tempted to do one of these numbers, where you draw the outer lump here, and you press the F key in order to flip it, and then you draw a final arc, and you press F again, once to flip it, but that would result in one ugly looking heart. So thats not what we want. Lets go ahead and get rid of those path outlines by switching to the Black Arrow tool and notice, by the way, the Black Arrow has a keyboard shortcut of V, all you have to do is just tap the V key. And you might think of V as being an upside down arrow. So weve got the Black Arrow thats got an upside down arrow for a keyboard in Illustrator CS6 shortcut, that is the V key. And then weve got a White Arrow, Ill tell you how it works later, thats got a right side up arrow for its keyboard shortcut, which is the A key, which of course also happens to stand for arrow. All right, I am going to go ahead and switch to the Black Arrow, which allows me to select entire path outlines, which is what these things are called inside of Illustrator.
Notice that at this point Im seeing a bounding box around my selected arc. The bounding box extensibly makes it easy to scale and rotate a graphic. But in my experience it gets in the way of getting actual work done, and there are better ways to scale and rotate, as Ill show you in a future chapter. So I am going to advise that you turn the bounding box off, and Im definitely doing so. By going up to the View menu and choosing the Hide Bounding Box command. If you ever need the Bounding Box in the future just choose this command again and of course, its got a keyboard shortcut Ctrl+ Shift+B, or Command+Shift+B on a Mac.
Now I am going to draw this dotted marquee in order to partially select these two path outlines and that will select them both, and then Ill press the Backspace key or the Delete key on a Mac, to get rid of them. Instead what we want to do is go ahead and switch back to the Arc tool in Illustrator CS6 here, and you want to drag from the last anchor point there, all the way down to the intersection of the middle vertical guide and the fourth horizontal guide down.So its not the long guide, its the shorter one just above it. And you want to make sure you see the word Intersect, so youre intersecting those guidelines, and then tap the F key if necessary in order to send the arc in the other direction, and then release.
Now of course, Arc tool in Illustrator CS6 Tutorial where our heart concerned, that doesnt look any better than one I showed you before. We are going to make it look way better by manually modifying this arc in the very next movie.
Friday, April 3, 2015
a,
create,
effect,
glowing,
in,
liquid,
photoshop,
splash,
text,
water,
with
1 comments
Create a Glowing Liquid Text with Water Splash Effect in Photoshop

Ground texture
Water pattern image
Water splash brush
Step 1
Create a new document sized 1280px * 800px with black background. Load the Ground Texture stock image into Photoshop, and select a piece of the ground as shown below:

Copy and paste the selection onto our document, use a soft eraser to remove the edges and some parts of the ground as shown below:

Add the following 3 adjustm
ent layers on top of the ground texture layer:
Black and White

Levels

Curves

Create a new layer on top and add some cloud effect over the ground with either a cloud brush or the cloud filter – this adds some dramatic effect into it:

Step 2
We will now add some text onto the document – I used the “Freestyle Script” font (should come with Photoshop):
Apply the following layer blending options to this text layer:
Bevel and Emboss

Color Overlay

Outer Glow

and you will have the following effect:

Step 3
We add some water pattern over the text – download the water pattern pack and choose one of the images, select a portion of it with any selection tool:
Copy and paste the selection over the text and set it as a clipping mask to the text layer:

We will go back to the water images and select a piece again, then copy and paste the selection and put it below the text layer, use the liquify filter’s forward warping tool to make it into a pattern as shown below:

This step can be a bit and you will probably need to have a few tries before getting it right. The effect below is the one you’re aiming to achieve:

Step 4
Load the water splash brush into Photoshop and paint some splash around the text, use a soft eraser to fade the edges of the splash for depth:
We will fine tune the colour effect a bit with the following image adjustment layer on top:
Selective Color
Cyans

Whites

Neutrals

Layer mask on the selective colour adjustment layer:

Curves

Layer mask on this curves adjustment layer:

Color Balance


and you will have the following final image: (click to enlarge)

That’s it for this tutorial! Hope you enjoy it and find it useful! Till next time, have a great day!
 Writer : Tommy Kurniawan
Hello! My name is Tommy. Im a blogger, I love graphics design and now i went to Architechture Technical Senior High School. | Facebook |
Source : PSDVault
Image Masking with Pencil
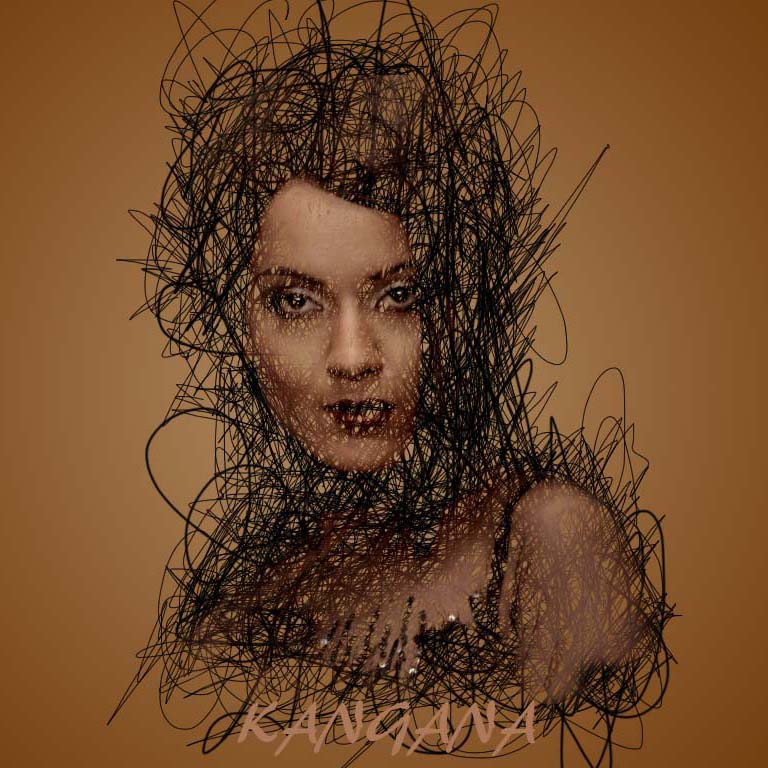
We See In last tutorial how to Mask the image, Now lets see how to mask image using Brush or Pencil
Final view
.jpg "Image Masking with Pencil")
Step 1:
First take a image which is to be mask.and cut the background of the object..
Original
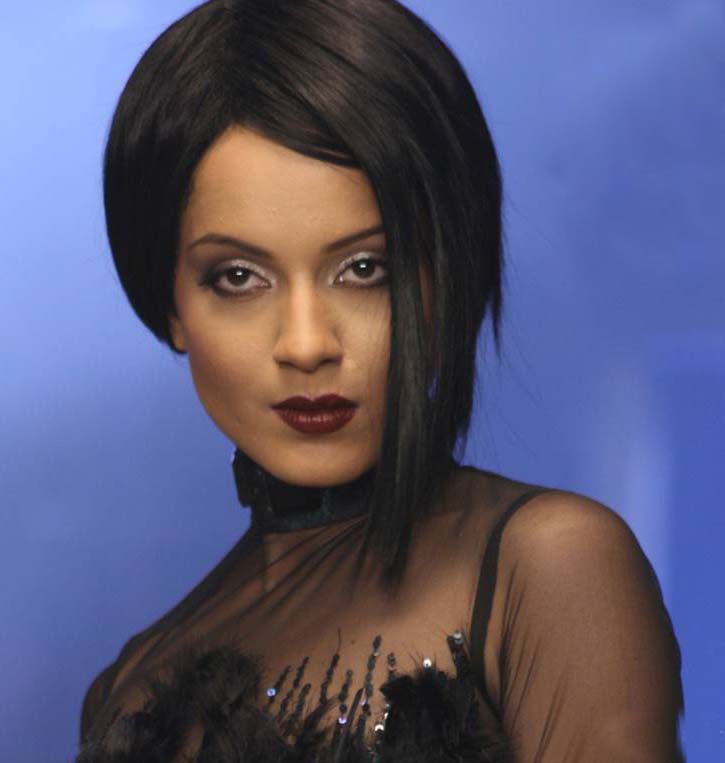
By removing background
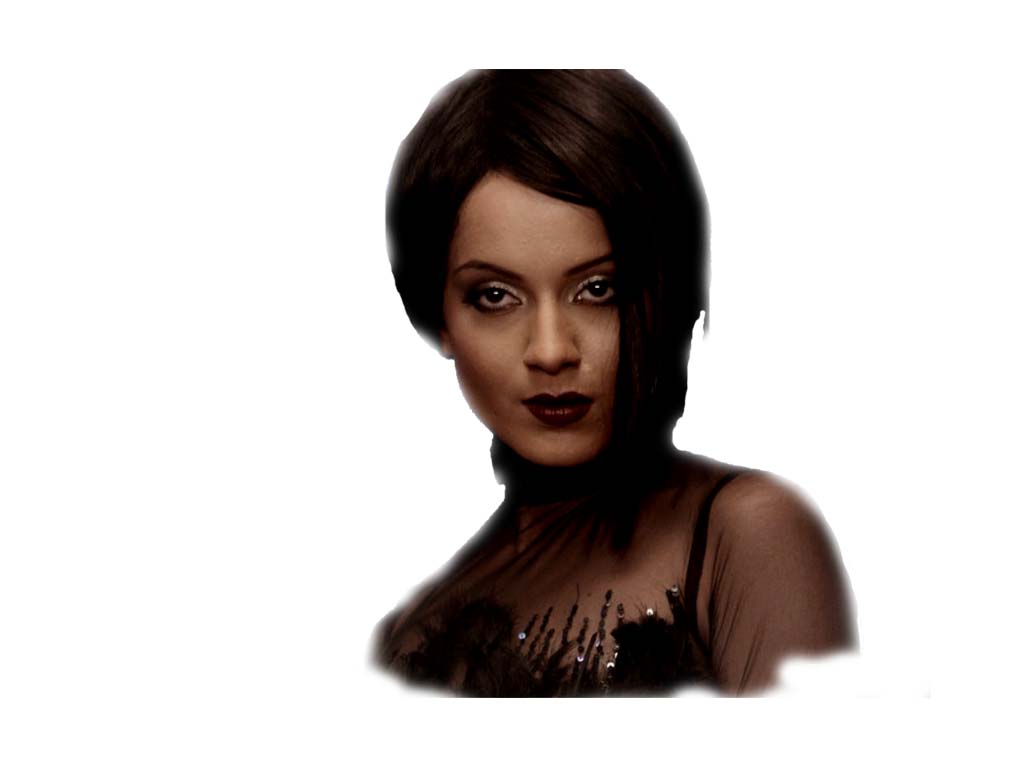
Add some red and yellow color on image by pressing Ctrl+B.
Make background transparent and Save this image as png.
Step 2:
Step 2:
Create New File in photoshop.
make a duplicate layer by right clicking on the background "background copy" (ctrl+j).
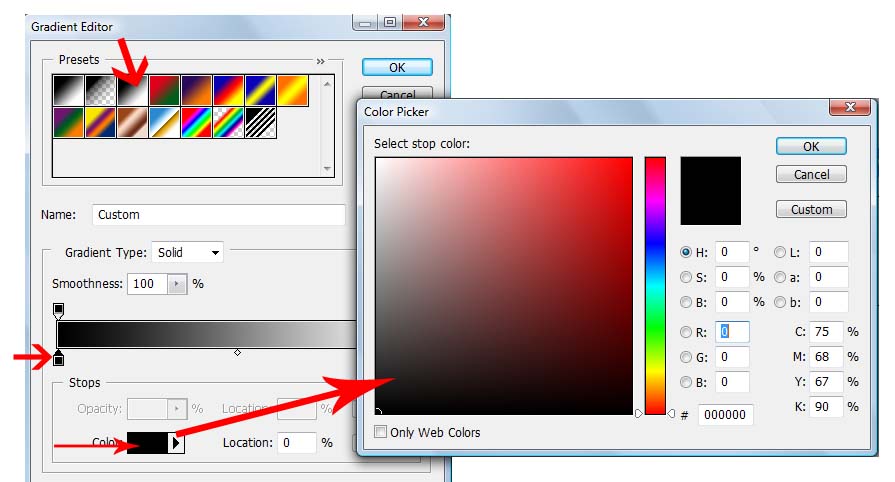
select the fill gradient tool from toll box and select 2 color pattern, change the colors as shown.. (orange-- light orange) set fill type to radial and fill the color by dragging the mouse from middle of the layer to the corner...


Step 3:
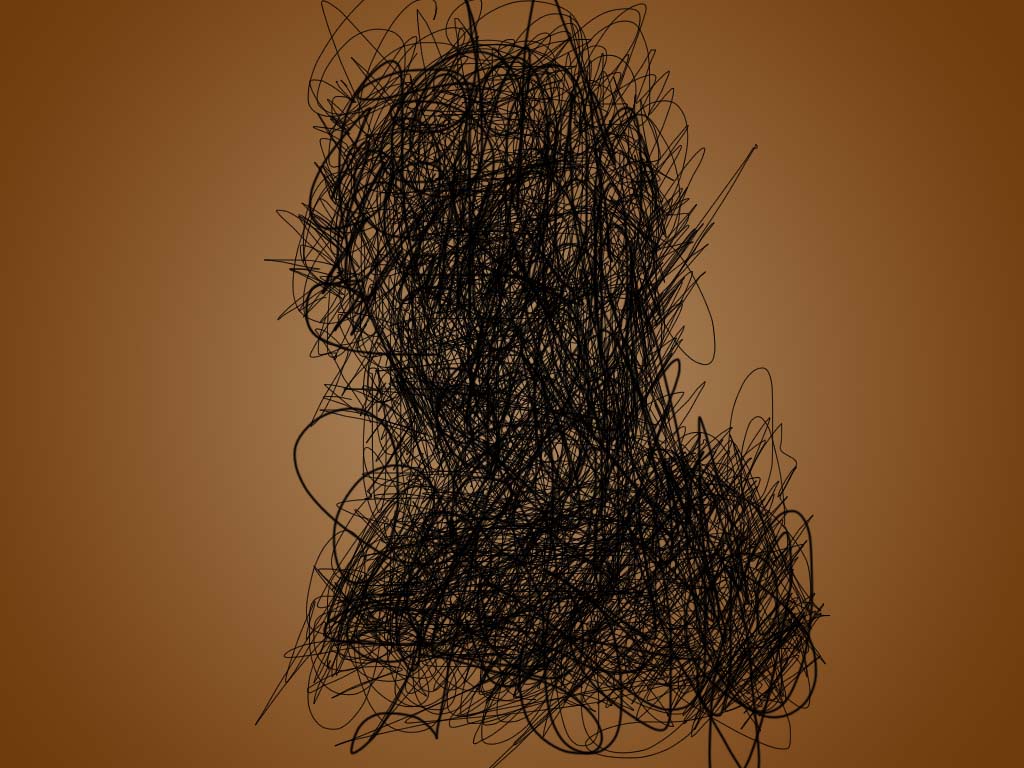
Now make a new layer Ctrl+Shft+N.. Name it Layer1.
and add some strokes by free hand using brush while radius of the brush is maximum 1 or 2 px....
Step 4:
Now take the image, which is to be mask.. that is our PNG image. and put it on the current psd (Copy+Paste).
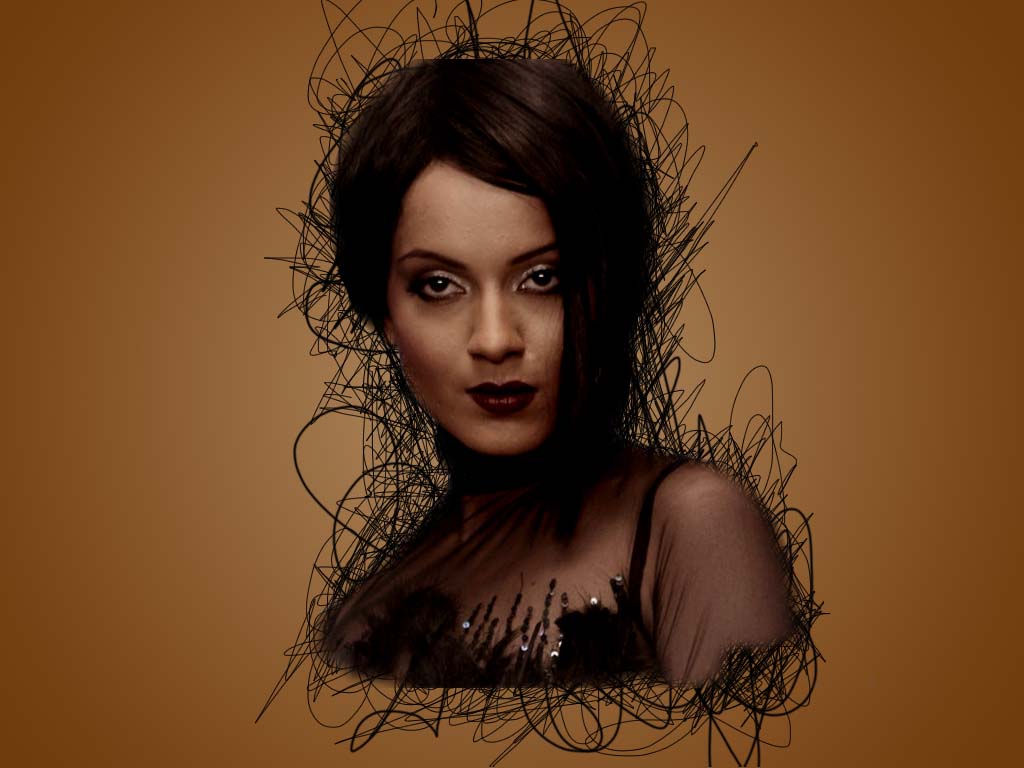
Just copy the image and paste on the our project at the top.
Step 5:
Now press hold ALT button from keyboard and take the cursor in between the border of the two layers (Layer2 and the layer1 which is to be masked).Note: press and hold ALT button until masking is done.
when the cursor symbol changes, just left click on the border.
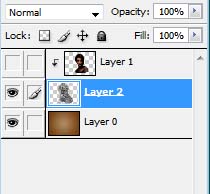
Now you will see the Layer1 become Masked.
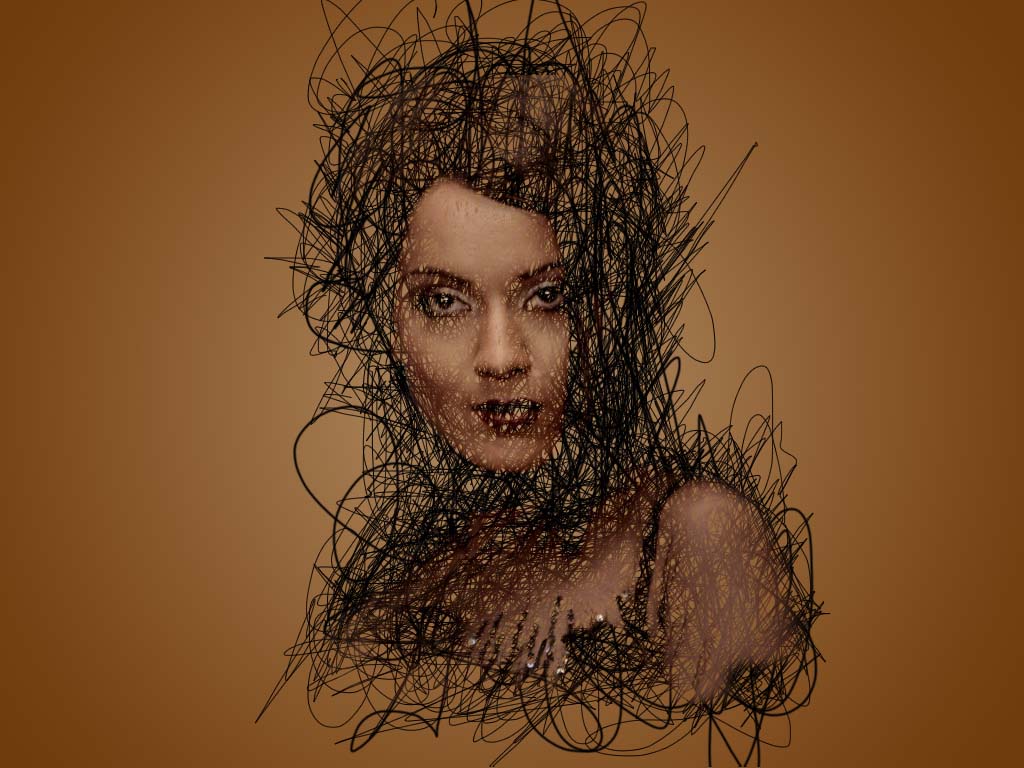
If your object not fit in the mask, adjust the image by pressing Ctrl+t.
Step 6:
Add text on image by Horizontal type text tool ..
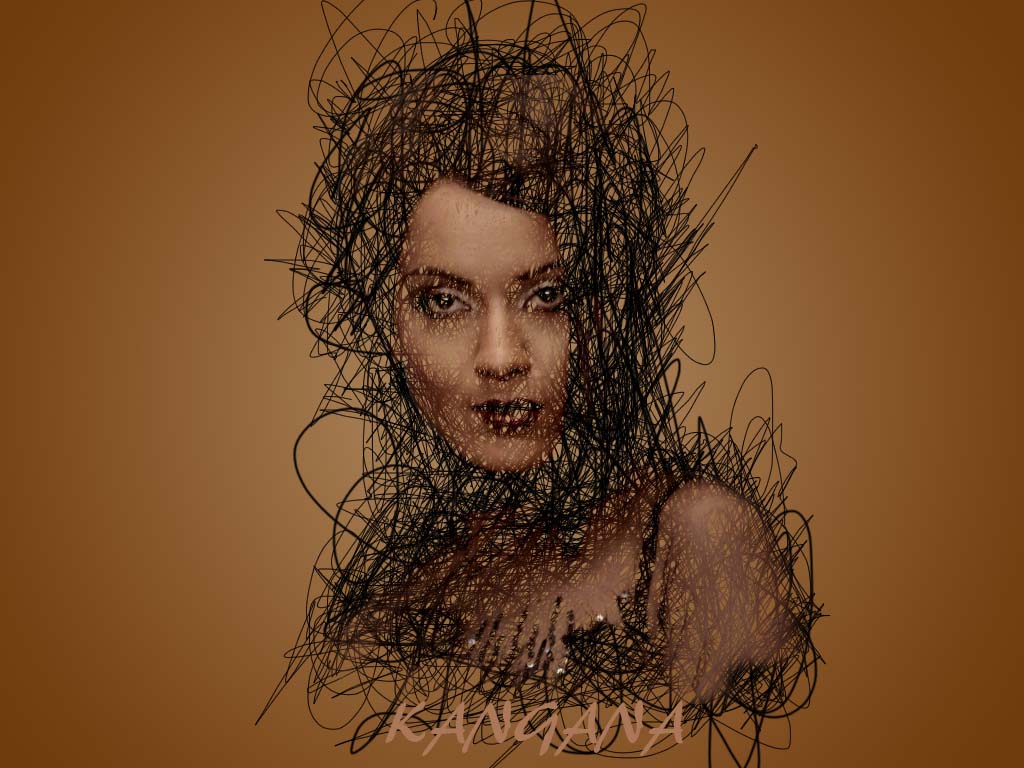
Done..!!
Subscribe to:
Posts (Atom)


- Follow Us on Twitter!
- "Join Us on Facebook!
- RSS
Contact