Showing posts with label skin. Show all posts
Showing posts with label skin. Show all posts
Wednesday, March 18, 2015
airbrush,
skin,
superb,
technique
0
comments
Superb Skin Airbrush Technique
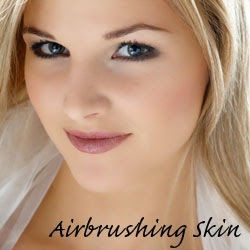
Airbrush skin like a pro. In this Photoshop retouching tutorial, you’ll learn how to retouch skin like the professionals. Find out how to make skin look healthy without looking plastic or blurred.
Step 1
Open the photo into Photoshop. For this tutorial, try to use a high resolution image where you can see the skin texture.
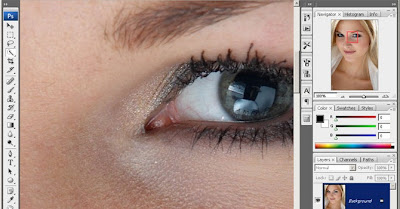
Step 2
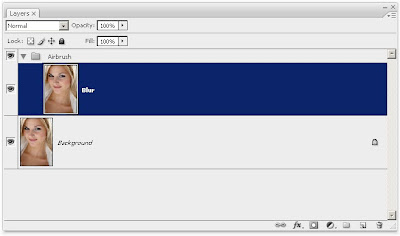
Create a duplicate layer and put it into a group. To do this, press Ctrl+J to duplicate the layer then Ctrl+G to place the new layer into a group. Name the group "Airbrush" and the layer "Blur". To retouch the skin, there will be two layers in the Airbrush group. The first layer we’ve created (the Blur layer) will be used to blur the skin. After that, we’ll add another layer to restore the natural skin texture.
Step 3
Have the Blur layer selected. To blur this layer, use the Surface Blur filter. This filter blurs like the Gaussian Blur filter except it can retain edge detail. We’ll need to blur the layer so that the skin is smoothed and somewhat blurry without having the edges
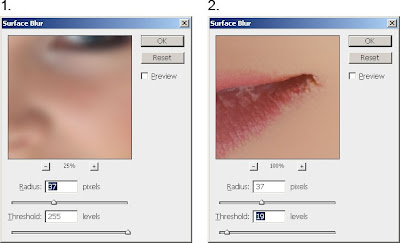
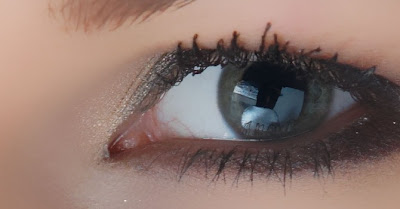
Here’s what my image looks looks like after the Surface Blur filter. Your image should look similar with details such as the eye intact. If the eye becomes blurry, your settings are too strong. Undo and redo the Surface Blur filter with a lower setting.
Step 4
Create a new layer and move it above the Blur layer. Name this layer "Texture" and change the blend mode to Hard Light. This layer, as the name states, will be used to add a slight texture to the skin and also adjust the skin tonality.
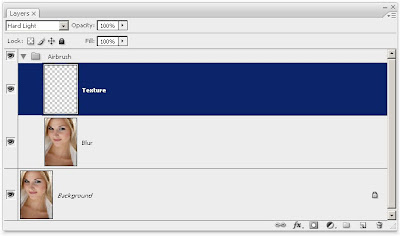
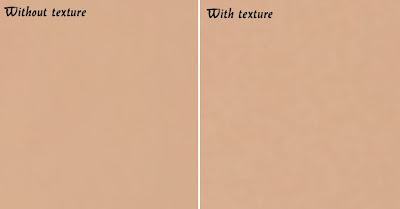
The texture created in this layer will contribute to the final results very minimally - the difference can only be easily seen zoomed in on high resolution images and varies from image to image. Even though the result is very minimal, it ensures that no area of the skin looks too smooth or plastic.
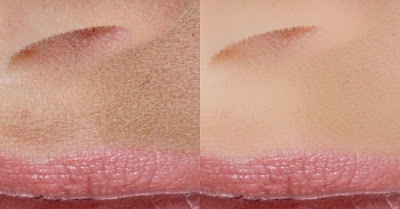
Below is an example of this. On the left, the image looks like a solid color, also known as plastic skin. The image on the right has a slight noise pattern to make the skin look more realistic.
Step 5
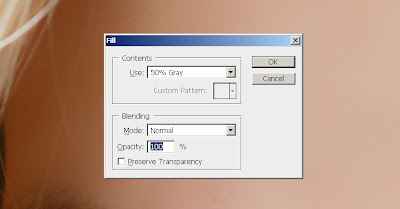
Make sure that you have the "Texture" layer selected. With that layer selected, press Shift+F5 or choose Edit > Fill. In the Fill tool, set the settings according to the image below. This will fill your layer with a 50% gray color.
Step 6
Open the Add Noise filter from the Filter > Noise menu. Enter in the settings shown in the image below. This will add some noise to the image that will prevent skin from looking plastic. It may look a little too sharp, but in the next step, we’ll fix this with a Gaussian Blur filter.
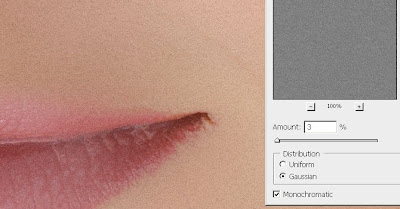
Step 7
Choose Filter > Blur > Gaussian Blur. Blur the layer by 1 pixel.
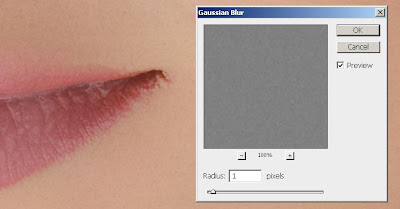
Step 8
Now we’ll temporarily tint the color of this layer. First, select the Eye Dropper tool from the toolbar. Sample an area on the skin that appears to be the average skin color. You don’t have to be very precise because we will tune the color later in the tutorial. In the Color palette, click on the flyout menu below the close window button and select HSB sliders. We’ll need to see the HSB values for the next step.
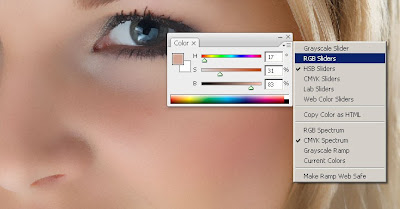
Step 9
Open the Hue/Saturation tool by pressing Ctrl+U or choosing Image > Adjustments > Hue/Saturation. Check the Colorize option and adjust the hue, saturation, and lightness values to match the HSB values from the color we sampled in the previous step. For the brightness, set this to
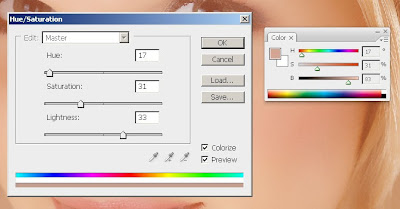
Step 10
Select the Airbrush group in the Layers palette and add go to Layer > Layer Mask > Hide All. This will create a layer mask filled with the color black that will hide the group. With this layer mask, we’ll paint the areas were we want the skin to appear. Otherwise, this skin airbrushing effect will appear on the entire image.
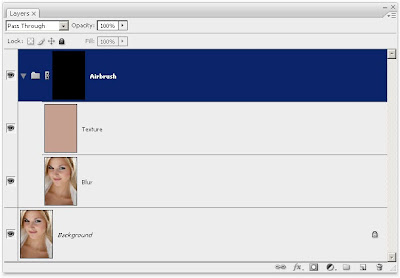
Step 11
First, press D on your keyboard to set the foreground and background colors to the default black and white. Select the Brush tool and apply the settings below.
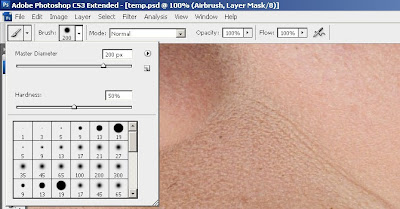
Zoom in to 100% and paint over the skin. The parts that you paint will appear smoother with a different skin tone. Don’t worry if the skin tone doesn’t look correct. This is because we didn’t pick the correct color when we used the Hue/Saturation to tint the "Texture" layer. It’s too difficult to do that without a preview, so we’ll fix that later.
When painting, you’ll need to change the brush size and hardness frequently. It would be tedious to always access the brush option menu to do this so take this as an opportunity to use hot keys. Use the following hot keys to help you with modifying the brush size and hardness:
• Decrease brush size: [
• Increase brush size: ]
• Decrease brush softness by 25%: Shift + [
• Increase brush softness by 25%: Shift + ]
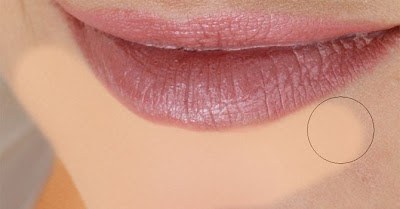
When you’re done, your layer mask should have the skin areas in white and the skin should look smooth.
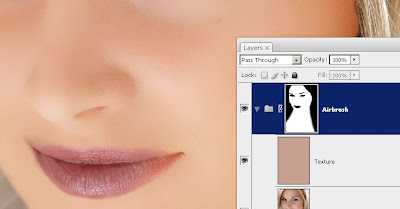
Step 12
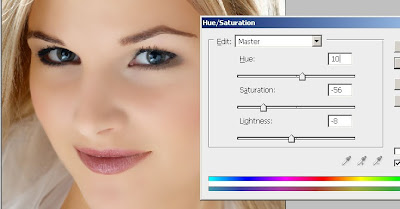
Now we’re going to fix back the color and tone of the skin as we mentioned earlier in the tutorial. Select the "Texture" layer and press Ctrl+U to access the Hue/Saturation tool. Alter the settings to get a natural looking skin tone.
• The Hue setting is usually correct. I increased it by 10 to add more yellow to it to make the appearance of the red areas less visible.
• The Saturation setting usually needs to be reduced greatly. Adjust this until the skin tone looks natural but not too pale.
• The Lightness setting requires slight modification. A slight change in the lightness will create big difference in how the skin blends in with the image. As you adjust the setting, you will see how sensitive this setting is. Even though it requires high precision, it is easy to tell when it is the correct setting. If it is off, it will look really off. If it is at the correct setting, it will look a lot more natural.
Step 13
Finally, we’re going to restore the skin details. Choose Image > Apply Image. Use the settings below.
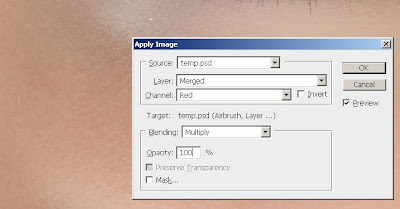
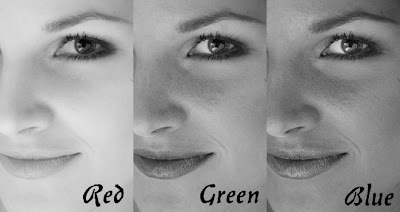
The reason why we’re applying data from the Red channel is because it contains the least skin imperfections. The image below shows the difference in the channels. The red channel hides many of the skin imperfections that are visible in the green and blue channel.
Final Results
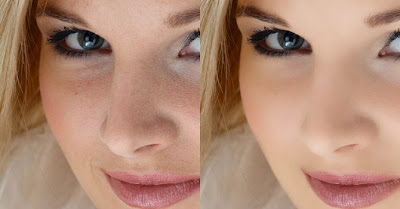
Here’s the final results after applying this airbrushing technique. In the image below, you can see how smooth the skin looks. Because the image below has been downsized to fit into this tutorial, it may look slightly plastic. However, when zoomed in, the texture is clearly visible.
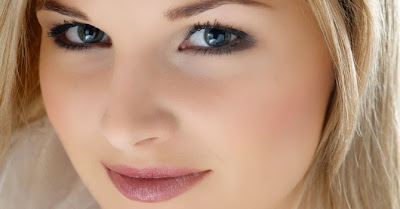
This is a crop of an area zoomed in 100%. The tiny skin bumps are still visible. Even near the bottom right of the image, it still looks natural because of the "Texture" layer that we added. Without that layer, that area would appear as a solid color with no noise.
And as usual, here are the before and after images.

By Dirk Metzmacher
You might have asked yourself now and then „How do I make a soft skin without destroying the pores?“. In this workshop I’ll show you how this kind of touch-up works, and how you can conserve the pores. This goes from basic retouch up to powdering the skin.

Basic retouch
Before we start softening the skin, you should perform a so-called basic retouch. This means that zits, moles and other blemishes are removed. How much you want to weaken things depends entirely on your personal taste, of course.
Before we start softening the skin, you should perform a so-called basic retouch. This means that zits, moles and other blemishes are removed. How much you want to weaken things depends entirely on your personal taste, of course.
Contrary to the Clone Stamp tool which transfers areas exactly as in the original, the Healing Brush tool works by cross-calculating brightness values and thus removing blemishes very cleanly, adapted to the surrounding area.
Skin powdering
Now we get around to doing the so-called skin “powdering”. Duplicate the layer with Layer > Duplicate Layers or Ctrl+J and give the new layer a Vivid Light blending mode.

Press Ctrl+I or use Image > Adjustments > Invert to invert the current layer. Whatever you may see on the screen now: Don’t get confused by that, we’re still on the right track even though it might look a bit funny.
Apply Filter > Blur > Gaussian Blur with a radius of about one pixel. Here you should choose a radius just small enough so you can barely see the pores anymore.
Next, use the High Pass filter which you can find under Filter > Other. With this one it’s a matter of taste how strongly you apply it. I usually keep the radius between 20 and 40 pixels.
This change should not be applied everywhere. Select Layer > Layer Mask > Hide All to create a black mask that hides all layer content for now.
Tip: You can also create a black mask by clicking on the Add Layer Mask button in the layer palette and holding the Alt key.

Now use a white foreground color to paint the changes back into the image, but only on the skin. Don’t start off with an opacity of 100%, but experiment a little with the strength instead. You’ll see how the skin becomes noticeably softer and the pores are kept intact.
Tip: If you select Filter > Convert for Smart Filters right after inverting the image, you can do all this retouching in a completely non-destructive way.
Read more »
You might have asked yourself now and then „How do I make a soft skin without destroying the pores?“. In this workshop I’ll show you how this kind of touch-up works, and how you can conserve the pores. This goes from basic retouch up to powdering the skin.
Basic retouch
Before we start softening the skin, you should perform a so-called basic retouch. This means that zits, moles and other blemishes are removed. How much you want to weaken things depends entirely on your personal taste, of course.
Before we start softening the skin, you should perform a so-called basic retouch. This means that zits, moles and other blemishes are removed. How much you want to weaken things depends entirely on your personal taste, of course.
Contrary to the Clone Stamp tool which transfers areas exactly as in the original, the Healing Brush tool works by cross-calculating brightness values and thus removing blemishes very cleanly, adapted to the surrounding area.
Skin powdering
Now we get around to doing the so-called skin “powdering”. Duplicate the layer with Layer > Duplicate Layers or Ctrl+J and give the new layer a Vivid Light blending mode.
Press Ctrl+I or use Image > Adjustments > Invert to invert the current layer. Whatever you may see on the screen now: Don’t get confused by that, we’re still on the right track even though it might look a bit funny.
Apply Filter > Blur > Gaussian Blur with a radius of about one pixel. Here you should choose a radius just small enough so you can barely see the pores anymore.
Next, use the High Pass filter which you can find under Filter > Other. With this one it’s a matter of taste how strongly you apply it. I usually keep the radius between 20 and 40 pixels.
This change should not be applied everywhere. Select Layer > Layer Mask > Hide All to create a black mask that hides all layer content for now.
Tip: You can also create a black mask by clicking on the Add Layer Mask button in the layer palette and holding the Alt key.
Now use a white foreground color to paint the changes back into the image, but only on the skin. Don’t start off with an opacity of 100%, but experiment a little with the strength instead. You’ll see how the skin becomes noticeably softer and the pores are kept intact.
Tip: If you select Filter > Convert for Smart Filters right after inverting the image, you can do all this retouching in a completely non-destructive way.
how,
in,
losing,
photoshop,
skin,
smooth,
texture,
to,
without
0
comments
How to Smooth Skin Without Losing Texture in Photoshop
There are several ways to smooth skin in Photoshop. All to often, however, skin can appear too smooth, fake, and synthetic. Today I will demonstrate a straightforward technique to help you smooth skin fairly quickly while preserving the texture of the pores. Let’s get started!
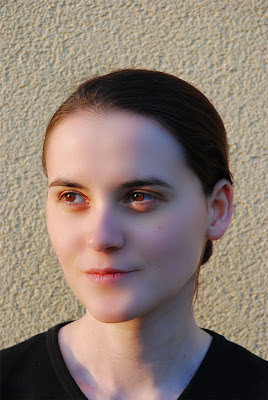
Final Image Preview
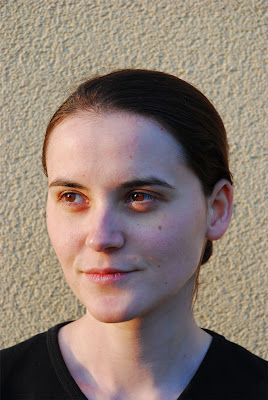
Take a look at the final image that we will be creating.Original Image
Before we begin, let’s take a look at the original image.Step 1
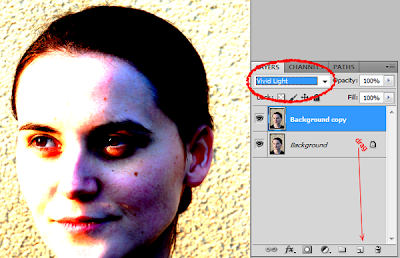
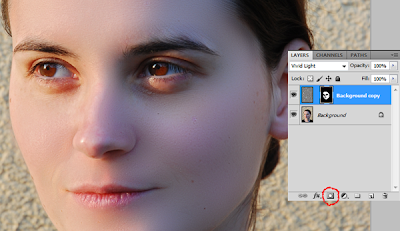
First, open your image and duplicate your background layer. Simply drag the layer onto the new layer icon in the bottom right of the layer palette. Now set the blending mode of this newly created layer to "Vivid Light."Step 2
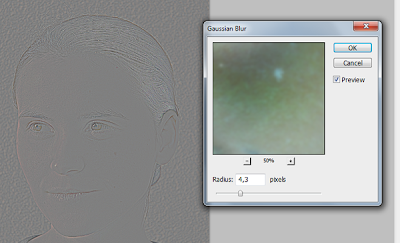
Now, let’s invert this layer. Do this by pressing Cmd + I or Image > Adjustments > Invert. Then, apply a Gaussian Blur by selecting Filter > Blur > Gaussian Blur. Applying a blur filter to an inverted picture will make it look shaper. Use the slider until you can see the pores on her face.Step 3
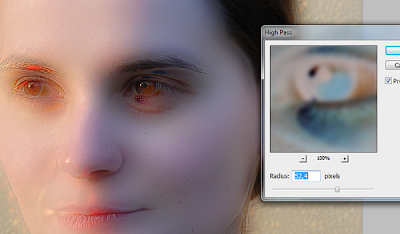
Now let smooth the skin! Go to Filter > Other >High Pass. Move the slider until you are happy with the smoothing. You may notice some ghosting and other weird stuff around the eyes – just ignore it for now. Concentrate on the cheeks, forehead and nose.Step 4
Almost done! Create a new mask for the layer and fill it with black to hide the image. Switch your color to white, select the mask and start drawing on the skin with a soft brush. Start at the cheeks, move over to the forehead, the nose and stop on the chin. If the effect is too strong for your liking, just lover the opacity of the brush and you’re good to go!Final Image
We’re finished! I hope that you learned a few new techniques here. If you have a different approach, let me know in the comments!
Subscribe to:
Posts (Atom)


- Follow Us on Twitter!
- "Join Us on Facebook!
- RSS
Contact