Showing posts with label own. Show all posts
Showing posts with label own. Show all posts
Wednesday, May 13, 2015
and,
content,
create,
have,
how,
in,
own,
panels,
pse,
templates,
them,
theme,
to,
using,
your
0
comments
How to create your own theme templates using PSE and have them in your content panels
You can create your own custom themes for the different creations like Greeting card, Photo book, CD/DVD jacket etc and have them placed in your content panel of Photoshop Elements Editor.
Here are the steps with which I created my own theme "Mothers Day" for Mothers day and had it placed in my content panel.
1. Create a blank file from File>New>Blank File. Select default size of the file.
2. Now paint it with the color you like. I painted pink and used gradient tool to give non monotonous effect of the background.
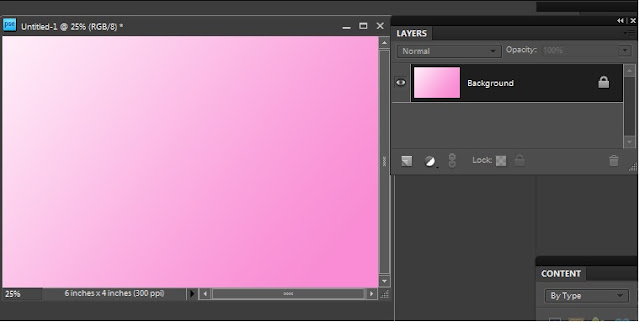
3. Save this as a jpeg on your hard drive. This step is workaround for PSE8 where there is no way of creating a smart object from a leyer as we had in PSE7. Once you have saved the jpeg, click on close widget of the file you were previously working with. It will ask you to save the untitled file. Say No. This will bring back the file you were working till step 2.
4. Now select the background layer from layers pallette and File>Place and select the jpeg saved at step 3. Click on the green checkmark shown shown over the image.
As soon as you do this, you would notice that there is a layer created as a smart object with a tiny icon on the layer thumbnail as shown below. And this layer is exactly as your background layer.
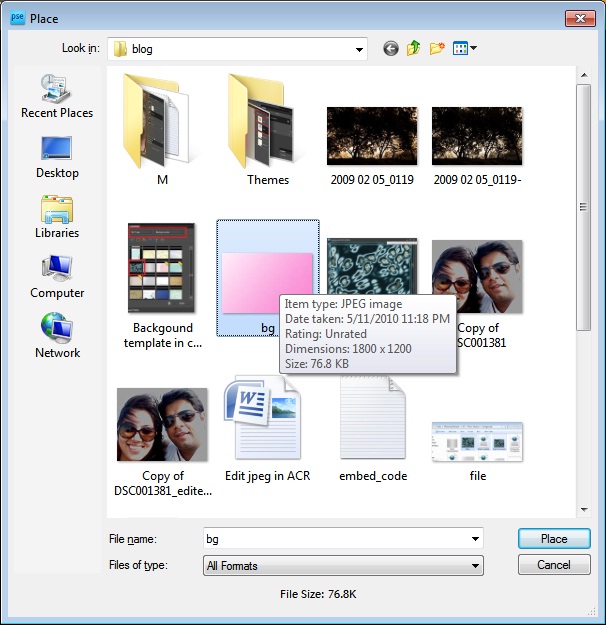
So by now, you would have understood why we saved the background as a separate jpeg in step3. The reason is, in PSE8, we can create smart objects using File>Place. In PSE 7, we do not need the step 3 as we can directly create the background layer as a smart object. This is a workaround in PSE8.
5. Now you can create a duplicate of this smart object layer by pressing Control+J and delete the original background layer.
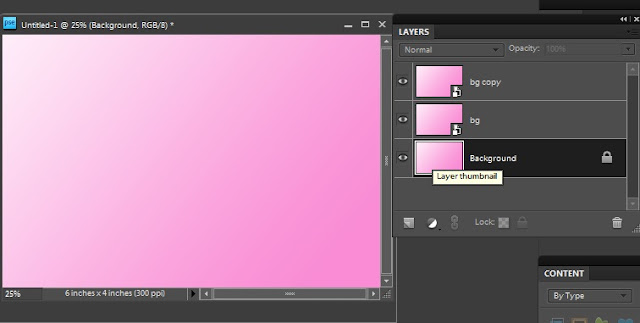
6. From Window meniu, select Content. This will result in Content pane appear in right hand panel.
7. Select "By Type" from Category and "Frames" in sub category.
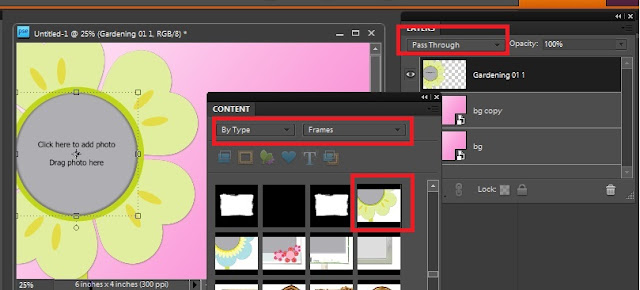
8. Drag a frame from the frames shown in the content bin to the image. Once you do this, you will notice that the blending mode for the frame dropped is "Pass through".
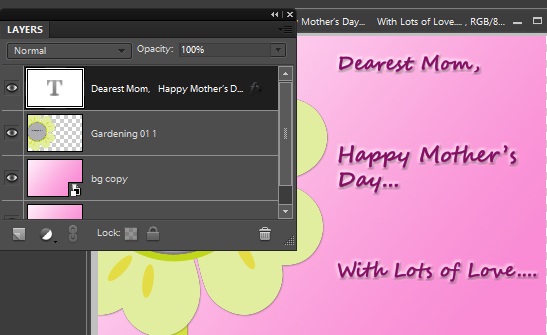
9. Add text layer and put some text to your theme. I am creating a Mothers day greeting card template in this example. So I added the text as shown below.
11. Save this file as a psd. I saved it as "Mothers day.psd"
12. Create a template file with name "<filename>.metadata.xml". I created "Mothers day.metadata.xml"
13. Copy the following into your xml file :
**************************************************************************
Also note that you can edit the categories and sub categories as per your needs. For example my above theme will appear under category Event and sub category Celebration. Similarly in category Color and sub category Pink.
You can customize these as per your needs.
14. Now place your jpeg and your metadata xml file at location :
On XP : C:Documents and SettingsAll UsersApplication DataAdobePhotoshop Elements8.0Photo Creations hemes
On Win 7 : C:ProgramDataAdobePhotoshop Elements8.0Photo Creations hemes
Please make sure that your Editor is closed and you relaunch it to see the background created in your content pane.
If you still do not find it in the content pane in Background category, close Editor and rename the file : "C:Documents and SettingsAll UsersApplication DataAdobePhotoshop Elements8.0Localeen_USMediaDatabase.db3" followed by application relaunch. The launch may take sometime as application creates thumbnails for your background at the location where you have created your jpeg.
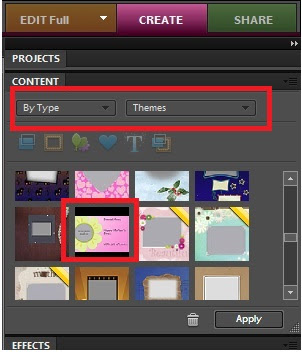
After relaunch, here is where I see my Mothers day theme in Content Panel from Create Pane>Photo Book or Greeting Card :
I hope you find this tutorial useful!
Read more »
Here are the steps with which I created my own theme "Mothers Day" for Mothers day and had it placed in my content panel.
1. Create a blank file from File>New>Blank File. Select default size of the file.
2. Now paint it with the color you like. I painted pink and used gradient tool to give non monotonous effect of the background.
3. Save this as a jpeg on your hard drive. This step is workaround for PSE8 where there is no way of creating a smart object from a leyer as we had in PSE7. Once you have saved the jpeg, click on close widget of the file you were previously working with. It will ask you to save the untitled file. Say No. This will bring back the file you were working till step 2.
4. Now select the background layer from layers pallette and File>Place and select the jpeg saved at step 3. Click on the green checkmark shown shown over the image.
As soon as you do this, you would notice that there is a layer created as a smart object with a tiny icon on the layer thumbnail as shown below. And this layer is exactly as your background layer.
So by now, you would have understood why we saved the background as a separate jpeg in step3. The reason is, in PSE8, we can create smart objects using File>Place. In PSE 7, we do not need the step 3 as we can directly create the background layer as a smart object. This is a workaround in PSE8.
5. Now you can create a duplicate of this smart object layer by pressing Control+J and delete the original background layer.
6. From Window meniu, select Content. This will result in Content pane appear in right hand panel.
7. Select "By Type" from Category and "Frames" in sub category.
8. Drag a frame from the frames shown in the content bin to the image. Once you do this, you will notice that the blending mode for the frame dropped is "Pass through".
9. Add text layer and put some text to your theme. I am creating a Mothers day greeting card template in this example. So I added the text as shown below.
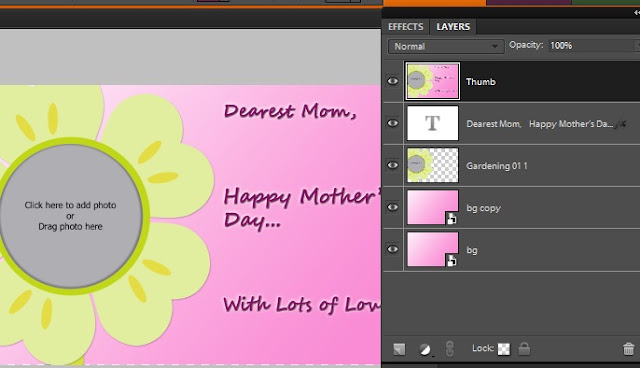
10. Now select all the layers in the palette and right click>Duplicate. This will create duplicate of all layers. Right click again and Merge. name this layer as thumb.
12. Create a template file with name "<filename>.metadata.xml". I created "Mothers day.metadata.xml"
13. Copy the following into your xml file :
**************************************************************************
<?xml version="1.0" encoding="UTF-8"?><PSEContent xmlns="http://ns.adobe.com/PSEContent/2.0/"><name value="$$$/content/themes/Mothers Day=Mothers Day" /><type value="theme" /><creation value="1x1" /><creation value="2x3" /><creation value="3x4" /><creation value="cddvdlabel" /><creation value="cdjacket" /><creation value="dvdjacket" /><creation value="photobook" /><creation value="1x1photobook" /><creation value="3x4photobook" /><category value="$$$/content/category/Event=Event"><subcategory value="$$$/content/category/Event/Celebration=Celebration" /></category><category value="$$$/content/category/Color=Color"><subcategory value="$$$/content/category/Color/Pink=Pink" /></category><category value="$$$/content/category/Style=Style"><subcategory value="$$$/content/category/Style/Cute=Cute" /></category><category value="$$$/content/category/Object=Object" /><category value="$$$/content/category/Mood=Mood"><subcategory value="$$$/content/category/Mood/Fun=Fun" /></category><keyword value="$$$/content/keyword/Toys=Toys" /></PSEContent>
**************************************************************************
Replace the text in the tag with your filename : <name value="$$$/content/themes/<filename>=<filename>" />Also note that you can edit the categories and sub categories as per your needs. For example my above theme will appear under category Event and sub category Celebration. Similarly in category Color and sub category Pink.
You can customize these as per your needs.
14. Now place your jpeg and your metadata xml file at location :
On XP : C:Documents and SettingsAll UsersApplication DataAdobePhotoshop Elements8.0Photo Creations hemes
On Win 7 : C:ProgramDataAdobePhotoshop Elements8.0Photo Creations hemes
Please make sure that your Editor is closed and you relaunch it to see the background created in your content pane.
If you still do not find it in the content pane in Background category, close Editor and rename the file : "C:Documents and SettingsAll UsersApplication DataAdobePhotoshop Elements8.0Localeen_USMediaDatabase.db3" followed by application relaunch. The launch may take sometime as application creates thumbnails for your background at the location where you have created your jpeg.
After relaunch, here is where I see my Mothers day theme in Content Panel from Create Pane>Photo Book or Greeting Card :
I hope you find this tutorial useful!

Saturday, March 28, 2015
action,
in,
make,
own,
photoshop,
your
0
comments
Make Your Own Action In Photoshop
Make Your Own Action In Photoshop
Photoshop Action is nothing but the bunch of the steps. While editing a photo in photoshop, you have to made minimum four - five steps.. But when you require these steps to edit each and every photo then, besides doing these steps for every photo Make A Action and play the same action for every photo.. you will get same effect..
At every time you apply the Action for a photo, these 4-5 steps will be automatically done because these steps are saved in to your action.
At every time you apply the Action for a photo, these 4-5 steps will be automatically done because these steps are saved in to your action.
Step 1:
Take the Image in Photoshop to edit. (Click Here to take this photo)
Now go to "Window --- Action"
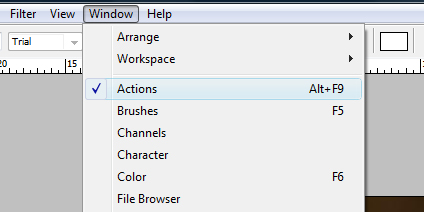
You will get following window and default actions in it.
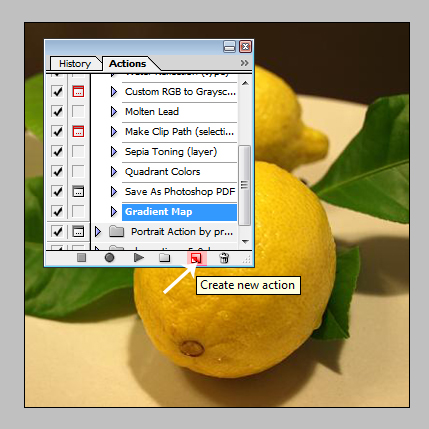
Click on the "New Action" button shown by arrow. (below the action window)
Click on the "New Action" button shown by arrow. (below the action window)
Step 2:
Name Your action as "Test" and click Record
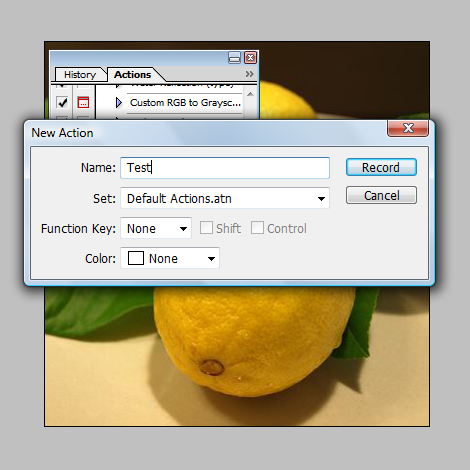
Name Your action as "Test" and click Record
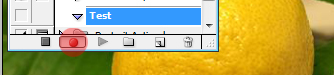
( When you click on the record button your action is started recording, when you complete the job/editing then click on "stop" button.. The action will be automatically saved. )
Step 3:
Now Ive started the recording..
Select Crop Tool from tool box.. and crop the Image..
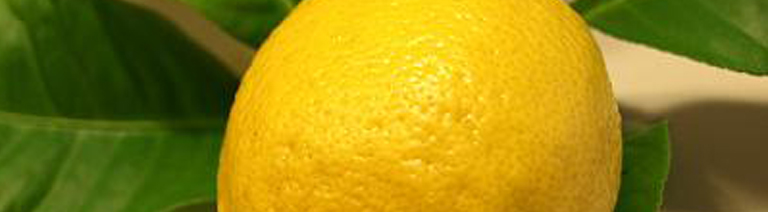
This Crop step is now recorded by the action.. Now Stop the Action..
When you stop the Action recording, It will be saved and appear in Action window.
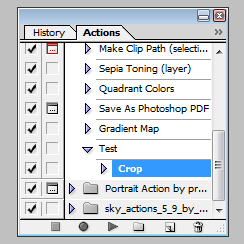
You made a Action Successfully...
Now we will see how to use this Action..
Now Take the image to edit..
Go to "Window ---> Action".
Click on "Test" action in the action window..
And click on Play button below the action window..
You will get the image cropped of exact size you will saved it..

Done--!!
Note :- Ive used only 1 step(Cropping) for this action. but you can add your steps to it.. Only remember that you will record all the steps..
Subscribe to:
Posts (Atom)


- Follow Us on Twitter!
- "Join Us on Facebook!
- RSS
Contact