Showing posts with label make. Show all posts
Showing posts with label make. Show all posts
Thursday, April 2, 2015
3,
background,
how,
in,
make,
polygon,
steps,
to
0
comments
How to Make Polygon Background In 3 Steps
How to Make Polygon Background In 3 Steps
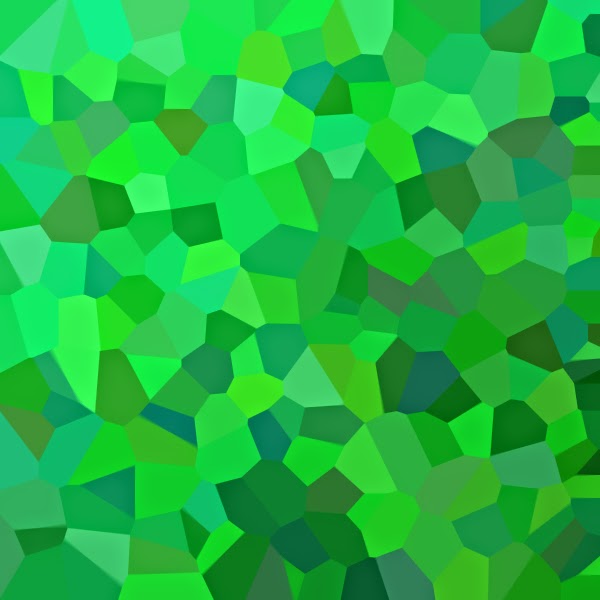
Usung polygonal backgrounds for websites and applications is a new trend. Making polygonal background is quit difficult task, but we can make it our own simple way. polygonal backgrounds looks good for web design an application designs..
Final View
Step 1
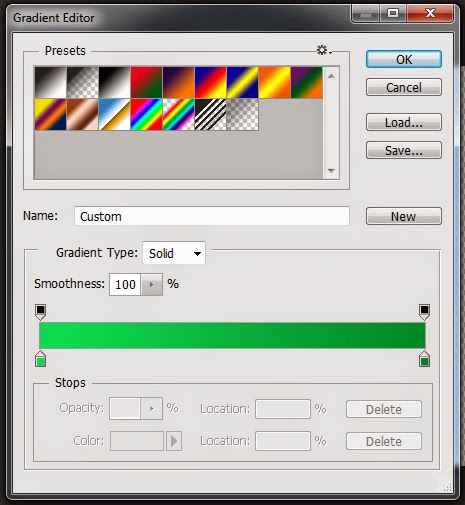
- Create a new file
- and add Gradient (Choose your color combination for gradient)

Step 2
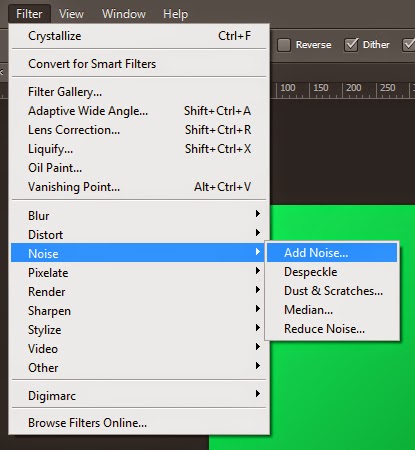
- Now add Noise to image (filter -> Noise -> Add Noise)
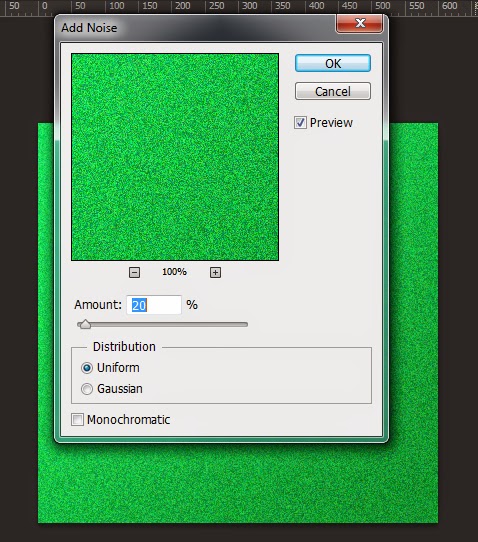
By setting amount to 20, Your image will look like this.
Step 3
- Again open filter and crystallize the image.
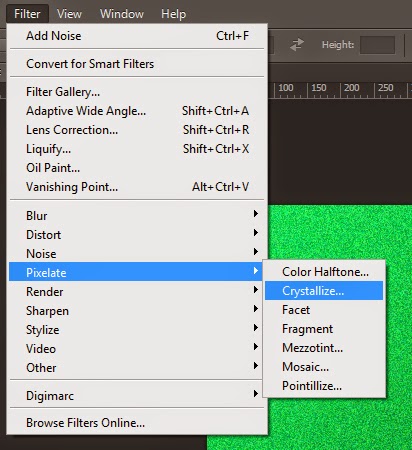
Set cell size to 60 and hot OK
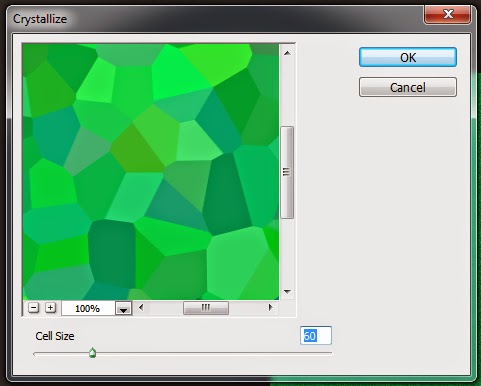
DONE
Make sure that while adding gradient choose color combination carefully. we can make many backgrounds as same..

Saturday, March 28, 2015
a,
christmas,
for,
make,
sketchy,
this,
wallpaper
0
comments
Make a Sketchy Wallpaper for this Christmas

This tutorial will show how we can create a sketchy wallpaper for Christmas this year! We shall cover watercoloring, pencil sketching and some simple lighting effects. It will be good if you are working with a pen and tablet.


 Writer : Tommy Kurniawan
Hello! My name is Tommy. Im a blogger, I love graphics design and now i went to Architechture Technical Senior High School. | Facebook |
Source : 10steps.sg
Make Your Own Action In Photoshop
Photoshop Action is nothing but the bunch of the steps. While editing a photo in photoshop, you have to made minimum four - five steps.. But when you require these steps to edit each and every photo then, besides doing these steps for every photo Make A Action and play the same action for every photo.. you will get same effect..
At every time you apply the Action for a photo, these 4-5 steps will be automatically done because these steps are saved in to your action.
At every time you apply the Action for a photo, these 4-5 steps will be automatically done because these steps are saved in to your action.
Step 1:
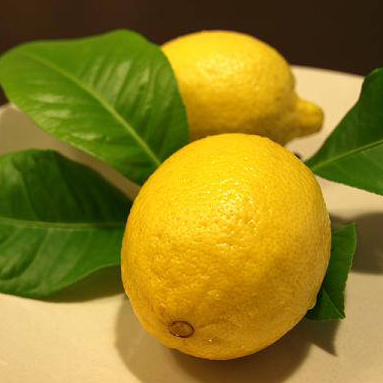
Take the Image in Photoshop to edit. (Click Here to take this photo)
Now go to "Window --- Action"
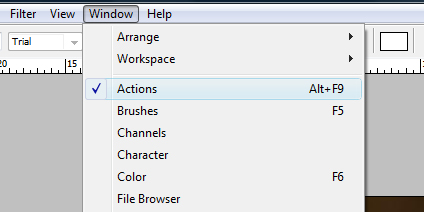
You will get following window and default actions in it.
Click on the "New Action" button shown by arrow. (below the action window)
Click on the "New Action" button shown by arrow. (below the action window)
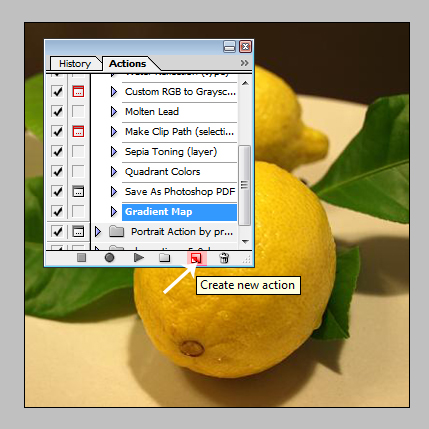
Step 2:
Name Your action as "Test" and click Record
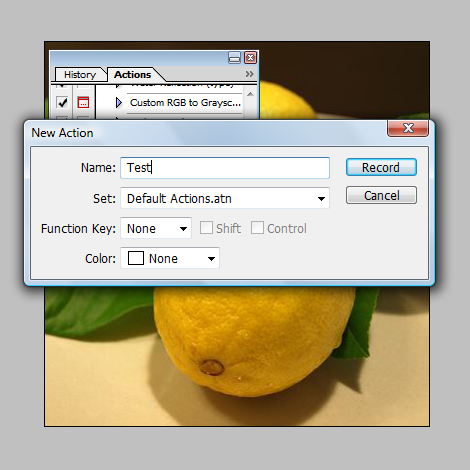
Name Your action as "Test" and click Record
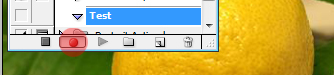
( When you click on the record button your action is started recording, when you complete the job/editing then click on "stop" button.. The action will be automatically saved. )
Step 3:
Now Ive started the recording..
Select Crop Tool from tool box.. and crop the Image..

This Crop step is now recorded by the action.. Now Stop the Action..
When you stop the Action recording, It will be saved and appear in Action window.
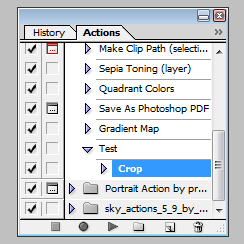
You made a Action Successfully...
Now we will see how to use this Action..
Now Take the image to edit..

Go to "Window ---> Action".
Click on "Test" action in the action window..
And click on Play button below the action window..
You will get the image cropped of exact size you will saved it..
Done--!!
Note :- Ive used only 1 step(Cropping) for this action. but you can add your steps to it.. Only remember that you will record all the steps..
Wednesday, March 18, 2015
best,
effect,
gothic,
make,
photo,
picture
0
comments
Make Gothic Picture Best Photo Effect
To get started, pick a picture you want to manipulate, or use this same one.

1. Use the tool named Dodge Tool to get a whiter effect over the skin. You can find it in the left tool bar.
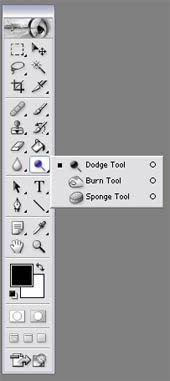
I usually use that tool in a %45 exposure.

2. Now we will desaturate the skin color with the Sponge Tool also in the left tool bar. %100 flow.
Look for it in the same place where the Dodge Tool is, you just have to click over it, and you will see another two options hidden in the same place. (my english sucks, I know it, but try to follow…)
Now that the skin looks dead enough, will work on the eyes.

3. Now pick the Dodge Tool again, and apply it over the eyes.

4. Pick a color you like for the eyes. I like light blue…
Use the color with an opacity of %18, we dont want to lose all the little details of the eye.

5. If you want to add more light to the eye, use a regular brush, white color, and select Mode: Color Dodge %35 opacity.
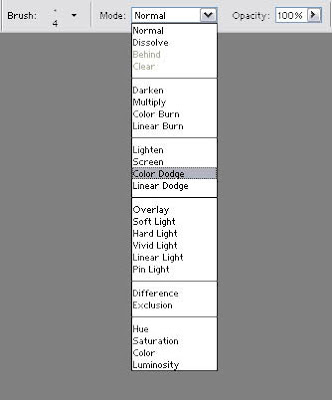
Like this…

6. Now the make up…
Black color, opacity %18, and apply it around the eye a few times. Darker in the center, and softer on the edges.

7. You can also work on the mouth with the Burn Tool also placed below the Dodge Tool.
This tool is very good when you need to add shadows or you want something to look darker. Also, dont forget to use the Blur Tool to correct the skin, and make it look softer and silky.

Read more »
1. Use the tool named Dodge Tool to get a whiter effect over the skin. You can find it in the left tool bar.
I usually use that tool in a %45 exposure.
2. Now we will desaturate the skin color with the Sponge Tool also in the left tool bar. %100 flow.
Look for it in the same place where the Dodge Tool is, you just have to click over it, and you will see another two options hidden in the same place. (my english sucks, I know it, but try to follow…)
Now that the skin looks dead enough, will work on the eyes.
3. Now pick the Dodge Tool again, and apply it over the eyes.
4. Pick a color you like for the eyes. I like light blue…
Use the color with an opacity of %18, we dont want to lose all the little details of the eye.
5. If you want to add more light to the eye, use a regular brush, white color, and select Mode: Color Dodge %35 opacity.
Like this…
6. Now the make up…
Black color, opacity %18, and apply it around the eye a few times. Darker in the center, and softer on the edges.
7. You can also work on the mouth with the Burn Tool also placed below the Dodge Tool.
This tool is very good when you need to add shadows or you want something to look darker. Also, dont forget to use the Blur Tool to correct the skin, and make it look softer and silky.
Subscribe to:
Posts (Atom)


- Follow Us on Twitter!
- "Join Us on Facebook!
- RSS
Contact