Showing posts with label shape. Show all posts
Showing posts with label shape. Show all posts
Thursday, April 30, 2015
and,
artboards,
changing,
cs6,
illustrator,
in,
of,
shape,
size,
the
0
comments
Changing the size and shape of artboards in Illustrator CS6
Changing the size and shape of artboards in Illustrator CS6
 In this movie, I will show you how to change the change the shape and size of your artboards.
Now the first thing I would like you to do, just to make sure that you and I are on the same page, is to go up to the View menu, and make sure that the Smart Guides command is turned on.
If you see a check mark everythings good, if not go ahead and choose the command, you also have the keyboard shortcut of Ctrl+U and Command+U on a Mac.
What Smart Guides do is they allow you to align objects inside of your illustrationsas well as artboards on the fly.
Next step, of course, is to switch to Artboard tool, you can get by pressing Shift+O, or you can just click on it here inside the toolbox.
But before I do that, I want you to notice something.
At this point, you can see that page 1 is active because it has a black outline, whereas page 2 or Artboard 2 if you prefer is not selected nor or any of the others, because they have gray outlines.
If you click on lets say Artboard 4, you can see that it gets the black outline because
its now active and the others are inactive.
Youll also see a number 4 down here in the bottom left corner of the window.
Illustrator goes ahead and numbers Artboards automatically, in the order you create them.
You can override that however that I will show you in a later movie.
Now I will go ahead and switch to the Artboard tool and notice that Artboard 4 is highlighted.
So I just want you to see that artboard thats selected in a standard mode also become selected here inside Artboard mode.
I am going to go ahead and switch back to Artboard 1 by clicking on it and notice that
you have these handles that are surrounding the Artboard.
If you drag one of the handles then you will resize Artboard on the fly and see those green lines, those are the Smart Guides.
So I have got one Smart Guide on the far right side of artboard and another down there at
the bottom thats showing me that I have a center intersection.
So I know that Im exactly aligned to the right side of pages 2 and 6 as well as the
Now, I am going to drag this bottom handle down until I get alignment with the bottom
of those artboards, and I now have this large artboard that includes 1, 2, 5, and 6 and
has independent artboards inside of it for 2, 5, and 6, which can be a very useful way
to work if you want to have one larger artboard that includes all the artwork inside of a
document, for example, as well as independent artboards for each item.
Its a great way to organize and control the output of your artboard.
You also have some options that are available to you up here in the Options bar.
Notice that I have these orientation icon, so I can switch from Portrait to Landscape
just by clicking on it.
You can also select from preset artboard sizes, such as the popular page sizes letter here
Illustrator CS6in States and A4 in Europe and elsewhere.
Ill go ahead and select A4 for now.
You also have numerical control over the size and location of your artboard.
Lets say, I want to go ahead and switch mine back to 6x8 inches.
I would go ahead and highlight Width value, and you can do that, by the way just by clicking
on the letter next to it.
So Ill click on the W, and Ill change it to 6 in, and then press the tab key, and Ill
change the Height value which is now active to 8 in order to reset the size of that page.
Notice however, that Illustrator went ahead and resized the artboard with respect to its
center, and thats because the center reference point is selected up here in the Options bar.
If I want to position the artboard with respect to its upper left corner, I go ahead and click
on the upper left point inside of that reference matrix, and now Ill change the X value to 0,
and then Ill tab to the Y value and change it to 0 as well, and that gos ahead and restores
the original location of the page. In order to accept the work just press the Escape key
in order to return to the Black Arrow tool.
Read more »
Illustrator CS6 Tutorial Video,
I have gone ahead and restored the saved version of 8-page newsletter.ai found inside the 02_artboards folder.Now the first thing I would like you to do, just to make sure that you and I are on the same page, is to go up to the View menu, and make sure that the Smart Guides command is turned on.
If you see a check mark everythings good, if not go ahead and choose the command, you also have the keyboard shortcut of Ctrl+U and Command+U on a Mac.
What Smart Guides do is they allow you to align objects inside of your illustrationsas well as artboards on the fly.
Next step, of course, is to switch to Artboard tool, you can get by pressing Shift+O, or you can just click on it here inside the toolbox.
But before I do that, I want you to notice something.
At this point, you can see that page 1 is active because it has a black outline, whereas page 2 or Artboard 2 if you prefer is not selected nor or any of the others, because they have gray outlines.
If you click on lets say Artboard 4, you can see that it gets the black outline because
its now active and the others are inactive.
Youll also see a number 4 down here in the bottom left corner of the window.
Illustrator goes ahead and numbers Artboards automatically, in the order you create them.
You can override that however that I will show you in a later movie.
Now I will go ahead and switch to the Artboard tool and notice that Artboard 4 is highlighted.
So I just want you to see that artboard thats selected in a standard mode also become selected here inside Artboard mode.
I am going to go ahead and switch back to Artboard 1 by clicking on it and notice that
you have these handles that are surrounding the Artboard.
If you drag one of the handles then you will resize Artboard on the fly and see those green lines, those are the Smart Guides.
So I have got one Smart Guide on the far right side of artboard and another down there at
the bottom thats showing me that I have a center intersection.
So I know that Im exactly aligned to the right side of pages 2 and 6 as well as the
Illustrator CS6 Tutorial Video,
center of the bottom row of artboards.Now, I am going to drag this bottom handle down until I get alignment with the bottom
of those artboards, and I now have this large artboard that includes 1, 2, 5, and 6 and
has independent artboards inside of it for 2, 5, and 6, which can be a very useful way
to work if you want to have one larger artboard that includes all the artwork inside of a
document, for example, as well as independent artboards for each item.
Its a great way to organize and control the output of your artboard.
You also have some options that are available to you up here in the Options bar.
Notice that I have these orientation icon, so I can switch from Portrait to Landscape
just by clicking on it.
You can also select from preset artboard sizes, such as the popular page sizes letter here
Ill go ahead and select A4 for now.
You also have numerical control over the size and location of your artboard.
Lets say, I want to go ahead and switch mine back to 6x8 inches.
I would go ahead and highlight Width value, and you can do that, by the way just by clicking
on the letter next to it.
So Ill click on the W, and Ill change it to 6 in, and then press the tab key, and Ill
change the Height value which is now active to 8 in order to reset the size of that page.
Notice however, that Illustrator went ahead and resized the artboard with respect to its
center, and thats because the center reference point is selected up here in the Options bar.
If I want to position the artboard with respect to its upper left corner, I go ahead and click
on the upper left point inside of that reference matrix, and now Ill change the X value to 0,
and then Ill tab to the Y value and change it to 0 as well, and that gos ahead and restores
the original location of the page. In order to accept the work just press the Escape key
in order to return to the Black Arrow tool.

Wednesday, April 1, 2015
forming,
gambar,
image,
menyerupai,
resembling,
shape
0
comments
Image Resembling Shape Forming Gambar Menyerupai Shape
Photoshop Tutorials

English
First of all create a new document with a size of 750 x 350 pixels. You can change the size, in accordance with the number of images that you will use later. In order for the image to look more attractive given his background, here I use the image as you can see in the picture below, to see the pattern that I have a collection you can click here to use it too. Provide an easy way of background, you open the image you are going to use as a background image with Photoshop and drag it using the Move Tool to a new document that we created earlier, well if backgroudnya size can not cover the whole area we had new document, you can press ctrl + T on the keyboard and change the image size in accordance with your wishes.
Indonesia
Pertama-tama buat sebuah dokumen baru dengan ukuran 750 x 350 pixels . Kamu bisa merubah ukuranya sesuai dengan banyaknya gambar yang akan kamu gunakan nantinya. Agar gambar terlihat lebih menarik beri background nya, disini saya menggunakan gambar seperti yang bisa kamu lihat pada gambar dibawah ini, untuk melihat koleksi pattern yang saya punya kamu bisa klik disini untuk menggunakanya juga. Cara memberikan backgroundnya mudah, kamu buka gambar yang akan kamu gunakan sebagai background dengan Photoshop lalu drag gambar nya dengan menggunakan Move TOol ke dokumen baru yang kita buat tadi, nah jika ukuran backgroudnya tidak dapat menutupi seluruh area dokumen baru kita tadi, kamu bisa menekan ctrl + T pada keyboard lalu ubah ukuran gambar sesuai dengan keinginan kamu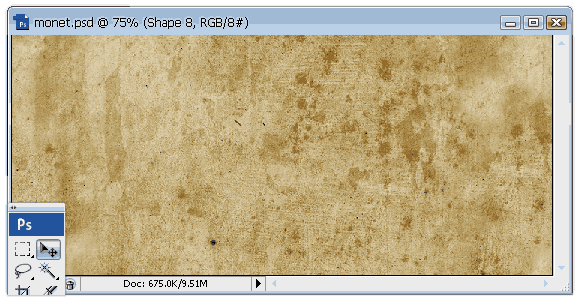
English
Next insert images or photos to be formed, the same way as inserting images backgroundya, but let her image size according to the size of the background picture or photo but want to set up not to meet our document
Indonesia
Selanjutnya masukkan gambar atau foto yang akan dibentuk, caranya sama seperti memasukkan gambar backgroundya, namun biarkan ukuran gambar nya sesuai dengan ukuran backgroundnya tapi gambar atau foto yang ingin dibentuk jangan sampai memenuhi dokumen kita |
Furthermore activate the Custom Shape Tool (U) and then right click on the document. select a shape that you like by double click here I use the leaf shape. then drag the document so we had her shape appear if it is you can use Free Transform (Ctrl + T) to resize and position
Indonesia
Selanjutnya aktifkan Custom shape Tool (U) lalu klik kanan pada dokumen. nah pilih shape yang kamu sukai dengan melakukan double klik disini saya menggunakan shape daun. lalu drag pada dokumen kita tadi sehingga shape nya muncul jika sudah kamu bisa menggunakan Free Transform (Ctrl + T) untuk mengubah ukuran dan posisinya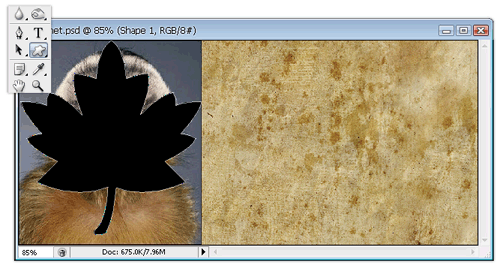
English
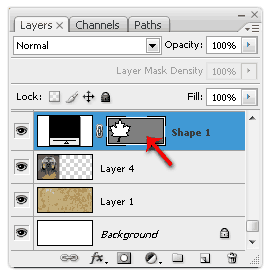
furthermore hold the ctrl key on the keyboard and then click appointed in the picture below it will display a selection of our documents before
Indonesia
English
After the selection appears click image or photograph (on my documents marked with the name of the layer 4) who want to set up and press ctrl + J it will display a layer of photo-shaped shape but we chose earlier (I didokumen marked with layer 10) and then hidden or remove by clicking the eye on the rectangle layer and the initial photo
Indonesia

English
Then click on Layer 10 and then go to the menu Layer - Layer Style - Drop Shadow set its properties as shown below and then click Okay
Indonesia

English
then the picture will look like the image below
Indonesia
maka gambarnya akan terlihat seperti gambar dibawah ini

English
then by using a touch of magic then by following the above steps you can create as shown below
Indonesia
Subscribe to:
Posts (Atom)


- Follow Us on Twitter!
- "Join Us on Facebook!
- RSS
Contact