Showing posts with label 3d. Show all posts
Showing posts with label 3d. Show all posts
Friday, May 8, 2015
3d,
create,
elements,
how,
in,
photoshop,
text,
to
0
comments
How to create 3D text in Photoshop Elements
1. Open a new file in PSE Editor.
2. Now make the default colors in color swatch in the tool bar.
3. Select the text tool from left tools bar.

4. Write some text and simplify the text layer by right clicking the text layer in layers panel and choose "Simplify Layer".
5. Image >Free Transform.
6. Skew the layer to give 3 effect. Press Control and skew the text by extending the left top of the layer towards top left and right top toward a little down left(or some other orientation you may choose). Similar with bottom left and bottom rights.
7. Press Control selecting the text layer.
8. Select a gradient tool and choose colors and stroke from left to right or vice versa.

9. Now from Effects palette, select simple bevel and double click to give bevel effect. Click on the layer effect button on right and change the bevel level to 1 pixel.
10. Now create duplicates of this text layer say 15-20 duplicates. This will create a 3 D effect. Right click last duplicated layer and choose Clear layer style.
Its that easy !

Thursday, April 30, 2015
3d,
cs6,
illustrator,
logo,
tutorial
0
comments
Illustrator Cs6 Tutorial 3D Logo
This tutorial will show you how to make a 3D gradient logo in minutes by using the Warp and 3D effects. It is great for making 3D graphics and icons.
Download Source File
Required: Illustrator CS2+


Here are the steps:


Read more »
Download Source File
Required: Illustrator CS2+
1. 3D Text Illustrator Cs6 Tutorial
Use the Type tool, type in “3D Logo”. Go to Effect >Warp > Arc and apply the following settings:2. 3D Extrude & Bevel Illustrator Cs6 Tutorial
Then go to Effect > 3D > Extrude & Bevel and apply the setting as shown in the image below. You can drag around the cube to set the X,Y,Z rotation values. Set the Extrude Depth to 20pt.3. Expand Appearance
Now go to Object > Expand Appearance to remove all effects and convert to paths. After the text object is expanded, Ungrounp the object by Object > Ungroup or press Ctrl+Shift+G. You probably need to do Ungroup 4-5 times in order to break the object apart.4. Merge Paths
Select the round corner paths and merge them together by using the Pathfinder tool. Hold down Alt key, click on the Add to shape area to merge the selected paths. Repeat this step to clean up all round corner paths.5. Apply Gradient Illustrator Cs6 Tutorial
Select the top level paths and apply a yellow-green color gradient.6. Eyedropper
Select the back(depth) paths, use the Eyedropper tool and click on the front paths. This will copy the gradient fill.7. Darken Illustrator Cs6 Tutorial
Keep the back paths selected, go to Gradient palette and adjust the gradient colors to a darker tone.8. 3D Logo Illustrator Cs6 Tutorial 3D Logo
You can use this technique to make 3D objects from any shape, text, etc.Here are the steps:
- Apply 3D Extrude & Bevel effect
- Expand object
- Ungroup object
- Apply gradient
- Eyedropper gradient fill
More…
Here are more samples I made using the same technique.
Photoshop Tutotials

STEP 1
Create a new document with a size of 500 x 500 px and using the Gradient Tool Bucket paint our background as shown below. ctt: do not need the exact same result like the image below important Middle oscillate between the color red so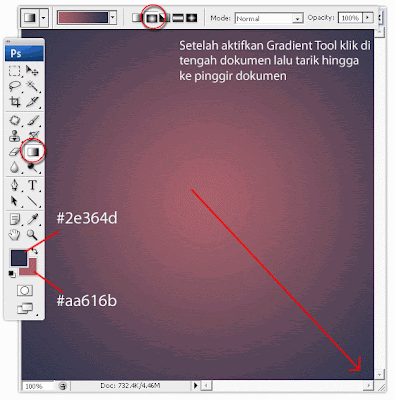
STEP 2
Create a new layer (shift + ctrl + n) and create a rectangular columns as shown below. First by using the Rectangular Marquee Tool create a selection rectangle then using the Paint Bucket Tool fill it before the selection with black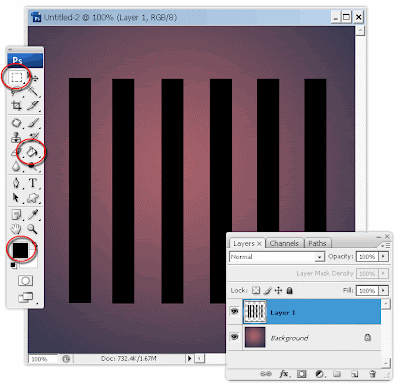
STEP 3
If it is double layer square pillar by pressing Ctrl + J on the keyboard and then open the Edit menu - Transform - Rotate 90 CW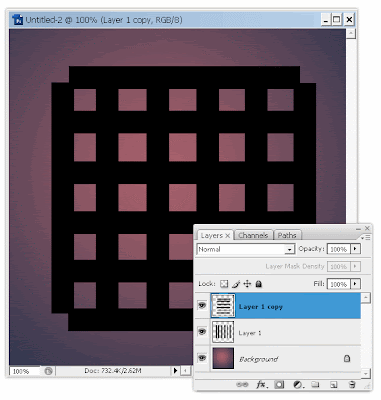
STEP 4
Combine its layer by pressing Ctrl + E on the keyboard
STEP 5
Furthermore activate Eliptical marquee tool and while holding down the shift key on the keyboard (to make a perfect circle) make a circle selection like Figure 1 below. Next open the filter menu - distrort - spherize set the Amount value is 100 and the Normal mode the picture will look like Figure 2 below
STEP 6
Then press Shift + Ctrl + i then the pattern will change the selection, then press the Del key on the keyboard then the remaining are round, and then press ctrl + d to remove the selection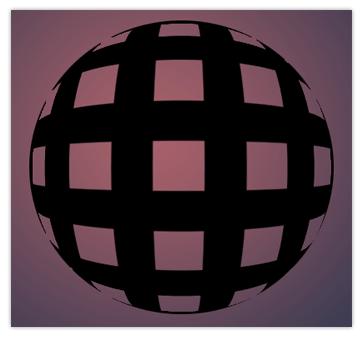
STEP 7
Next open the menu Layer - Layer Style - Gradient Overlay and set its properties as shown below and click OK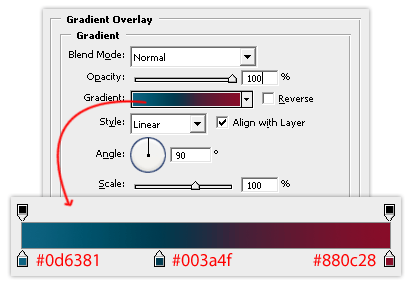
STEP 8
Then globe image will look like the image below
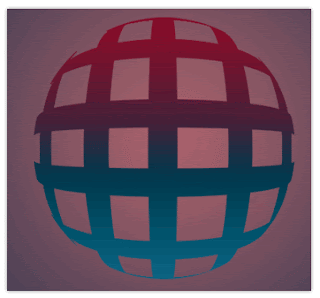
STEP 9
Her ball Duplicate Layer (ctrl + j) and press Ctrl + T and rotate about 45 degrees and then press enter if it fits. Well if it is changing its style and add layer via the Layer menu - Layer Style - Gradient Overlay settings for Inner Shadow also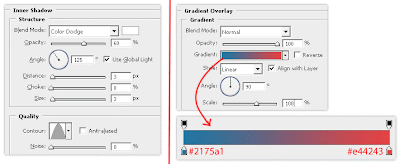 |
| Click To Zoom Image |
STEP 10
If the above step is done correctly then the picture will look like the image below
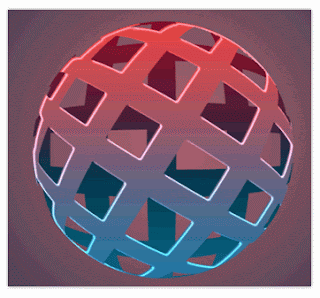
STEP 11
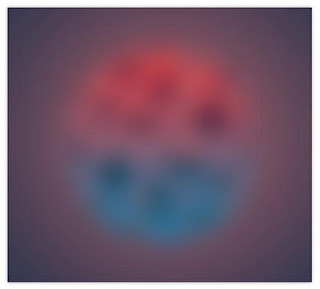
Press Shift + Ctrl + Alt + E it will create a new layer as Figure 1 below. Then go to Filter - Blur - Gaussian Blur radius insert 20 in the field and click OK then the ball was going to be blurred due to the blur effect earlier (fig 2 below). Next, change its Blending mode to Overlay and the Opacity to 60% of its picture will be shown in Figure 3 below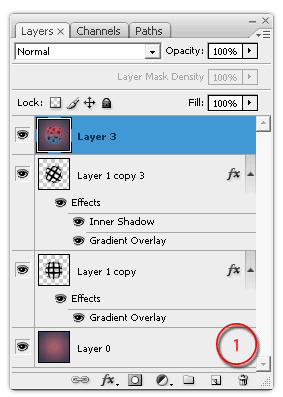

STEP 12
Duplicate the layer ball is in position 2 of the bottom by pressing ctrl + A then turn off its layer style 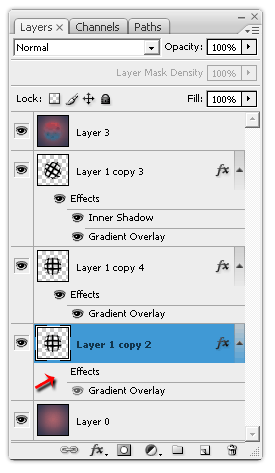
STEP 13
then press Ctrl + T to change the shape of the balls to be like the picture below 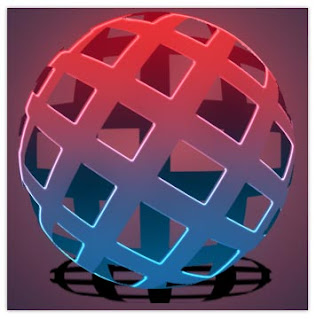
STEP 14
Then go to Filter - Blur - Gaussian Blur radius fill 9 on the field, and change its opacity to 30%
Creating 3D Header For Website
Final view

Step 1:
Create New File and Paint background with the color which you are selected for website.
Go to view ---> Rulers.. You can get markings on corners of photoshop. Drag cursor from that marking on image to make our headers position.
Create New File and Paint background with the color which you are selected for website.
Go to view ---> Rulers.. You can get markings on corners of photoshop. Drag cursor from that marking on image to make our headers position.
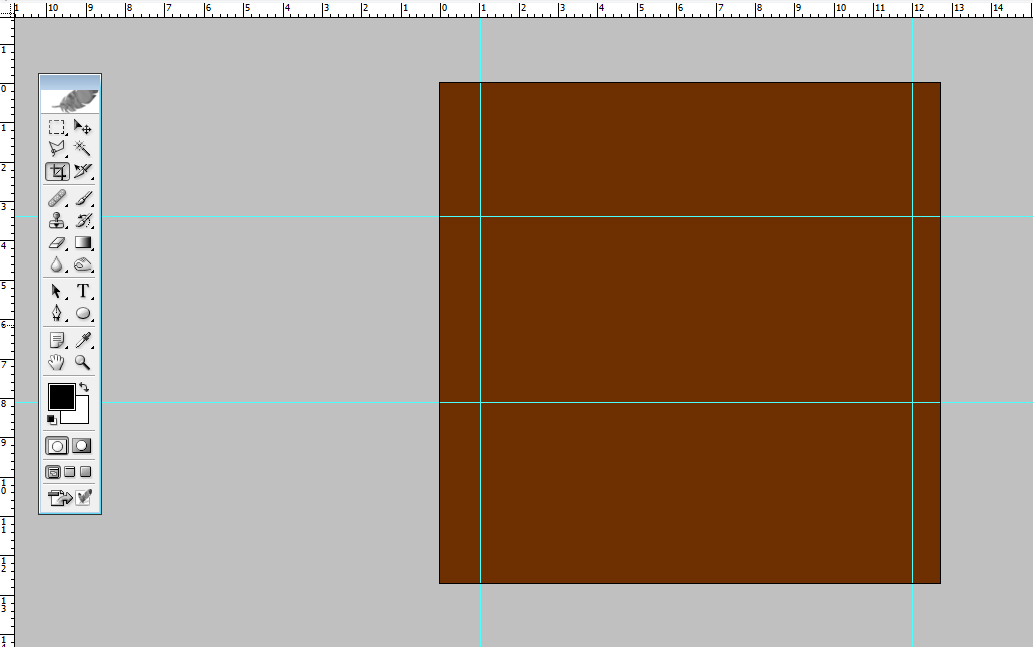
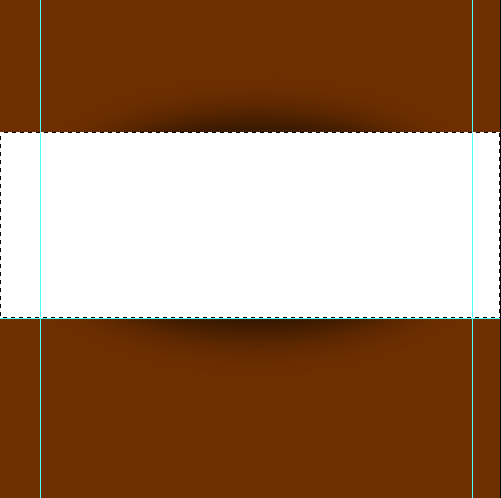
Here I make the header position(middle rectangle).
Step 2:
Create New Layer(Ctrl+Shft+N).
Select the Rectangular Marquee Tool and make a rectangle along our header area.
Then Press Shft+f5 For fill color in rectangle. and fill rectangle with White color.
Select the Rectangular Marquee Tool and make a rectangle along our header area.
Then Press Shft+f5 For fill color in rectangle. and fill rectangle with White color.

Step 3:
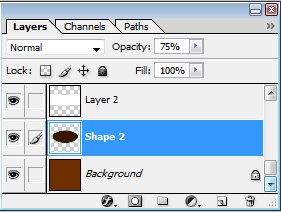
Now Create New Layer above background layer and below the rectangle layer(Header)(Ctrl+Shft+N).
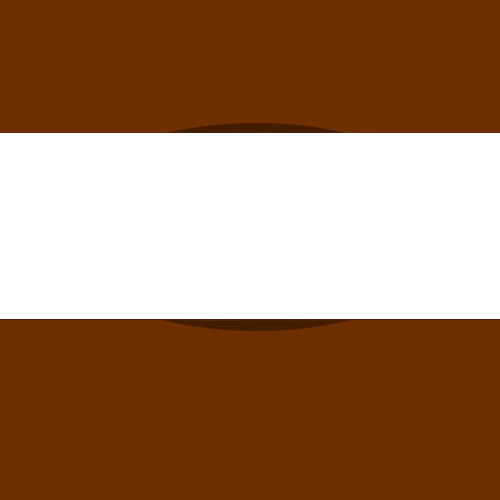
Select Elliptical Marquee tool and Create a round behind Rectangle(for making shadow). Make sure that the round is bit higher than rectangle.
Fill the round with black.(Shft+f5)
Select Elliptical Marquee tool and Create a round behind Rectangle(for making shadow). Make sure that the round is bit higher than rectangle.
Fill the round with black.(Shft+f5)
Step 4:
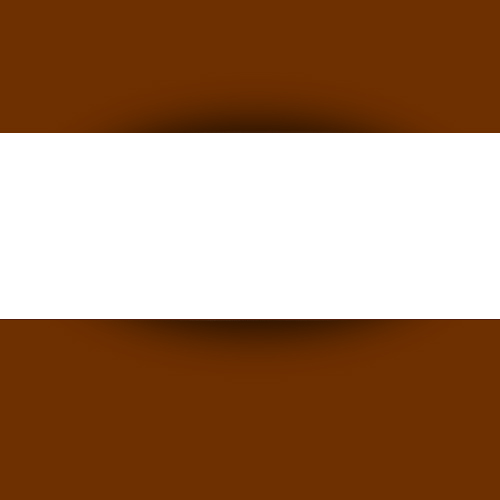
Go to Filter ---> Blur ---> Gaussian Blur. and set radius to 30PX.
Go to Filter ---> Blur ---> Gaussian Blur. and set radius to 30PX.
Step 5:
Make a new layer above the Rectangle (Ctrl+Shft+N).
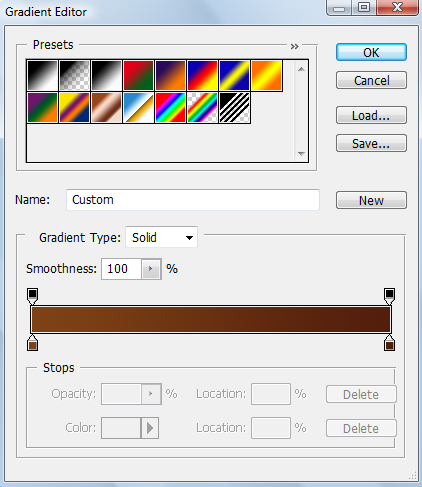
Select the Rectangular Marquee tool and select the white rectangles border for filling Gradient.
Now Fill Gradient With Fill Gradient Fill Tool.
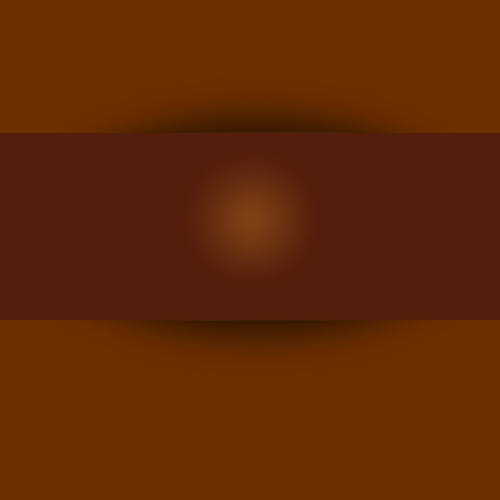
Step 6:
Select Horizontal Type Text Tool and Type Name Of Website or Header Title.

Right click on the text layer and click on Rasterize Layer.
Now go to Blending Options.
1) Gradient Overlay :-
Make a white and Gray Combination And feel style to linear.
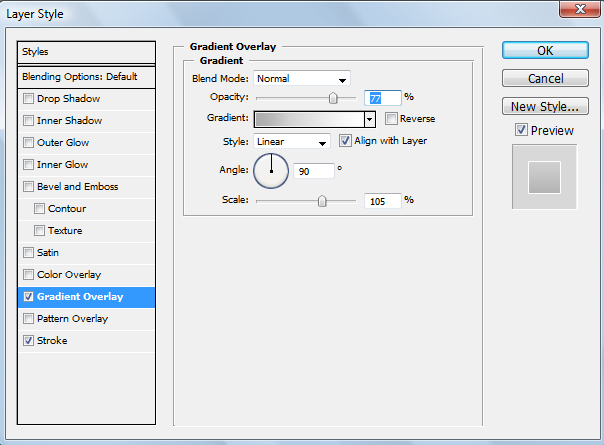
2) Stroke :-
Set size of stroke to 1px and color to white.
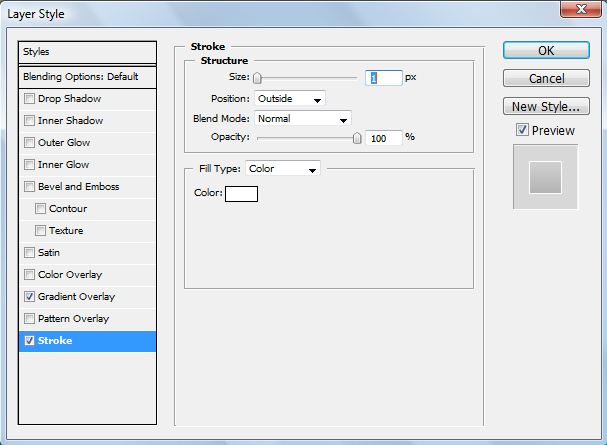
You can also Smooth Give Bevel and Emboss From Blending Options By increasing Smoothness..

Step 7:
Now If you Want to add navigation Bar at bottom, You can just add text and drop shadow.
You can also create separation of navigation links using "Single Row Marquee Tool".
You can also create separation of navigation links using "Single Row Marquee Tool".
Done..!!

Step 1
Open Adobe Illustrator and find the font that you want to use in your artwork, in this case I used Xirod Font and tweaked it a little. Make it outline and save it in Adobe Illustrator 8. (Cinema 4D just open vectors in this Adobe Illustrator version).
Step 2
Go to Cinema 4D and open your Illustrator file, when you open it in Cinema 4D you can see that it is inside of a group. You need to ungroup them and add the extrude NURBS to each letter of your word. Then when you have each letter with extrude you need to add lights (I used 2 area lights, in the front and the left side) and target camera (optional, you can use whatever you want).
Step 3
Well, we have our 3D text and we need to add more details before we go over to Photoshop. Were going to duplicate our 3D object 8 times to make it editable and we are going to add explosion and shatter. You need to play with the settings to see how you want your 3D text to look like. Just apply 3 explosions and 3 shatters to it and make a preview, you will see where to add more details and where not to.


Step 4
Go to render settings and put these following settings. Make the render and save in 300 DPI TIFF format with Alpha Channel.


Step 5
Take the render into Photoshop, go to the Channels windows and choose the Alpha Channel. Make your selection, cut your 3D text and paste it in another layer. Then you can work just with your 3D text and after, with your background.
Step 6
Were going to create the background and paint some areas with dark blue. I used the basic soft brush and 50% opacity to achieve the effect that I wanted.
Step 7
Now were going to add more details to the background and we also need to create some highlights behind the 3D text to make it stand out.
Step 8
Time to add some color to our 3D text. You can do this in different ways. I just used the basic soft brush and painted over the 3D letter and made some masks.

Step 9
We need to do a special effect to apply in front of our 3D letters. To do this, choose the Gradient Tool and change the mode to Difference. Make gradients in different directions. After, select the text and make a layer mask in this effect layer. Change the blend mode to Soft Light and Opacity to 70%
Step 10
Next, select the 3D text, go to Modify - Contract and use 10 to 20 pixels. Delete then deselect and go to Effects - Blur - Motion Blur use Angle: 15 and Distance between 60 to 70 pixels.
Step 11
Now well add more detail to our 3D text. Choose a good splatter brush and paint wherever you want. To generate the back of the explosion you need to add broken glasses behind text. (http://psdtuts.s3.amazonaws.com/208_Break_Down/pieces.png). Add some highlights to make it stand out.
Step 12
Add some shadows inside of the 3D text with the Polygonal Lasso Tool and the Gradient Tool in Black to Transparent.
Step 13
Now add some crack brushes in the 3D text to make the explosion more real. Put a crack on the letter you want to brake, in my case, the x.
Step 14
Add highlights on the border of each letter to give it a real explosion feeling. To create the beginning of the explosion add a mini explosion brush to the inside corner of the x.
Step 15
Make some lines and flares in the explosion point in different ways. Use different colors to give it a great look.
Step 16
Add the broken glass image on top of your 3D text and change the Blend Mode to Overlay. Duplicate it, go to Edit - Transform - Flip Horizontal and change the Blend Mode to Normal.
FINAL
This is the final image. Hope you enjoyed this tutorial!
Source : Abduzeedo
 About The Writer
Hello! My name is Tommy. Im a blogger, I love graphics design and now i went to Architechture Technical Senior High School. | Facebook |
Subscribe to:
Posts (Atom)


- Follow Us on Twitter!
- "Join Us on Facebook!
- RSS
Contact