Showing posts with label or. Show all posts
Showing posts with label or. Show all posts
Thursday, April 30, 2015
a,
adobe,
cs6,
document,
illustrator,
or,
panning,
scrolling
0
comments
Adobe Illustrator CS6 Scrolling or panning a document
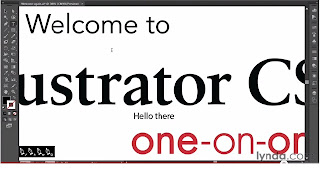
In this movie, I will show you how to scroll or if you prefer pan your Illustrator cs6
.
So here I am zoomed in on a detail, but I want to be able to scroll around a little bit.
Take a look at a different detail at this exact zoom level.
You can take advantage of the scroll bars down here at the bottom and along the right side of the Document window.
But the better way to work is to get the Hand tool.
So if I switch to the Hand tool which has a keyboard shortcut of H, then I can just drag my Illustrator cs6 around as much as I like.
Of course, you dont want to have to go running after the Hand tool every time you need to scroll.
So heres a better way to work.
I will switch back to my black arrow tool, and then I will press and hold the spacebar. Notice that gets me the Hand tool as long as the spacebar is down, and then I can drag the document as much as I want.
Now, what happens though, if youve got live text? Now, none of the text in this document is live, by the way.
I use special fonts that arent on your system so I had to convert everything to outlines.
Illustrator CS6 Tutorial
But lets just go ahead and create some text.
Ill switch to the Type tool, which I can do of course, by pressing the T key.
And Ill click inside the document, and I will just enter the word Hello.
Now if I try to press the spacebar and scroll at this point, I will enter a space character of course.
So one option is to press the Escape key so the text is no longer active, and then you can spacebar-drag, but because I pressed the Escape key I am back to the Black arrow tool so.
Now if want to do some more text editing Id have to switch back to my Type tool, and then click after that space character and enter some more text.
Here is the way I work, when I have live text.
I will just go head and scroll using the Scroll wheel.
So obviously scrolling down moves you down, scrolling up moves you up.
If you want to move more quickly, its a Shift+ Scroll down or a Shift+Scroll up, if you want to
move back and forth then you press the Ctrl key, or the Command key on the Mac, and you scroll down to go right, scroll up to go left, if you want to move more quickly its Ctrl+Shift
on a PC, or Command+Shift on the Mac, scroll down to go right and scroll up to go left. Also, by the way, those of you with Macintosh trackpads, you can use that two finger swipe as well.
Illustrator will respond to that, and thats probably the easiest way to work on that platform.
So there you have it, the myriad ways to scroll or pan a document here inside Illustrator cs6

Friday, April 3, 2015
effect,
exploding,
image,
or,
splatter
0
comments
Exploding Image or Splatter Image Effect
Tutorial for Exploding Image
Final view

Step 1:
Create New File.
Paint The background with white color.

Step 2:
Add your image/object on at center .

Step 3:
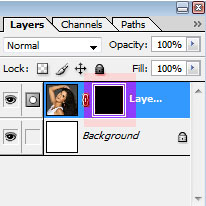
Go to Layer---> Add Layer Mask ---> Hide All.
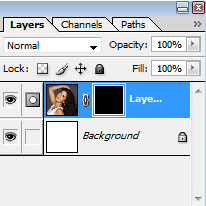
Step 3:
Select the Square brush. (24-28 px).


Step 3:
Select the Square brush. (24-28 px).
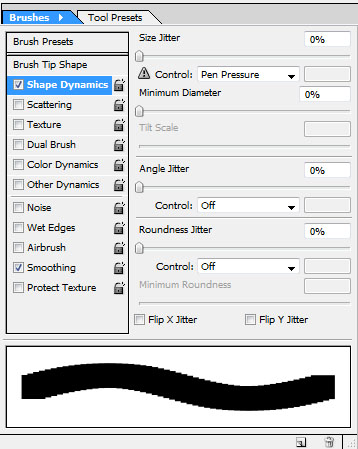
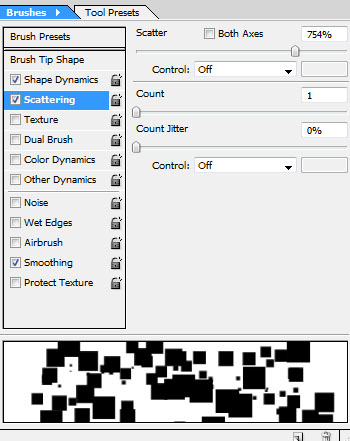
Now go to Window ---> Brushes.
You will see following window.
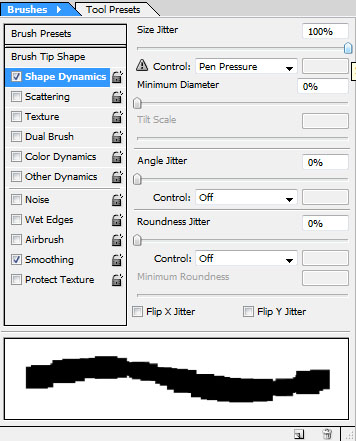
Select first check box of "shape dynamics", and increase site jitter to 100%.
Now select 2nd check box Scattering and increase Scattering to 750% to 760%.
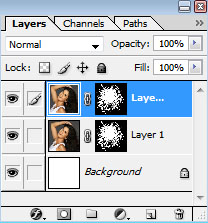
Now come to image, and give strikes on the masked layer, which appears Black as shown below.
Step 4:
Now make a duplicate layer by pressing Ctrl+J.
Step 5:
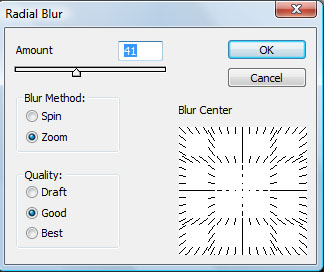
Now go to Filter ---> blur ---> radial blur.
set blur method to zoom and amount to 40/50.
And press OK.
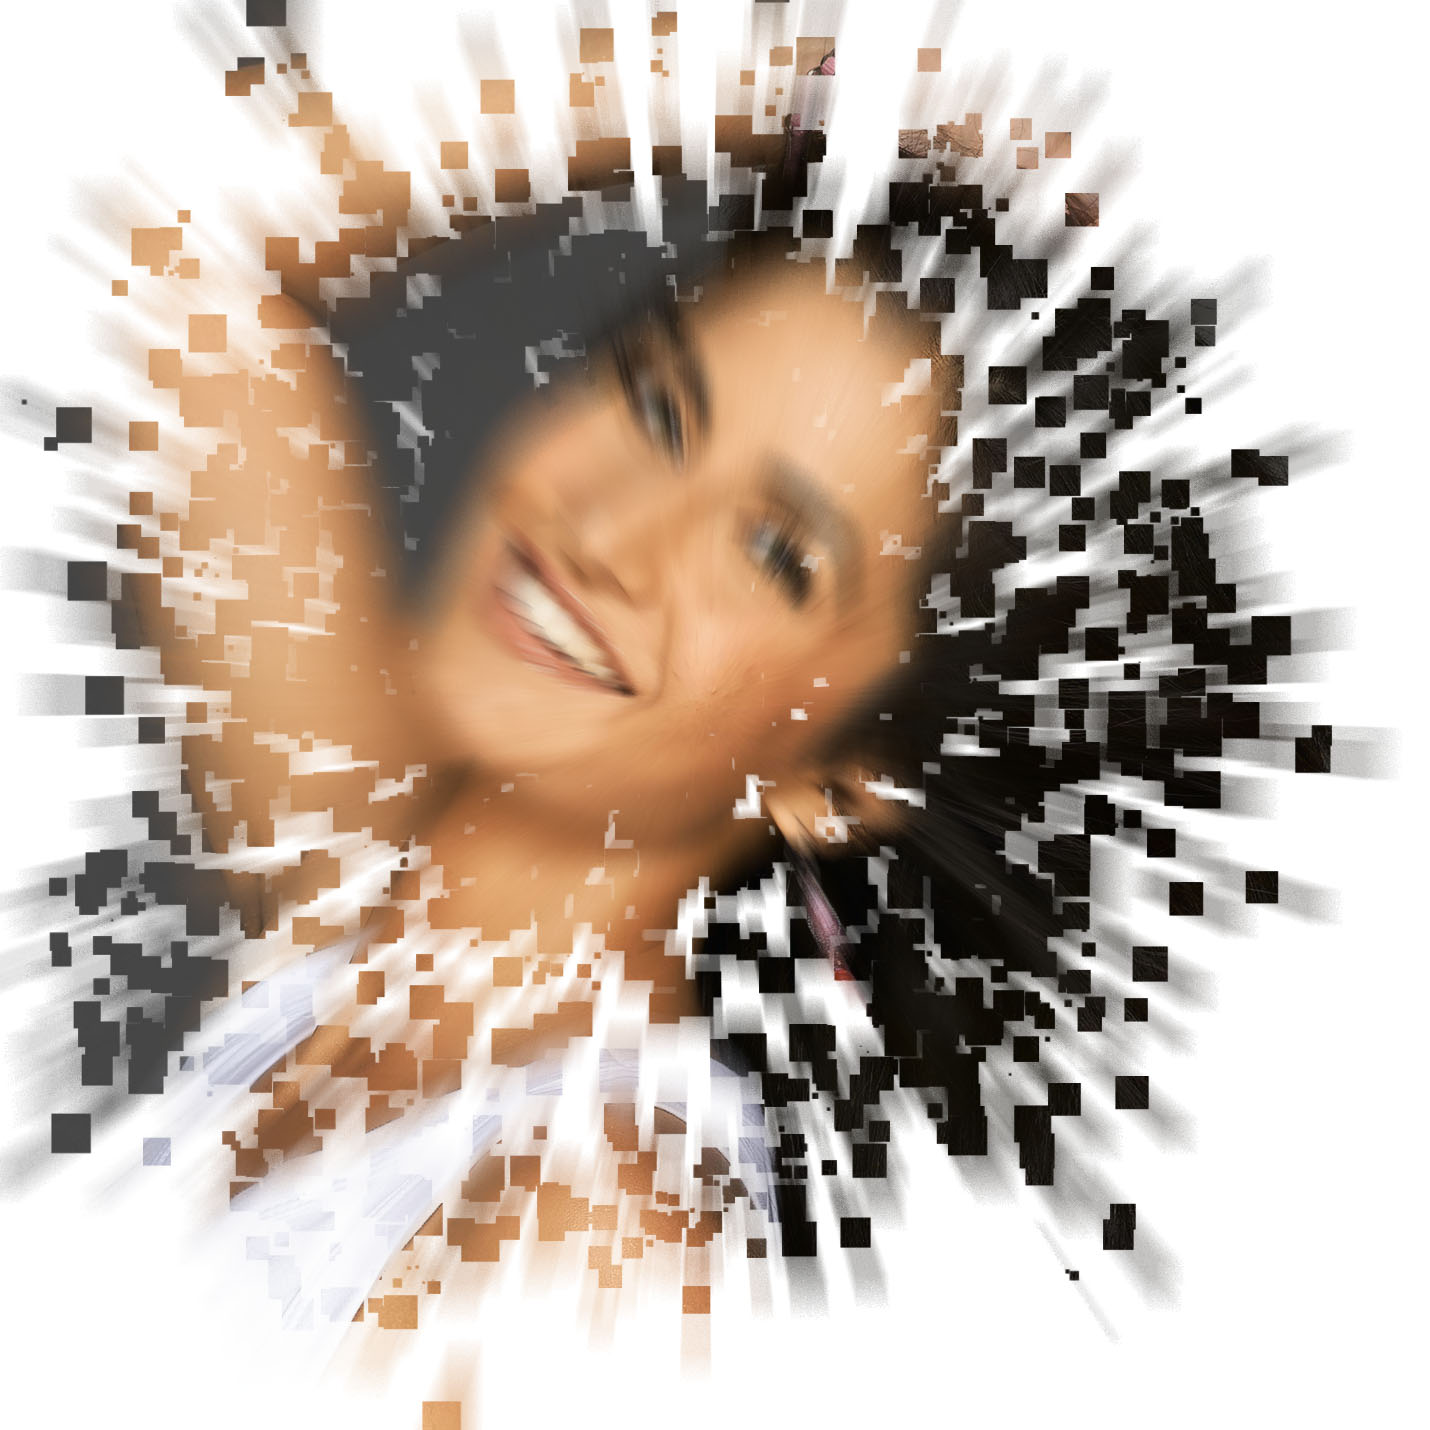
set blur method to zoom and amount to 40/50.
And press OK.
Step 6:
Now set the opacity of this layer to 50% to 60%.
Select the Eraser toll and erase some blurred area near object(face).
Select the Eraser toll and erase some blurred area near object(face).
Wednesday, April 1, 2015
a,
book,
cover,
create,
magazine,
or,
retro,
style
0
comments
Create A Retro Style Book OR Magazine Cover
Create A Retro Style Book OR Magazine Cover
We see previously that how to create a simple Magazine cover. Here we can see a very simple but attractive retro style magazine cover making only in few steps..
Final view

Step 1:
Create new file and get your content related photo as a background.. Ive make a architects magazine cover so I choose a Building photo..
( Click Here to take this image )
.jpg)
Make a new layer (Ctrl_Shft+N)
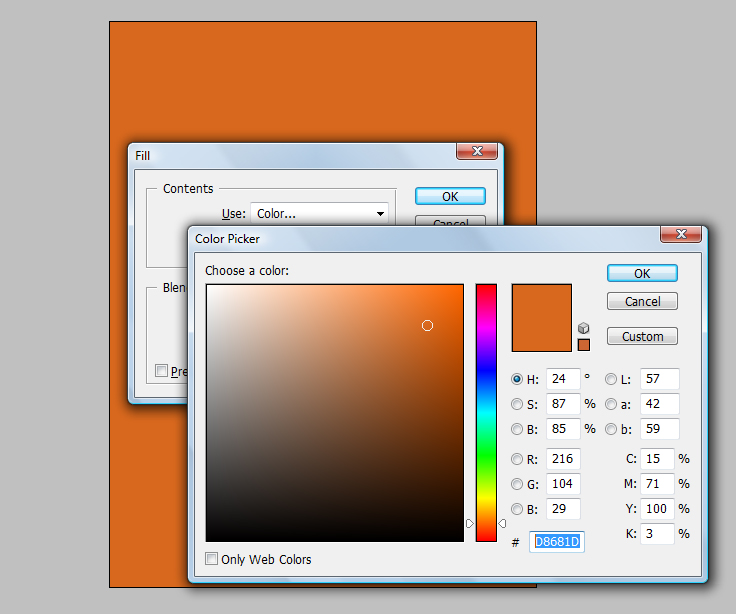
And fill the background with "#D8681D" color. (Shft+f5)
Step 3:
Now download some vector buildings from google..
and take them in the project.. Ive choose one vector building..

Create new file and get your content related photo as a background.. Ive make a architects magazine cover so I choose a Building photo..
( Click Here to take this image )
And fill the background with "#D8681D" color. (Shft+f5)
Make the opacity of layer to 85% - 90% .
Step 2:
Now select your font (Use Slandered fonts used for cover design) and add title and subtitle.
Remember that Title has larger font size than Subtitle.

Step 2:
Now select your font (Use Slandered fonts used for cover design) and add title and subtitle.
Remember that Title has larger font size than Subtitle.
Step 3:
Now download some vector buildings from google..
and take them in the project.. Ive choose one vector building..
Make this Layer property to "Multiply"

Done..!!
Sunday, March 29, 2015
a,
artistic,
cutout,
effect,
giving,
or,
photo,
to
0
comments
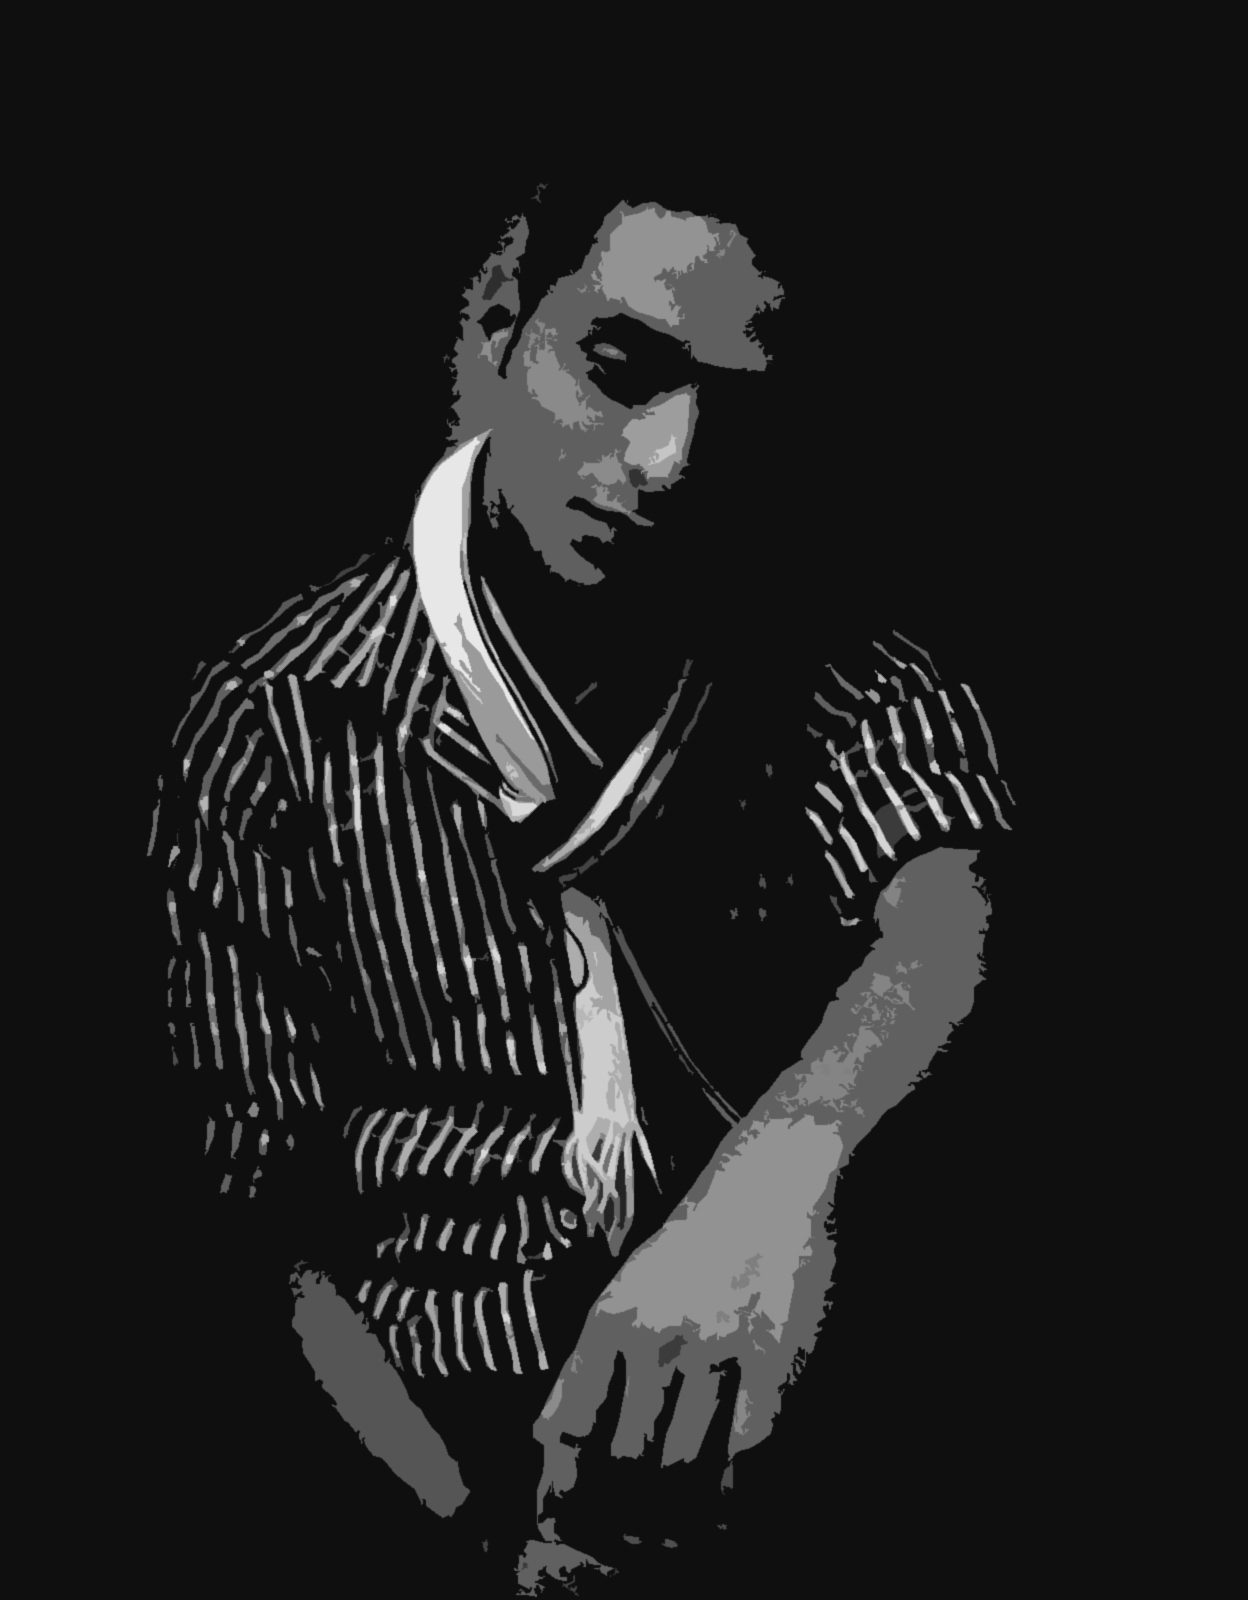
Giving Cutout Effect or Artistic Effect to a Photo
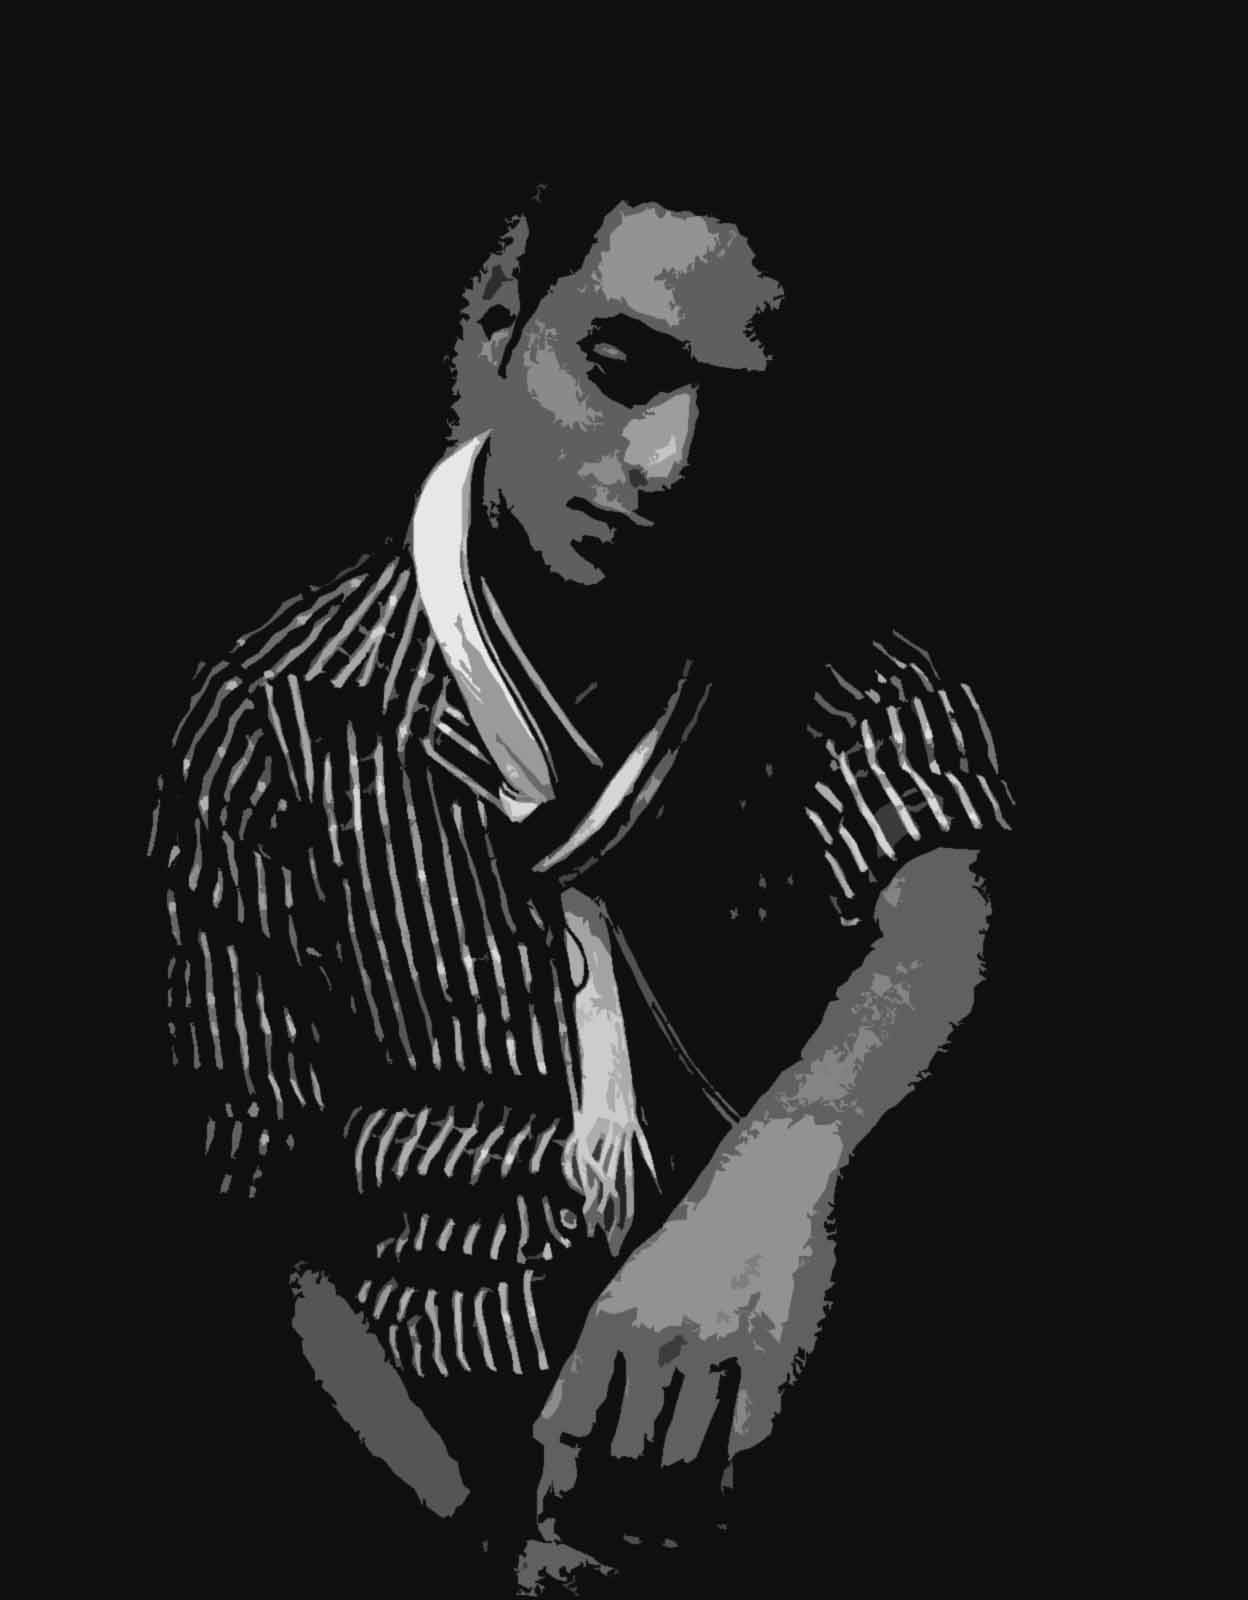
Cutout Effect Tutorial
Final View
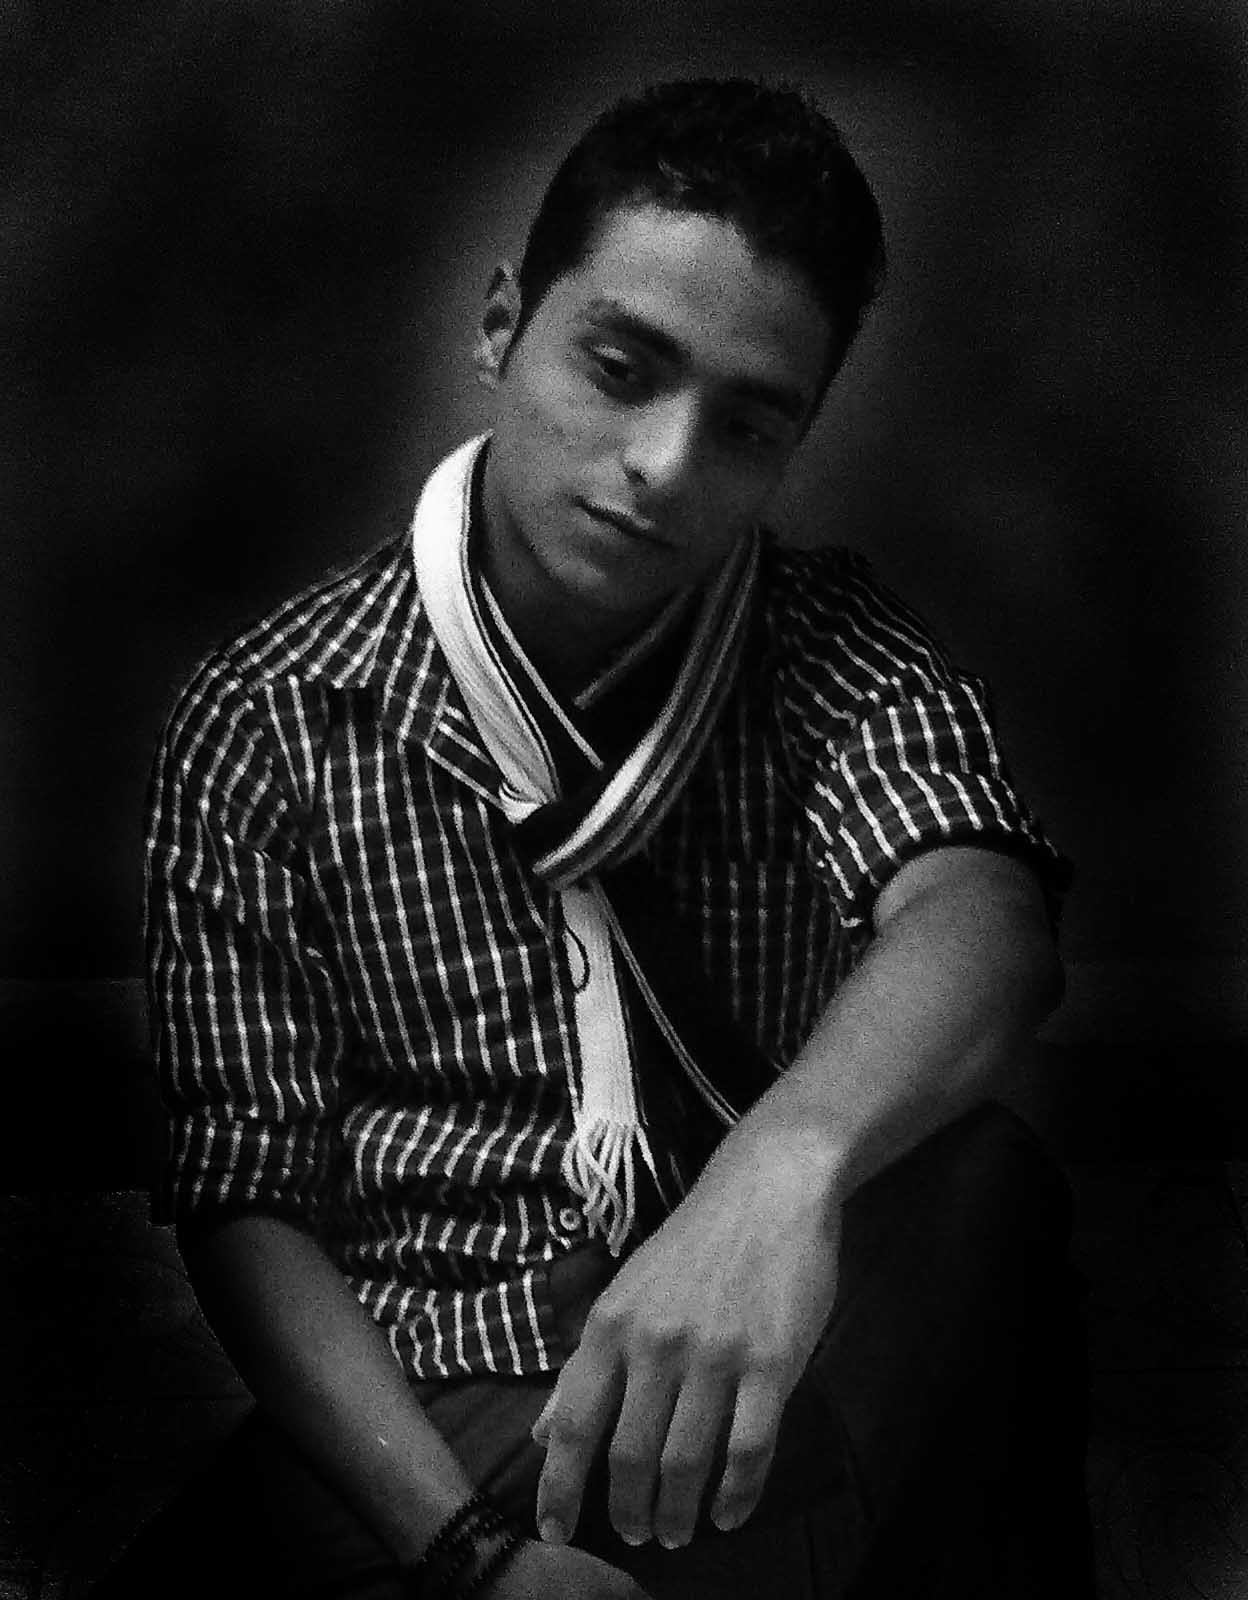
First get the images

Step 2 :-
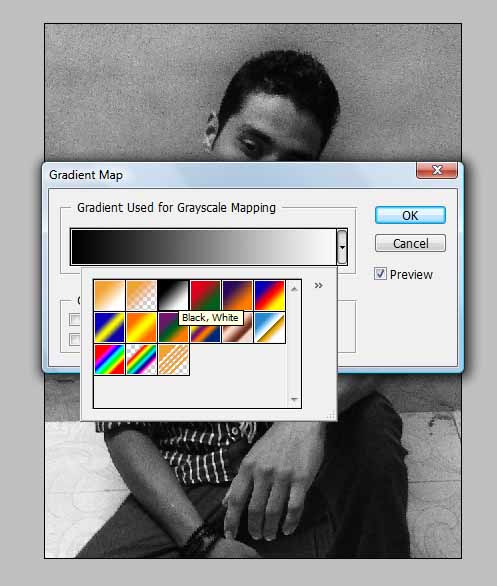
Select the image and go to "Image---> Adjustments---> Gradient Map.
Select the Black and White color (2 color combination). and click OK.
Step 3 :-
Now select the Burn tool from tool box, and burn the background of the image.
Note :- While Burning the background, remember that the Object or person remains as it is, burn only background.
Step 4 :-
Now go to "Filter ---> Artistic ---> Cutout"
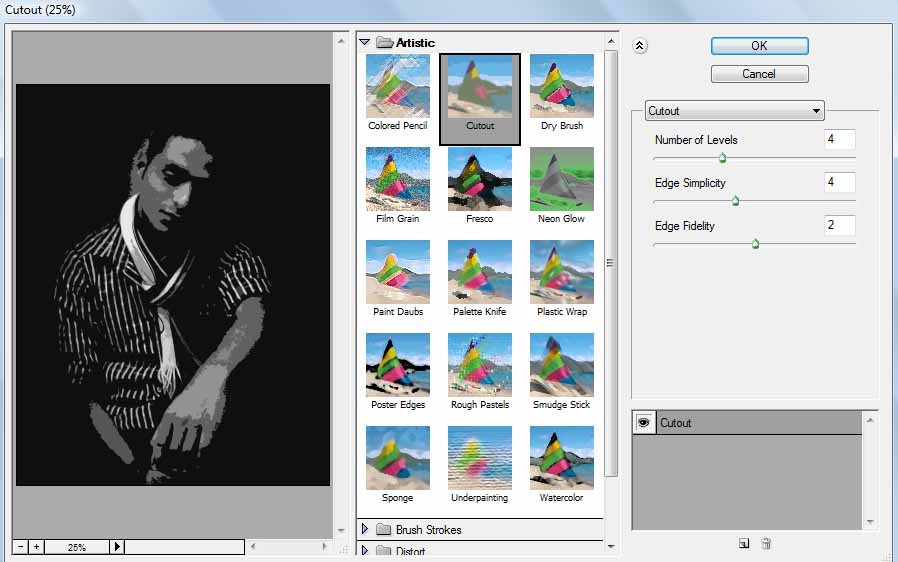
Click "OK"
and youll get final image.
Step 5 :-
You can add the name or color in it if you want..
Adjust the color balance by pressing Ctrl+B.
increase the color which you want and insert the text with your favorite font..

Done...!! :-)
Subscribe to:
Posts (Atom)


- Follow Us on Twitter!
- "Join Us on Facebook!
- RSS
Contact