Showing posts with label adobe. Show all posts
Showing posts with label adobe. Show all posts
Friday, May 1, 2015
adobe,
cs6,
how,
illustrator,
image,
in,
new,
the,
to,
trace,
use
0
comments
How to Use the New Image Trace in Adobe Illustrator CS6
Today we will learn the new features of the tracing engine in Adobe Illustrator CS6 and talk about its new functions. We will trace a photo, a sketch and a texture; then we will compare the results between Adobe Illustrator CS5 and CS6. Let’s get started!
In this tutorial I’ll use a photo a strawberry (credit to deviantART user StockProject1) ; the sketch was kindly provided by Victoria Vasilyeva and the texture (credit to deviantART user ~kingkool6).
 This allows us to use other panels and tools while tracing. Such features did not exist in Adobe Illustrator CS5 as well as in earlier releases; the setting of the tracing was made in the Tracing Options dialog box, and then it was impossible to access the other objects and interfaces.

 The new preset, "Silhouettes" allows quick creation of vector silhouettes.
 After the Expand command we get the vector object with the optimal amount of points.


 Note, in Adobe Illustrator CS6 you can set several of the Palette values. This parameter sets while the vector image is been made in color or in greyscale. As you can see, the new tracing engine in Adobe Illustrator CS6 shows better results.
 There is a new feature in Adobe Illustrator according to which you can instantly check out your original image. To do so, press and hold the eye icon near the View option.


 The overlapping method creates stacked paths, the contours of neighbor objects overlay.

The Minimum Area option corresponds to the Noise option in Adobe Illustrator CS6. This option specifies the size of the smallest areas of the initial image, which will be taken into account while tracing.
The Corner Angle option in Abode Illustrator CS5 corresponds with the Corners option in Adobe Illustrator CS6 and is been set in percentage. The higher value we set, the bigger amount of angles the final image will have.
 In Adobe Illustrator CS6 there are no such function of the tracing as the Blur and the Resample. In Adobe Illustrator CS5 the Blur function is for the reducing the number of small artifacts and smoothing the jagged edges in the final image. The Resample option allows speeding up the process of tracing for big size images, losing the quality of the output image.
 When we use the same preset in Adobe Illustrator CS6 the majority of small details disappear.
 Unfortunately, you need to change the parameters of the tracing manually in order to get the same results in Adobe Illustrator CS6.

 I’ve used different presets and operated the parameters manually, but I still couldn’t get the result which would correspond to the result that can be made in Adobe Illustrator CS5.
Read more »
In this tutorial I’ll use a photo a strawberry (credit to deviantART user StockProject1) ; the sketch was kindly provided by Victoria Vasilyeva and the texture (credit to deviantART user ~kingkool6).
Step 1
In Adobe Illustrator CS6 the settings of the tracing is in the new Image Trace panel (Window > Image Trace).Step 2
The presets have also changed between Adobe Illustrator CS5 and CS6Step 3
Let us evaluate the quality of the tracing using the same preset High Fidelity Photo in Adobe Illustrator CS5 and Adobe Illustrator CS6.Step 4
There were some changes in the Colors parameter. This parameter specifies the number of colors which the final vector image will consist of. In Adobe Illustrator CS5 the Max Colors options can be set in the number values, in Adobe Illustrator CS6 the Colors option can be set accurately in percentage.Step 5
You can get access to additional options of the settings if you press the Advanced key in the Image Trace panel. Now we have an opportunity to choose a tracing method. The Abutting method creates cutout paths. The contours of neighbor objects match.Step 6
The Path Fitting option defines the accuracy of the tracing of the initial raster image. In Adobe Illustrator CS5 the smaller value allows to create a more accurate contour, the bigger- the rough contour. In Adobe Illustrator CS6 it is vice versa, the bigger the value is the more accurate contour we get.The Minimum Area option corresponds to the Noise option in Adobe Illustrator CS6. This option specifies the size of the smallest areas of the initial image, which will be taken into account while tracing.
The Corner Angle option in Abode Illustrator CS5 corresponds with the Corners option in Adobe Illustrator CS6 and is been set in percentage. The higher value we set, the bigger amount of angles the final image will have.
Step 7
Let’s see how the new tracing engine works with sketches. Apply the preset Black & White Logo. The tracing of the sketch in Adobe Illustrator CS5 shows good results.Step 8
Let’s try to make the tracing of the texture. We will use the same Black&White Logo preset. As we can see, the result of the tracing in Adobe Illustrator CS5 looks better than in Adobe Illustrator CS6Conclusion
The new tracing engine really works good with the photos and allows quick and accurate vector silhouettes. But when you use it for tracing sketches and textures you will need to operate all the tracing processes manually, and that will not always show good result. If you work with the sketches and textures, the Live Trace feature in Adobe Illustrator CS5 shows good results when you use the presets. Have you used the trace features in Adobe CS6 yet? If so, what do you think?
adobe,
bridge,
cs2,
cs6,
icon,
illustrator,
tutorial
0
comments
Adobe Bridge CS2 Icon Illustrator CS6 Tutorial
Adobe Bridge CS2 Icon
This tutorial will show you how to replicate the Adobe Bridge icon in Illustrator CS6 using the same techniques as the Photoshop Splash Page tutorial. You will be surprised how easy it is to create such as complicated icon with gradient & blending mode.Download Source File
Required: Illustrator CS2+
1. Place Images
First, place in the original Adobe Bridge icon image in Layer 1 for reference. Double click on Layer 1 and change the following Layer Options: check Lock and Dim Images to 50%.
2. Start Tracing
Make a new layer. Hold down Ctrl key and click on the Visibility icon of Layer 2 to view that layer in Outline Mode. Now use the Pen tool and start tracing the basic shapes of the sea shell.

3. Gradient
Select the top layer and apply a 2 colors radial gradient (color 1 = m5, color 2 = c26, m86, y44). Use the Gradient Tool (G) and drag from the lower center to top corner. This will re-position the gradient.
4. Multiply Blending Mode
Now in the Transparency palette, select Multiply Blending Mode. Notice this will create the see through effect.
5. Back Layer
Select the back sea shell layer, fill it with another radial gradient (color 1 = c21, color 2 = c26, m86, y44). Again, you need to use the Gradient Tool to position the gradient. Then, select Multiply Blending Mode.
6. Top Layer
Select the top layer and fill it with different color gradient (color 1 = m5, color 2 = c33, m95, y62). Again, select Multiply Blending Mode.
7. Eyedropper
Select the rest of the unfilled paths, use the Eyedropper tool and click on the top layer to copy the gradient fill. To get the best result, you might need to use the Gradient Tool to adjust the gradient position of each shape.
8. Icon Base
Make a rectangle box and then apply 25pt round corner (Effect > Stylize > Round Corners).
9. Drop Shadow
Now go to Effect > Stylize > Drop Shadow and apply the following setting:
10. Gradient
Use the Gradient Tool and apply a 3 colors gradient as shown (color 1 = k0, color 2 = k16, color 3 = k13).
11. Add New Stroke
To make an inner glow effect, we need to add a new stroke. in the Appearance palette (top right corner dropdown menu), select Add New Stroke.
Align Stroke Inside
In the Appearance palette, selct the new added stroke, fill it with 4pt white stroke color. Then open the Stroke palette, and click on Align Stroke to Inside.
12. White Background
Notice when you place the sea shell on top of the icon base, the sea shell is see-through because the blending mode has been set to multiply? We can get rid of that by adding a white background to the sea shell. First copy the entire sea shell to clipboard, then merge the current sea shell by Alt-click on Add to shape area (Pathfinder palette).

Final
The image on the left is my version and the image on the right is the original version.
Thursday, April 30, 2015
a,
adobe,
and,
cs6,
from,
illustrator,
navigating,
numerically,
panel
0
comments
Adobe Illustrator CS6 Navigating numerically and from a panel
Now lets say you want to magnify your illustration on screen, but none of the standard zoom increments
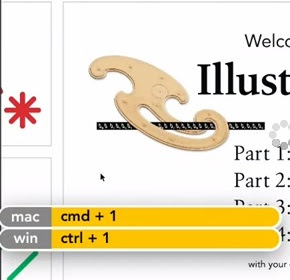 are really working for you.
For example, here I am taken in the illustration wide and if I press Ctrl+Plus, or Command+Plus on the Mac, then Ill zoom to 100%.
And if I do it again, Ill zoom to 150% and then 200% and then 300% and so on.
So weve got some pretty big increments going on and these are the exact same increments we get with the Zoom tool and with the other zooming techniques.
Im going to go ahead and press Ctrl+1, or Command+1 on the Mac, to zoom out to 100%.Illustrator cs6
If you want to dial in a custom zoom value then you can drop down here to this zoom option thats listed in the very bottom left corner of the document window.
Click on it, and then instead of entering a value, which you can do if you like, but my preferred method of working here is to press the Up arrow key in order to zoom in increments of one so you have very tight control.
You can also press the Shift Up arrow to move in 10% increments.
Illustrator CS6 Tutorial
And so at 120%, Im thinking Im zoomed in a little bit too far, Ill go ahead and take that down by pressing the Down arrow key until I reduce that value to 116% and that looks good to me.Now as I say, the other option of course is to dial in your own value.
For example, I could go ahead and zoom in to 2400%.
Now the problem becomes when youre this far zoomed into an illustration its difficult to get your bearings, you may not necessarily know where you are.
In that case, you want to bring up the Navigator panel, and you do that by going up to the Window menu and choosing the Navigator command, and then youll see this panel thats showing you your entire Illustrator cs6 and a tiny red thing right there that shows you the portion of theIllustrator cs6 that youre seeing right now.
All right, Im going to go ahead and expand this panel, like so so that I can see my Illustrator cs6 in a little more detail.
And by the way, working this way is great if you have two monitors, so you can go ahead and throw the Navigator panel on one monitor and of course have your document window open up in another.
Illustrator CS6 Tutorial
Anyway at this point, I could scroll inside the Illustrator cs6 by dragging this guy to a different location, or if I prefer I can just click somewhere in the illustration.You also have these zoom controls right here, so you can click on the little mountain to zoom out incrementally, or you can click on the big mountain to zoom in, you can also drag this zoom slider.
The only problem with this slider from my vantage point is it doesnt really show you a dynamic zoom, so you have to pause while youre dragging in order to update the screen.
It is a final way to work.
You can press and hold the Ctrl key or the Command key on the Mac, that will change your cursor to a little magnifying glass, and then you can drag around the portion of the Illustrator cs6 that you want to zoom.
As soon as you release Illustrator cs6 will show you that region on screen.
And then of course if the Navigator panel is getting too big for you, you can go ahead and drag a quarter or one of the sides in order to make it smaller.
And thats how you zoom to any degree you desire as well as get around using the Navigator panel here in Illustrator cs6 .
adobe,
an,
ball,
create,
flaming,
glossy,
how,
illustrator,
in,
to,
ultra
0
comments
How to Create an Ultra Glossy Flaming Ball in Adobe Illustrator
Tutorial Details
- Program: Adobe Illustrator CS5
- Difficulty: Intermediate
- Length: 22:58 mins
Final Product What Youll Be Creating

adobe,
cs6,
illustrator,
introduction,
tutorial,
video
0
comments
Adobe Illustrator CS6 Tutorial Video Introduction
Adobe Illustrator Cs6 is used by artists and graphic designers to create scalable vector artwork for use in projects for both print and web. Artists use Illustrator for creating clean visual compositions that can be scaled infinitely without losing quality, creating freehand drawings and illustrations, tracing and re-coloring scanned-in artwork, and also creating wireframes from which to create digital paintings.
Designers use Illustrator cs6 for creating logos, icons and other complex shapes, setting type for use in flyers, magazines and business cards, and creating web site mockups and graphics for use across multiple screens. Illustrator cs6 Tutorial isnt just limited to artists and designers though, many people use Illustrator for their projects, and it allows them to create visually compelling and flexible artwork like this.
Hello and welcome to Illustrator CS6 Essential Training. My name is Justin Seeley, and Im a staff author here at lynda.com. Ive been using Illustrator for nearly a decade, and it remains one of my favorite creative suite applications. Well start off slow by covering the basics like creating documents for both print and web, and well dive headfirst into creating vector shapes like
Illustrator also integrates with other Adobe applications like InDesign for print production and digital magazines.
Read more »
Designers use Illustrator cs6 for creating logos, icons and other complex shapes, setting type for use in flyers, magazines and business cards, and creating web site mockups and graphics for use across multiple screens. Illustrator cs6 Tutorial isnt just limited to artists and designers though, many people use Illustrator for their projects, and it allows them to create visually compelling and flexible artwork like this.
Hello and welcome to Illustrator CS6 Essential Training. My name is Justin Seeley, and Im a staff author here at lynda.com. Ive been using Illustrator for nearly a decade, and it remains one of my favorite creative suite applications. Well start off slow by covering the basics like creating documents for both print and web, and well dive headfirst into creating vector shapes like
| rectangles, circles, and even some complex artwork using the Shape Builder tool. |
Illustrator also integrates with other Adobe applications like InDesign for print production and digital magazines.
| Photoshop for use with Smart Filters, Flash for web animations and games or Adobe After Effects and Premiere for use in title sequences and video animation. Whether youre a graphic designer or an artist, Adobe Illustrator cs6 offers you a flexible way to deploy your creative vision to virtually any screen or substrate. |
Adobe Photoshop cs6 tutorial pdf,yes we have simplified your search about Adobe Photoshop cs6 tutorial pdf.We will explain you in brief as well as Give you the Pdf download also.Adobe Photoshop Cs6 Tutorial,Photoshop learning with new Adobe Photoshop cs6 serial number is what you find everyday but we will tell you how to use the Features.Adobe Photoshop cs6 Features is the leader in the market of photo editing software.

You will always find hard to find serial numbers but before getting the serial number we will tell you in detail how to use the Adobe Photoshop Cs6 with tutorial.To understand Adobe Photoshop cs6 with full features we will take you the complete guide of it so that you are easily able to understand the Full tutorial of Adobe Photoshop Cs6.
You might be having the Full software of Adobe Photoshop Cs6 pdf if you have than it is fine otherwise you should download the trial version from the official Adobe Website.When your download is complete than you have the 30days time to activate it and make it a full version.
Download Adobe Photoshop cs6 Trial version from Official website This will take you to the download section of the Adobe and than you can download the trial version this must be a large file and will take some to Download so just let it Download and than we will tell you Adobe Photoshop Cs6 Tutorial pdf ,Photoshop learning with new Features. Now your Download Must be over now the first thing that i Want to tell you is that Adobe Photoshop cs6 pdf tutorial has three Applications.
1:Adobe Bridge
2;Adobe Camera Raw
3:Adobe Photoshop
We will Take you to the Adobe Photoshop cs6 part and learn how to use Adobe Photoshop Cs6. 1:Darker tones: The first option that You can choose in Adobe Photoshop cs6 is the one of four different brightness values in the Preferences.A New Background Save and Auto-recovery option is available in Adobe Photoshop cs6 which provide a level of protection against crashes, while the introduction of Adobe’s Mercury Graphics Engine is designed to speed up processor-intensive tools like Liquify, Puppet Warp and Transform.
Adobe Photoshop cs6 tutorial pdf Download
Get Cover Product Template at here File PSD
Read more »
You will always find hard to find serial numbers but before getting the serial number we will tell you in detail how to use the Adobe Photoshop Cs6 with tutorial.To understand Adobe Photoshop cs6 with full features we will take you the complete guide of it so that you are easily able to understand the Full tutorial of Adobe Photoshop Cs6.
You might be having the Full software of Adobe Photoshop Cs6 pdf if you have than it is fine otherwise you should download the trial version from the official Adobe Website.When your download is complete than you have the 30days time to activate it and make it a full version.
Download Adobe Photoshop cs6 Trial version from Official website This will take you to the download section of the Adobe and than you can download the trial version this must be a large file and will take some to Download so just let it Download and than we will tell you Adobe Photoshop Cs6 Tutorial pdf ,Photoshop learning with new Features. Now your Download Must be over now the first thing that i Want to tell you is that Adobe Photoshop cs6 pdf tutorial has three Applications.
1:Adobe Bridge
2;Adobe Camera Raw
3:Adobe Photoshop
We will Take you to the Adobe Photoshop cs6 part and learn how to use Adobe Photoshop Cs6. 1:Darker tones: The first option that You can choose in Adobe Photoshop cs6 is the one of four different brightness values in the Preferences.A New Background Save and Auto-recovery option is available in Adobe Photoshop cs6 which provide a level of protection against crashes, while the introduction of Adobe’s Mercury Graphics Engine is designed to speed up processor-intensive tools like Liquify, Puppet Warp and Transform.
Adobe Photoshop cs6 tutorial pdf Download
Get Cover Product Template at here File PSD
adobe,
cs6,
demand,
illustrator,
on,
pdf,
tutorial
1 comments
Adobe Illustrator CS6 Tutorial on Demand PDF
Adobe Illustrator CS6 on Demand PDF has been created by the professional trainers and writers at Perspection, Inc. to the standards you’ve come to expect from Que publishing. Together, we are pleased to present this training book.
Perspection, Inc. is a software training company committed to providing information and training to help people use software more effectively in order to communicate, make decisions, and solve problems. Perspection writes and produces software training books, and develops multimedia and web-based training. Since 1991, we have written more than 120 computer books, with several bestsellers to our credit, and sold over 5 million books.
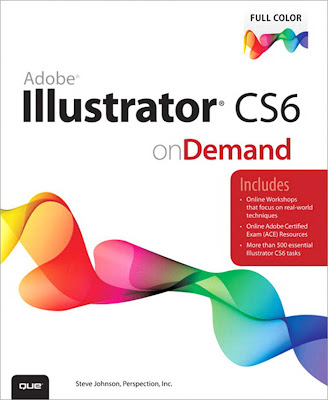
This book incorporates Perspection’s training expertise to ensure that you’ll receive the maximum return on your time. You’ll focus on the tasks and skills that increase productivity while working at your own pace and convenience. We invite you to visit the Perspection web site at: www.perspection.com
The task of creating any book requires the talents of many hard-working people pulling together to meet impossible deadlines and untold stresses. We’d like to thank the outstanding team responsible for making this book possible: the writer, Steve Johnson; the technical editor, Toni Bennett; the production editors, James
Teyler and Beth Teyler; proofreader, Beth Teyler; and the indexer, Sharon Shock. We’d also like to thank JP Johnson for his contribution of Illustrator artwork. At Que publishing, we’d like to thank Greg Wiegand and Laura Norman for the opportunity to undertake this project, Cindy Teeters for administrative support, and Sandra Schroeder for your production expertise and support
.
Steve Johnson has written more than 70 books on a variety of computer software, including Adobe Photoshop CS5, Adobe Dreamweaver CS5, Adobe InDesign CS5, Adobe Illustrator CS5, Adobe Flash Professional CS5, Microsoft Windows 7, Microsoft Office 2010 and 2007, Microsoft Office 2008 for the Macintosh, and Apple Mac OS X Lion. In 1991, after working for Apple Computer and Microsoft, Steve founded Perspection, Inc., which writes and produces software training. When he is not staying up late writing, he enjoys coaching baseball, playing golf, gardening, and spending time with his wife, Holly, and three children, JP, Brett, and Hannah. Steve and his family live in Northern California, but can also be found visiting family all over the western United States.
Creative artists from Hollywood, brochure designers, as well as casual users turn to Illustrator for its proven ability to create top-of-the-line vector artwork and complex graphic designs. Illustrators ability to manipulate illustrations for use in books, brochures, multimedia presentations, or on the web, has made Illustrator the undisputed leader in the graphics industry. When it comes to vector illustration, Illustrator is
literally the best software the computer industry has to offer. With Illustrator, you can create anything from simple icons to multilayered illustrations, as well as manipulate text. And Illustrators ability to work with other programs allows you to import Excel data for graph building, export Illustrator files directly to Adobe InDesign and QuarkXPress, as well as open layered Illustrator files in Photoshop, making it a snap to move back and forth between programs as you design.
Link Down load share by google Drive. (must login gmail and get) .
https://docs.google.com/open?id=0B_8GkjDl4WIfX3ppa013Zk8zX0E
Read more »
Perspection, Inc. is a software training company committed to providing information and training to help people use software more effectively in order to communicate, make decisions, and solve problems. Perspection writes and produces software training books, and develops multimedia and web-based training. Since 1991, we have written more than 120 computer books, with several bestsellers to our credit, and sold over 5 million books.
This book incorporates Perspection’s training expertise to ensure that you’ll receive the maximum return on your time. You’ll focus on the tasks and skills that increase productivity while working at your own pace and convenience. We invite you to visit the Perspection web site at: www.perspection.com
The task of creating any book requires the talents of many hard-working people pulling together to meet impossible deadlines and untold stresses. We’d like to thank the outstanding team responsible for making this book possible: the writer, Steve Johnson; the technical editor, Toni Bennett; the production editors, James
Teyler and Beth Teyler; proofreader, Beth Teyler; and the indexer, Sharon Shock. We’d also like to thank JP Johnson for his contribution of Illustrator artwork. At Que publishing, we’d like to thank Greg Wiegand and Laura Norman for the opportunity to undertake this project, Cindy Teeters for administrative support, and Sandra Schroeder for your production expertise and support
.
About the Author of Adobe Illustrator CS6 on Demand
Steve Johnson has written more than 70 books on a variety of computer software, including Adobe Photoshop CS5, Adobe Dreamweaver CS5, Adobe InDesign CS5, Adobe Illustrator CS5, Adobe Flash Professional CS5, Microsoft Windows 7, Microsoft Office 2010 and 2007, Microsoft Office 2008 for the Macintosh, and Apple Mac OS X Lion. In 1991, after working for Apple Computer and Microsoft, Steve founded Perspection, Inc., which writes and produces software training. When he is not staying up late writing, he enjoys coaching baseball, playing golf, gardening, and spending time with his wife, Holly, and three children, JP, Brett, and Hannah. Steve and his family live in Northern California, but can also be found visiting family all over the western United States.
Introduction Adobe Illustrator CS6 Tutorial on Demand PDF
Adobe Illustrator CS6 is a graphics design and drawing program that runs seamlessly on both Windows and Macintosh platforms. Adobe Illustrator CS6 is a stand-alone program, but it’s also part of Adobes Creative Suite of professional programs that work together to help you create designs in print, on the web, or on mobile devices. Many of the Creative Suite 6 programs also include additional Adobe programs and services—Bridge, Camera Raw plug-in, Media Encoder, Extension Manager, and ExtendScript Toolkit—to help you manage and work with files Adobe Illustrator CS6 Tutorial on Demand PDF.Creative artists from Hollywood, brochure designers, as well as casual users turn to Illustrator for its proven ability to create top-of-the-line vector artwork and complex graphic designs. Illustrators ability to manipulate illustrations for use in books, brochures, multimedia presentations, or on the web, has made Illustrator the undisputed leader in the graphics industry. When it comes to vector illustration, Illustrator is
literally the best software the computer industry has to offer. With Illustrator, you can create anything from simple icons to multilayered illustrations, as well as manipulate text. And Illustrators ability to work with other programs allows you to import Excel data for graph building, export Illustrator files directly to Adobe InDesign and QuarkXPress, as well as open layered Illustrator files in Photoshop, making it a snap to move back and forth between programs as you design.
Link Down load share by google Drive. (must login gmail and get) .
https://docs.google.com/open?id=0B_8GkjDl4WIfX3ppa013Zk8zX0E
adobe,
artwork,
cs6,
illustrator,
navigating,
tutorial,
your
0
comments
Adobe Illustrator CS6 Tutorial Navigating your artwork
Illustrator CS6 Tutorial Video
This chapter is all about getting around in Illustrator cs6., magnifying your artwork, panning
to another location, and managing your workspace.
I spend nine movies on this topic, which is a lot, for the simple reason that theres a lot to know.
 I want you to be able to move around inside Illustrator cs6. without even thinking, because
 thats how everything about the program is going to make sense.
Better still, you will be able to focus less on the mechanics of the software and more
on the task of creating great artwork.
Allow me to help you feel at home in Illustrator cs6..
a,
adobe,
cs6,
detail,
honing,
illustrator,
in,
specific,
tutorial
0
comments
Adobe Illustrator CS6 Tutorial Honing in a specific detail
In this movie Ill show you how to zoom with more control using the Zoom tool as well as
In this movie Ill show you how to zoom with more control using the Zoom tool as well as a Special Scroll Wheel Trick.
Now the problem with Ctrl+Plus, or Command+ Plus on a Mac, it is that youre zooming in on the center of whatever you are seeing on screen.
 And right now, the center of my screen is this dot at the top of the first colon and thats why I chose to draw my little bacteria there because after all, thats the dead center of the artboard.
However, what if you want to zoom in on, lets say, a more appealing detail.
Well, thats when you to take advantage of the Zoom tool.
So Im going to press Ctrl+Alt+0, or Command+Opt +0 on a Mac, this is a Zoom tool right there.
If youre looking at the Single Column tool Box its going to be the very last tool on the list.
It has a keyboard shortcut of Z and if I select the tool, and then click on some other detail in the illustration.
For example, Ill go ahead click on this bottom left pen cursor.
You can see that Illustrator not only zooms but it also goes ahead and centers that detail on screen.
Adobe
Illustrator CS6 Tutorial
| Now that I could switch to another if I want to just by clicking again, and then clicking | |||||||||||||||
| once more to zoom in even further, to zoom out you press and hold the Alt key or the | |||||||||||||||
| Option key on a Mac, and then you click. | |||||||||||||||
| And again, you are going to center the location of the newly zoomed screen each time you click with this tool. | |||||||||||||||
| Now the tool is so incredibly useful in my opinion that you really want to learn a keyboard shortcut for it. | |||||||||||||||
| You dont to have one has to switch to the Zoom tool every five seconds in order to magnify a detail. | |||||||||||||||
| So here is what you do. Illustrator cs6 | |||||||||||||||
| Again I will press Ctrl+Alt+0, or Command+Opt+ 0 on a Mac, to go ahead and center my artwork. | |||||||||||||||
| I will switch back to the black error tool to get to the Zoom tool on the fly you press | |||||||||||||||
| Ctrl+spacebar, thats Command+spacebar on a Mac, then you just go ahead and click to zoom on in. | |||||||||||||||
| If you want to zoom out, you have the Alt or Option key so thats Ctrl+Alt+spacebar here | |||||||||||||||
| on a PC, or Command+Opt+spacebar on the Mac, and then of course you click to zoom out. | |||||||||||||||
Here is another great thing you can do with the Zoom tool if you press Ctrl+spacebar, Illustrator cs6Illustrator CS6 Tutorial
|
a,
adobe,
cs6,
document,
illustrator,
or,
panning,
scrolling
0
comments
Adobe Illustrator CS6 Scrolling or panning a document
In this movie, I will show you how to scroll or if you prefer pan your Illustrator cs6
.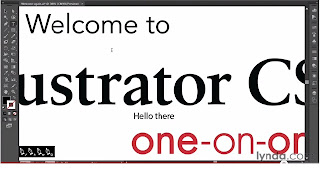
So here I am zoomed in on a detail, but I want to be able to scroll around a little bit.
Take a look at a different detail at this exact zoom level.
You can take advantage of the scroll bars down here at the bottom and along the right side of the Document window.
But the better way to work is to get the Hand tool.
So if I switch to the Hand tool which has a keyboard shortcut of H, then I can just drag my Illustrator cs6 around as much as I like.
Of course, you dont want to have to go running after the Hand tool every time you need to scroll.
So heres a better way to work.
I will switch back to my black arrow tool, and then I will press and hold the spacebar. Notice that gets me the Hand tool as long as the spacebar is down, and then I can drag the document as much as I want.
Now, what happens though, if youve got live text? Now, none of the text in this document is live, by the way.
I use special fonts that arent on your system so I had to convert everything to outlines.
Illustrator CS6 Tutorial
But lets just go ahead and create some text.
Ill switch to the Type tool, which I can do of course, by pressing the T key.
And Ill click inside the document, and I will just enter the word Hello.
Now if I try to press the spacebar and scroll at this point, I will enter a space character of course.
So one option is to press the Escape key so the text is no longer active, and then you can spacebar-drag, but because I pressed the Escape key I am back to the Black arrow tool so.
Now if want to do some more text editing Id have to switch back to my Type tool, and then click after that space character and enter some more text.
Here is the way I work, when I have live text.
I will just go head and scroll using the Scroll wheel.
So obviously scrolling down moves you down, scrolling up moves you up.
If you want to move more quickly, its a Shift+ Scroll down or a Shift+Scroll up, if you want to
move back and forth then you press the Ctrl key, or the Command key on the Mac, and you scroll down to go right, scroll up to go left, if you want to move more quickly its Ctrl+Shift
on a PC, or Command+Shift on the Mac, scroll down to go right and scroll up to go left. Also, by the way, those of you with Macintosh trackpads, you can use that two finger swipe as well.
Illustrator will respond to that, and thats probably the easiest way to work on that platform.
So there you have it, the myriad ways to scroll or pan a document here inside Illustrator cs6
adobe,
and,
cs6,
down,
illustrator,
keys,
page,
the,
up,
using
0
comments
Adobe Illustrator CS6 Using the Page Up and Page Down keys
In this movie, I am going to show you how to get around a document using the Page Up and Page Down keys.
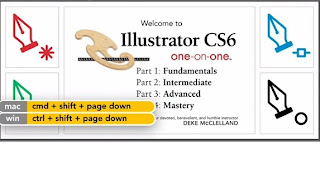
I am going to expect even the biggest shortcut fanatic to remember all of these.
Just remember this Page Up and Page Down combined with any of the modifier keys, does something in Illustrator cs6 .
So lets go ahead and zoom in quite a bit here, and then Ill press the Page Up key, and notice that I move almost a full screen upward.
And then if I press Page Down, I move almost a full screen downward.
If I want to move in smaller increments, then I press Alt+Page Up, this would be Option+Page Up on the Mac, or Alt+Page Down, this would be Option+Page Down on the Mac.
What if I want to move to the right? Well, then Ill press Ctrl+Page Down, thats Command+Page Down on the Mac.
If I want to move to the left, its Ctrl+Page Up, or Command+Page Up.
To move in smaller increments, once again, you add the Alt key.
So its Ctrl+Alt+Page Down, to move in small increments to the right, and Ctrl+Alt+Page
Illustrator CS6 Tutorial
Up, or Command+Option+Page up on the Mac, to move in smaller increments to the left.Now of course, that leaves the Shift key, and you may recall from the previous chapter that the Shift key combined with Page UP and Page Down actually moves you between artboards.
So Shift+Page Up, will take you to the previous artboard, as were seeing here.
And in my case, I am going all the way back to the first one.
And then Shift+Page Down is going to move me to the next artboard.
If I press Ctrl+Shift+Page Up, or Command+Shift+ Page Up on the Mac, I go to the first artboard,
and if I press Ctrl+Shift+Page Down, or Command+Shift +Page Down on the Mac, I go to last artboard, which
in my case is the big artboard that encompasses all the other ones.
And that for those of you who are interested is how you get around a document, using the Page Up and Page Down keys, combined with every modifier key you got.
adobe,
cs6,
how,
illustrator,
image,
in,
new,
the,
to,
trace,
use
1 comments
How to Use the New Image Trace in Adobe Illustrator CS6
Today we will learn the new features of the tracing engine in Adobe Illustrator CS6 and talk about its new functions. We will trace a photo, a sketch and a texture; then we will compare the results between Adobe Illustrator CS5 and CS6. Let’s get started!
In this tutorial I’ll use a photo a strawberry (credit to deviantART user StockProject1) ; the sketch was kindly provided by Victoria Vasilyeva and the texture (credit to deviantART user ~kingkool6).
This allows us to use other panels and tools while tracing. Such features did not exist in Adobe Illustrator CS5 as well as in earlier releases; the setting of the tracing was made in the Tracing Options dialog box, and then it was impossible to access the other objects and interfaces.
The new preset, "Silhouettes" allows quick creation of vector silhouettes.
After the Expand command we get the vector object with the optimal amount of points.
Note, in Adobe Illustrator CS6 you can set several of the Palette values. This parameter sets while the vector image is been made in color or in greyscale. As you can see, the new tracing engine in Adobe Illustrator CS6 shows better results.
There is a new feature in Adobe Illustrator according to which you can instantly check out your original image. To do so, press and hold the eye icon near the View option.
The overlapping method creates stacked paths, the contours of neighbor objects overlay.
The Minimum Area option corresponds to the Noise option in Adobe Illustrator CS6. This option specifies the size of the smallest areas of the initial image, which will be taken into account while tracing.
The Corner Angle option in Abode Illustrator CS5 corresponds with the Corners option in Adobe Illustrator CS6 and is been set in percentage. The higher value we set, the bigger amount of angles the final image will have.
In Adobe Illustrator CS6 there are no such function of the tracing as the Blur and the Resample. In Adobe Illustrator CS5 the Blur function is for the reducing the number of small artifacts and smoothing the jagged edges in the final image. The Resample option allows speeding up the process of tracing for big size images, losing the quality of the output image.
When we use the same preset in Adobe Illustrator CS6 the majority of small details disappear.
Unfortunately, you need to change the parameters of the tracing manually in order to get the same results in Adobe Illustrator CS6.
I’ve used different presets and operated the parameters manually, but I still couldn’t get the result which would correspond to the result that can be made in Adobe Illustrator CS5.
Read more »
In this tutorial I’ll use a photo a strawberry (credit to deviantART user StockProject1) ; the sketch was kindly provided by Victoria Vasilyeva and the texture (credit to deviantART user ~kingkool6).
Step 1
In Adobe Illustrator CS6 the settings of the tracing is in the new Image Trace panel (Window > Image Trace).Step 2
The presets have also changed between Adobe Illustrator CS5 and CS6Step 3
Let us evaluate the quality of the tracing using the same preset High Fidelity Photo in Adobe Illustrator CS5 and Adobe Illustrator CS6.Step 4
There were some changes in the Colors parameter. This parameter specifies the number of colors which the final vector image will consist of. In Adobe Illustrator CS5 the Max Colors options can be set in the number values, in Adobe Illustrator CS6 the Colors option can be set accurately in percentage.Step 5
You can get access to additional options of the settings if you press the Advanced key in the Image Trace panel. Now we have an opportunity to choose a tracing method. The Abutting method creates cutout paths. The contours of neighbor objects match.Step 6
The Path Fitting option defines the accuracy of the tracing of the initial raster image. In Adobe Illustrator CS5 the smaller value allows to create a more accurate contour, the bigger- the rough contour. In Adobe Illustrator CS6 it is vice versa, the bigger the value is the more accurate contour we get.The Minimum Area option corresponds to the Noise option in Adobe Illustrator CS6. This option specifies the size of the smallest areas of the initial image, which will be taken into account while tracing.
The Corner Angle option in Abode Illustrator CS5 corresponds with the Corners option in Adobe Illustrator CS6 and is been set in percentage. The higher value we set, the bigger amount of angles the final image will have.
Step 7
Let’s see how the new tracing engine works with sketches. Apply the preset Black & White Logo. The tracing of the sketch in Adobe Illustrator CS5 shows good results.Step 8
Let’s try to make the tracing of the texture. We will use the same Black&White Logo preset. As we can see, the result of the tracing in Adobe Illustrator CS5 looks better than in Adobe Illustrator CS6Conclusion
The new tracing engine really works good with the photos and allows quick and accurate vector silhouettes. But when you use it for tracing sketches and textures you will need to operate all the tracing processes manually, and that will not always show good result. If you work with the sketches and textures, the Live Trace feature in Adobe Illustrator CS5 shows good results when you use the presets. Have you used the trace features in Adobe CS6 yet? If so, what do you think?
Subscribe to:
Posts (Atom)


- Follow Us on Twitter!
- "Join Us on Facebook!
- RSS
Contact