Showing posts with label up. Show all posts
Showing posts with label up. Show all posts
Thursday, April 30, 2015
adobe,
and,
cs6,
down,
illustrator,
keys,
page,
the,
up,
using
0
comments
Adobe Illustrator CS6 Using the Page Up and Page Down keys
In this movie, I am going to show you how to get around a document using the Page Up and Page Down keys.
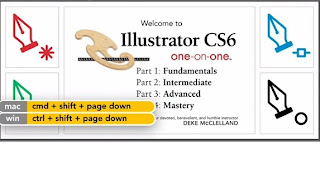
I am going to expect even the biggest shortcut fanatic to remember all of these.
Just remember this Page Up and Page Down combined with any of the modifier keys, does something in Illustrator cs6 .
So lets go ahead and zoom in quite a bit here, and then Ill press the Page Up key, and notice that I move almost a full screen upward.
And then if I press Page Down, I move almost a full screen downward.
If I want to move in smaller increments, then I press Alt+Page Up, this would be Option+Page Up on the Mac, or Alt+Page Down, this would be Option+Page Down on the Mac.
What if I want to move to the right? Well, then Ill press Ctrl+Page Down, thats Command+Page Down on the Mac.
If I want to move to the left, its Ctrl+Page Up, or Command+Page Up.
To move in smaller increments, once again, you add the Alt key.
So its Ctrl+Alt+Page Down, to move in small increments to the right, and Ctrl+Alt+Page
Illustrator CS6 Tutorial
Up, or Command+Option+Page up on the Mac, to move in smaller increments to the left.Now of course, that leaves the Shift key, and you may recall from the previous chapter that the Shift key combined with Page UP and Page Down actually moves you between artboards.
So Shift+Page Up, will take you to the previous artboard, as were seeing here.
And in my case, I am going all the way back to the first one.
And then Shift+Page Down is going to move me to the next artboard.
If I press Ctrl+Shift+Page Up, or Command+Shift+ Page Up on the Mac, I go to the first artboard,
and if I press Ctrl+Shift+Page Down, or Command+Shift +Page Down on the Mac, I go to last artboard, which
in my case is the big artboard that encompasses all the other ones.
And that for those of you who are interested is how you get around a document, using the Page Up and Page Down keys, combined with every modifier key you got.

Tuesday, March 31, 2015
21,
creatives,
fonts,
fresh,
spice,
to,
up,
your
0
comments
21 Fresh Fonts To Spice Up Your Creatives

Museo Cyrillic

Nexa free font

Sreda free font

Casper Typeface

Fengardo Neue

BALLEGE Typeface

Uppertype

Tikal Sans

Obey Typeface

Gluk Fonts

CHE’s Bone – Free Font

Oranienbaum free font

Mood Type

Pontus

Albatross – Free font

Stiff Staff font

BD Bardust

Civita

Foobar Pro

Zarif Typeface

Yeseva

 About The Writer
Hello! My name is Tommy. Im a blogger, I love graphics design and now i went to Architechture Technical Senior High School. | Facebook |
Tuesday, March 17, 2015
light,
painting,
photo,
quick,
technique,
touch,
up,
with
0
comments
Quick Photo Touch up Technique Painting with Light
Step One: Image to Touch-Up
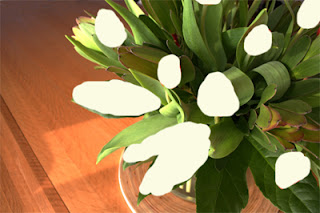
Obviously we need to start with something. Ill be using the photo below.

Step Two: Set Color & Start Painting
More often than anything else, this technique will be used when you have a photograph of someone inside a house - there isnt a lot "wrong" with the photo Im working with but were going to play anyways.
The first step here is to set your foreground color. Think of natural lighting colors - a very light, almost-white yellow, oranges, etc. Make sure that any color you use is nearly white, but not quite.
Then, grab a brush - it doesnt really matter what one, as long as its not too large. Create a new layer (Layer, New, New Layer) and start painting the areas that could use highlighting.
Step Three: Layer Mode
After youve painted a few key areas, its time to see how it looks. Go to your layer mode drop-down (its right at the top of your layers palette, and currently says "Normal") and choose "Overlay".
You may want to lower the opacity and/or clean up the painting with an eraser.
To add more highlights on other areas, repeat the process using a slightly different color on a new layer. This will start building up a beautiful series of highlight and shadow.

Read more »
Obviously we need to start with something. Ill be using the photo below.
Step Two: Set Color & Start Painting
More often than anything else, this technique will be used when you have a photograph of someone inside a house - there isnt a lot "wrong" with the photo Im working with but were going to play anyways.
The first step here is to set your foreground color. Think of natural lighting colors - a very light, almost-white yellow, oranges, etc. Make sure that any color you use is nearly white, but not quite.
Then, grab a brush - it doesnt really matter what one, as long as its not too large. Create a new layer (Layer, New, New Layer) and start painting the areas that could use highlighting.
Step Three: Layer Mode
After youve painted a few key areas, its time to see how it looks. Go to your layer mode drop-down (its right at the top of your layers palette, and currently says "Normal") and choose "Overlay".
You may want to lower the opacity and/or clean up the painting with an eraser.
To add more highlights on other areas, repeat the process using a slightly different color on a new layer. This will start building up a beautiful series of highlight and shadow.
Subscribe to:
Posts (Atom)


- Follow Us on Twitter!
- "Join Us on Facebook!
- RSS
Contact