Showing posts with label black. Show all posts
Showing posts with label black. Show all posts
Black-White-Color Effect
Final view
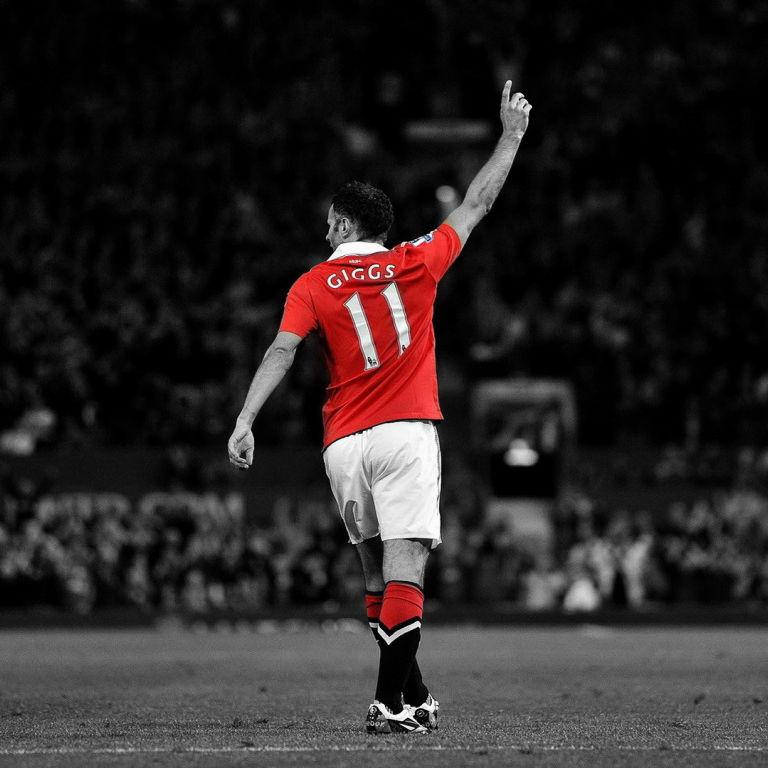
Step 1:
Take an image to edit in photoshop.
Take an image to edit in photoshop.
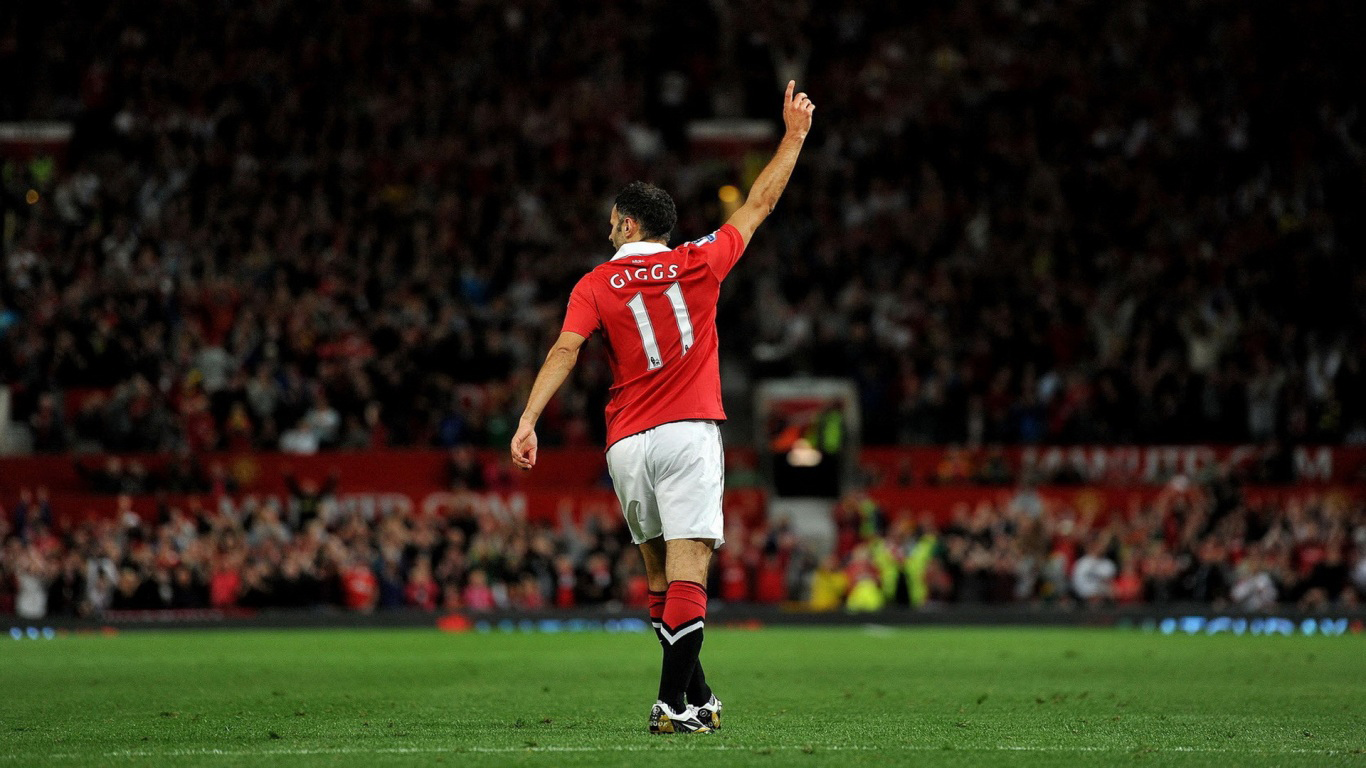
Step 2:
Make a duplicate layer pressing Ctrl+J.
And make the layer Black-White, or go to Image ---> Adjustments ---> Gradient Map ---> select black-white colors ---> OK.
NOTE :
(Before making Image Black-white, choose the color from image which is most used or choose the color of object.)
And make the layer Black-White, or go to Image ---> Adjustments ---> Gradient Map ---> select black-white colors ---> OK.
NOTE :
(Before making Image Black-white, choose the color from image which is most used or choose the color of object.)
Step 3:
Now select eraser tool from tool box and erase the RED color areas which are appear on the objective (Player).
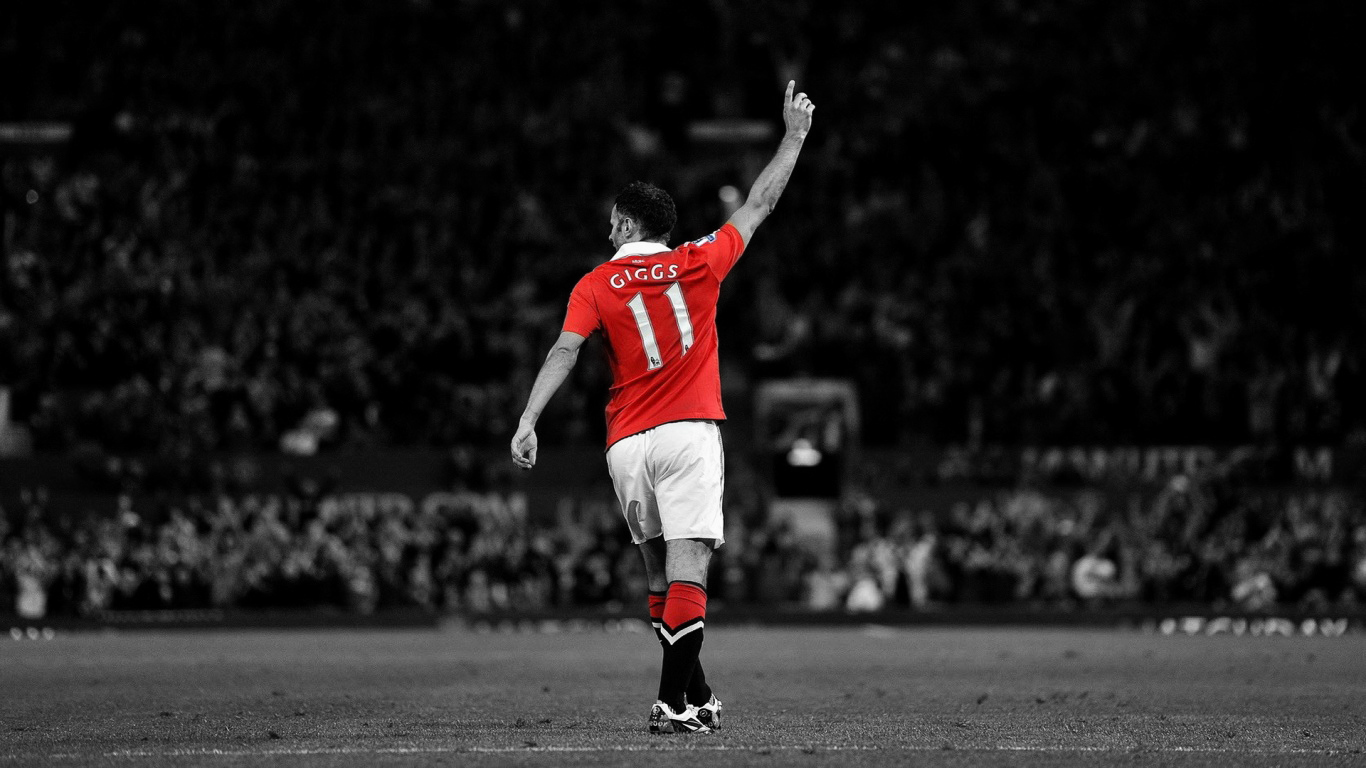
Done..!!

Wednesday, April 1, 2015
artistic,
black,
making,
photo,
white
0
comments
Making Artistic Black White Photo
Making Artistic Photo
Final view
Final view
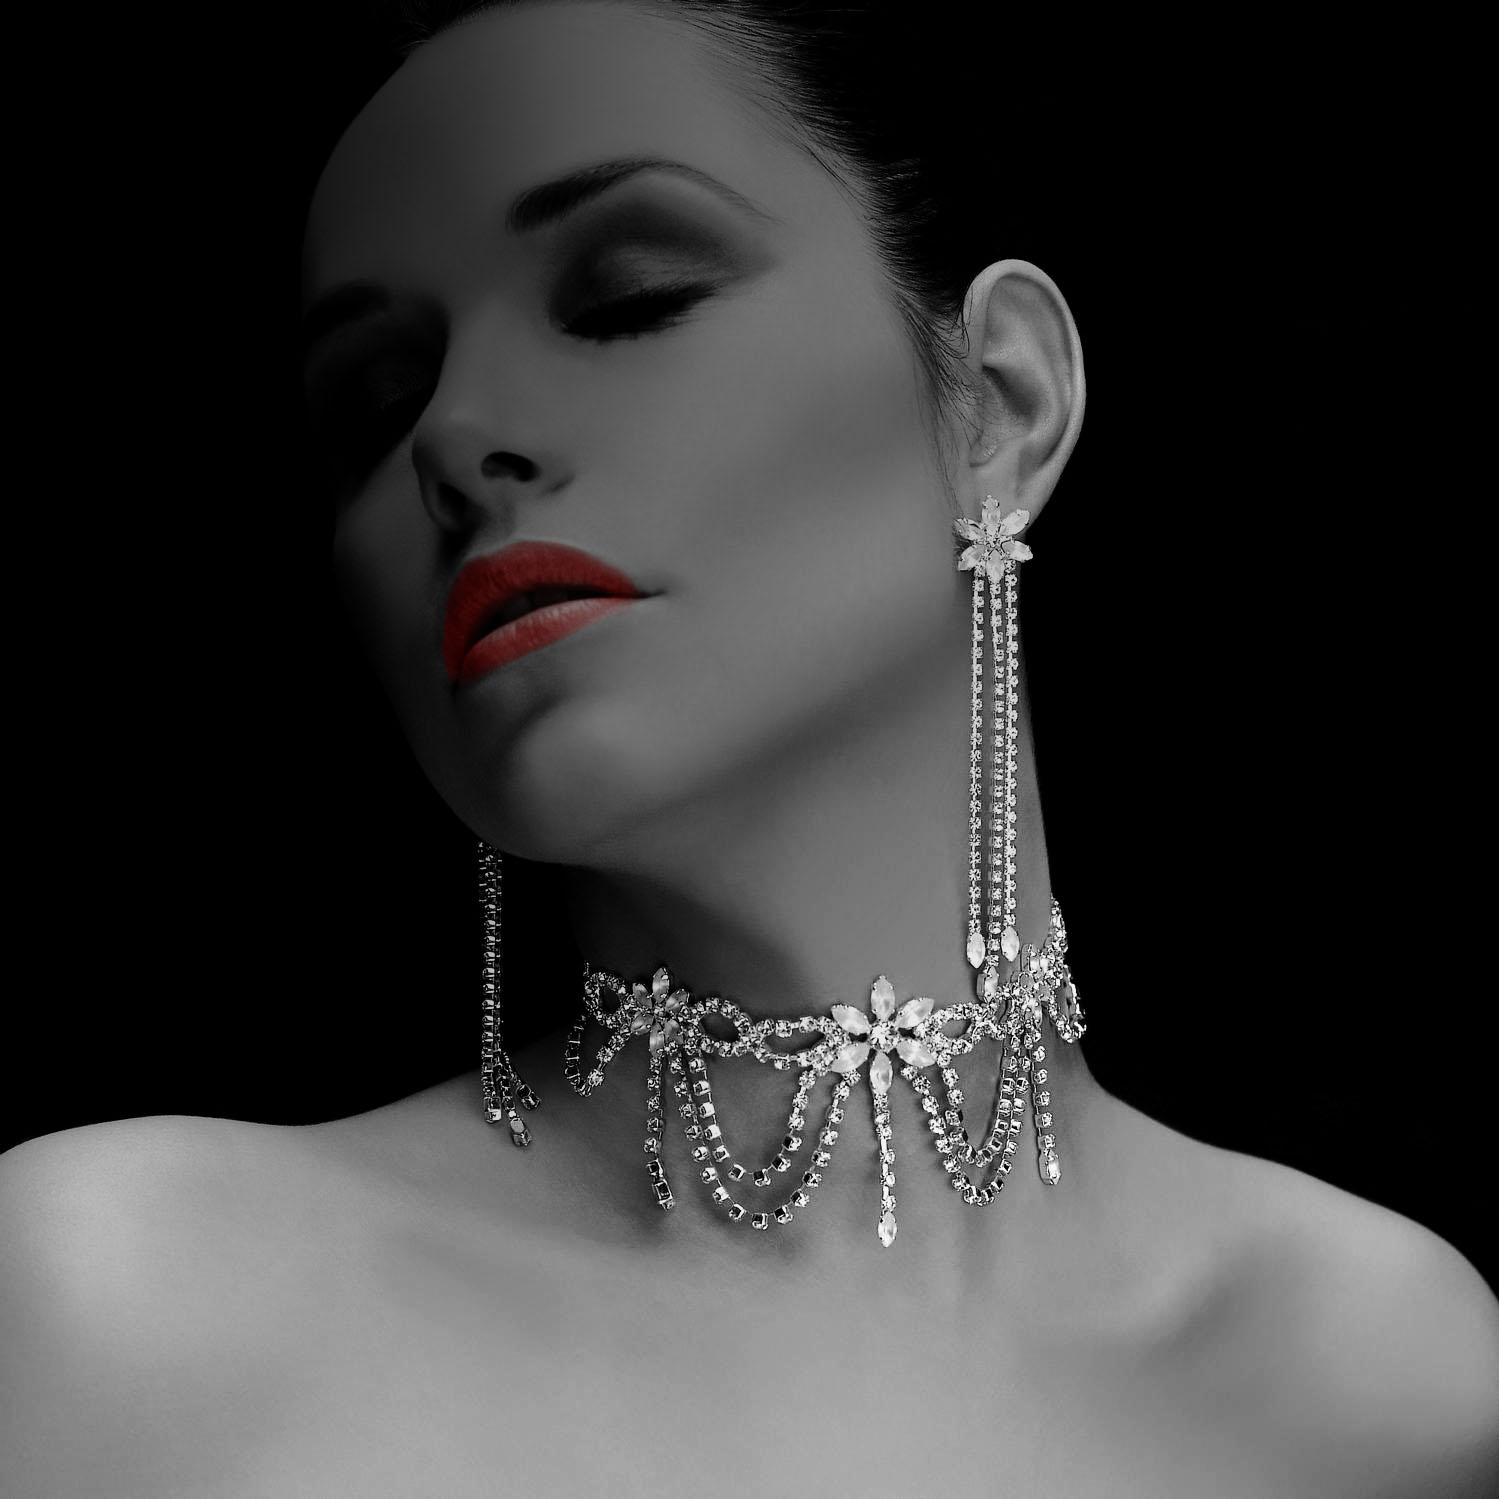
Step 1:
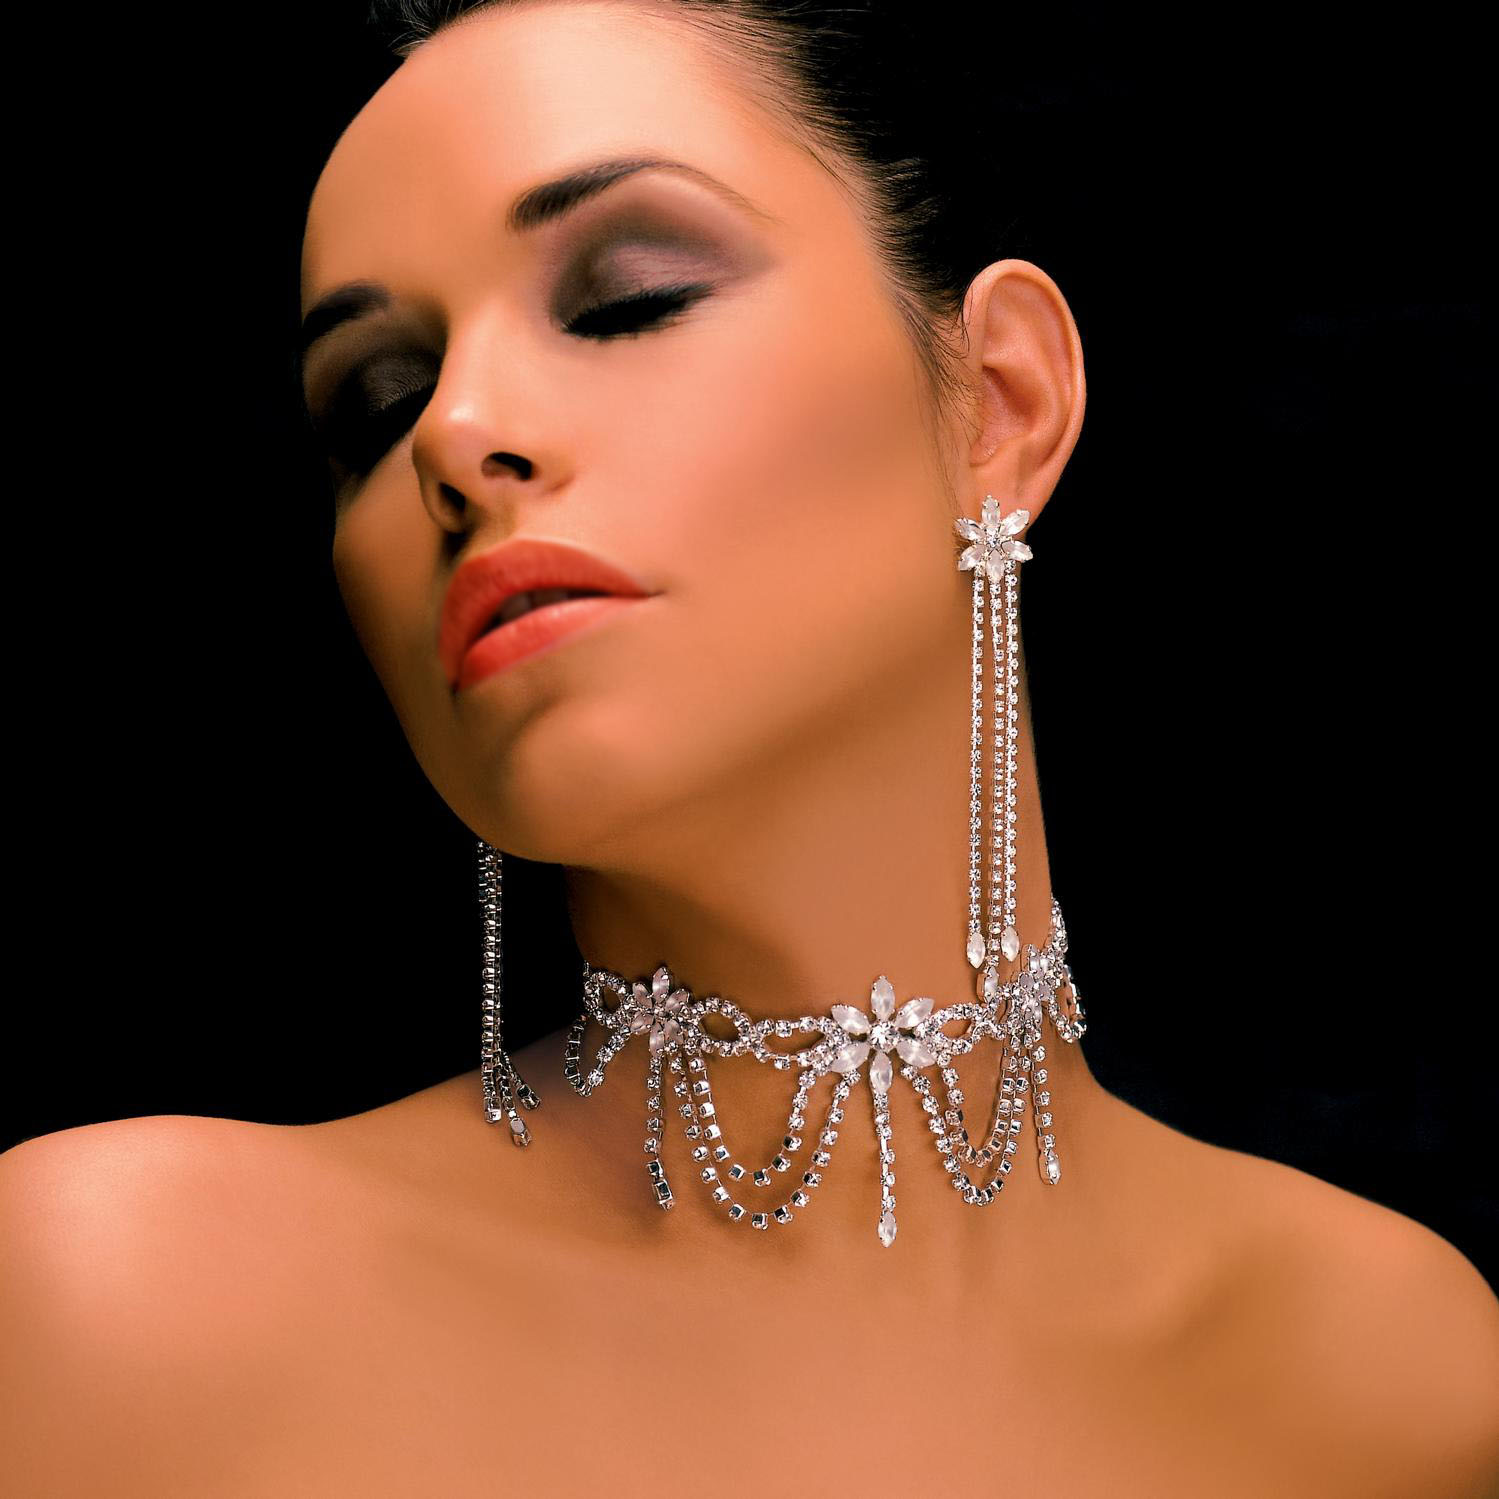
Take/Choose photo to giving artistic effect.
Take/Choose photo to giving artistic effect.
Step 2:
Make a Duplicate layer by pressing Ctrl+J.
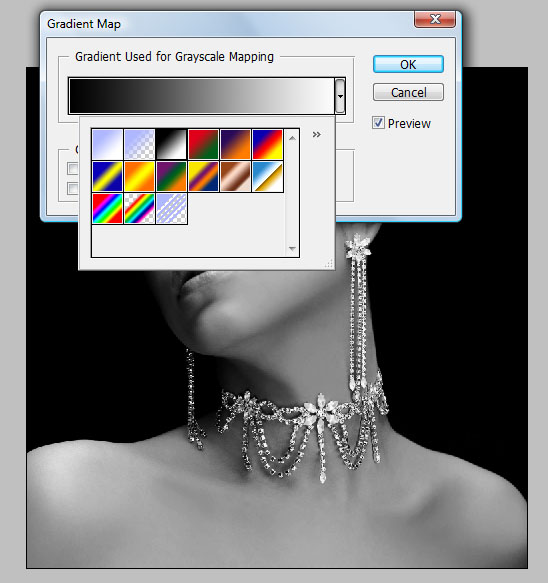
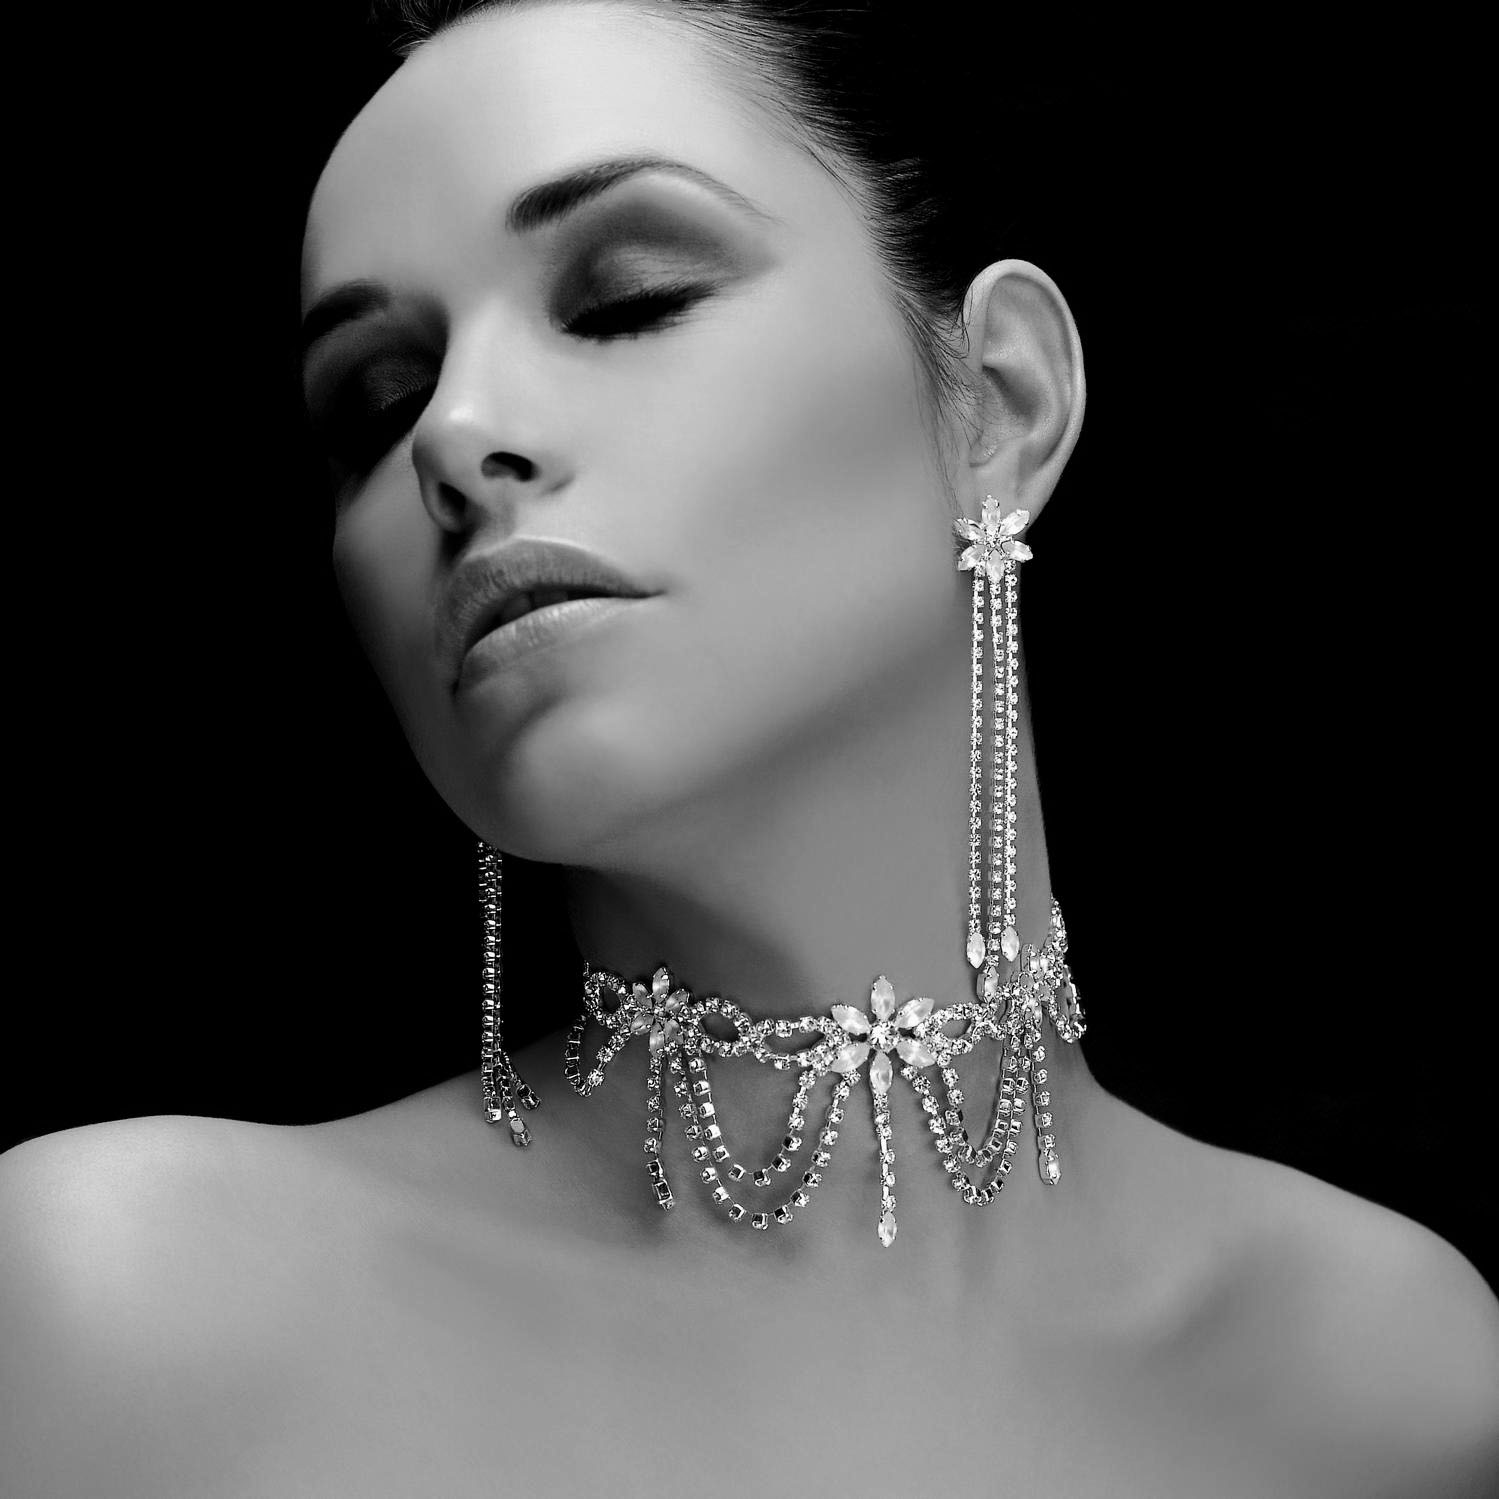
Select upper layer and go to Image ---> Adjustments ---> Gradient Map.
Select upper layer and go to Image ---> Adjustments ---> Gradient Map.
Step 3:
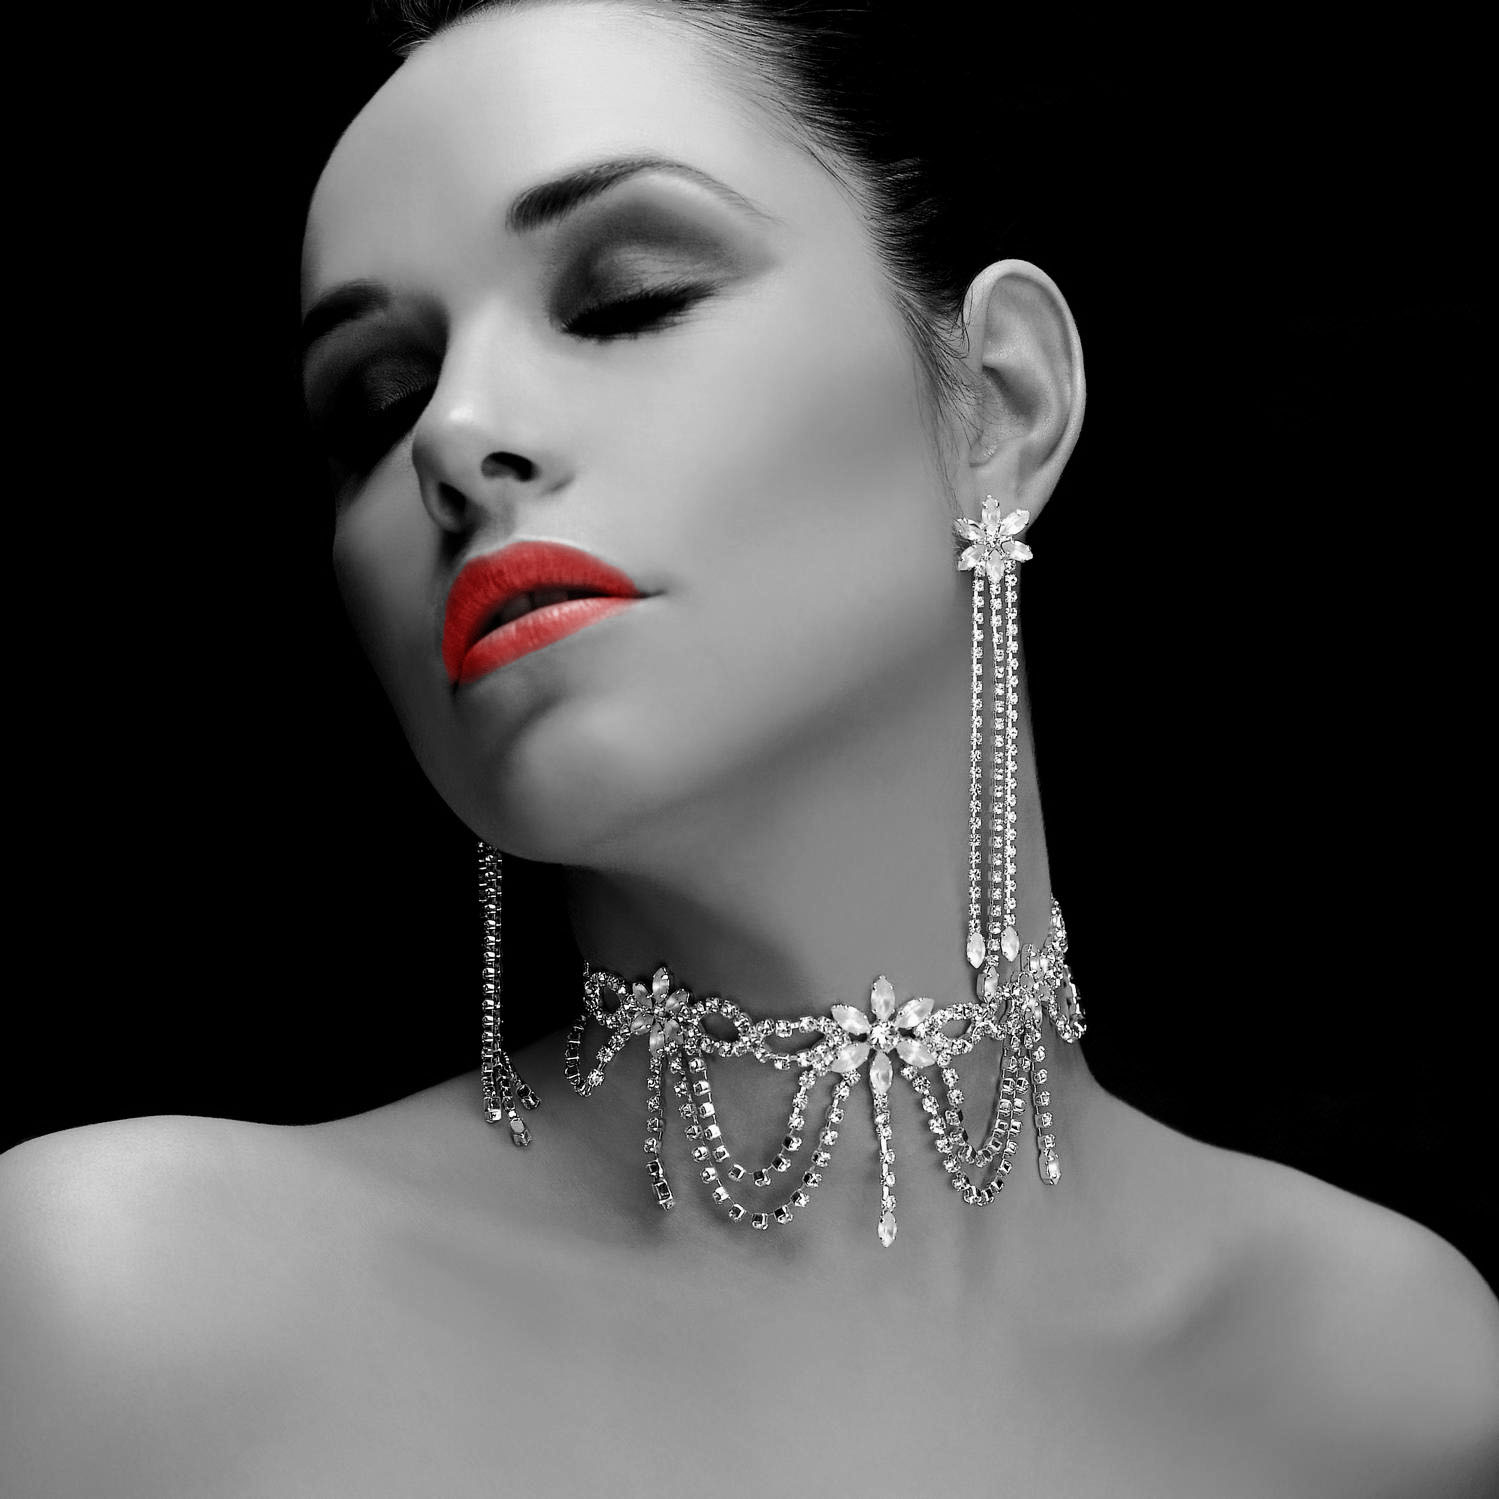
Now select Only Lips By "Plygon Lesso Tool" and Press "Ctrl+B(color balance)".
Increase the red color.
Increase the red color.
Step 4:
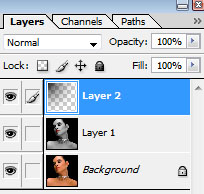
Now Make a new layer (Ctrl+Shft+N).
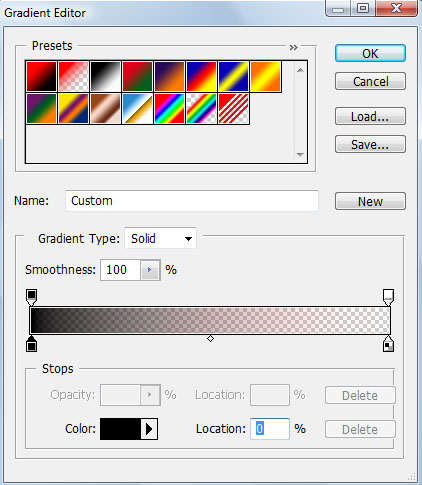
Select Gradient fill tool from tool box. and select only one color pattern (Black + Transparent).
Now Make a new layer (Ctrl+Shft+N).
Select Gradient fill tool from tool box. and select only one color pattern (Black + Transparent).
Done..!!
Sunday, March 29, 2015
black,
colors,
filling,
in,
photo,
the,
white
0
comments
Filling Colors In The Black White Photo
Filling Colors In The Black-White Photo
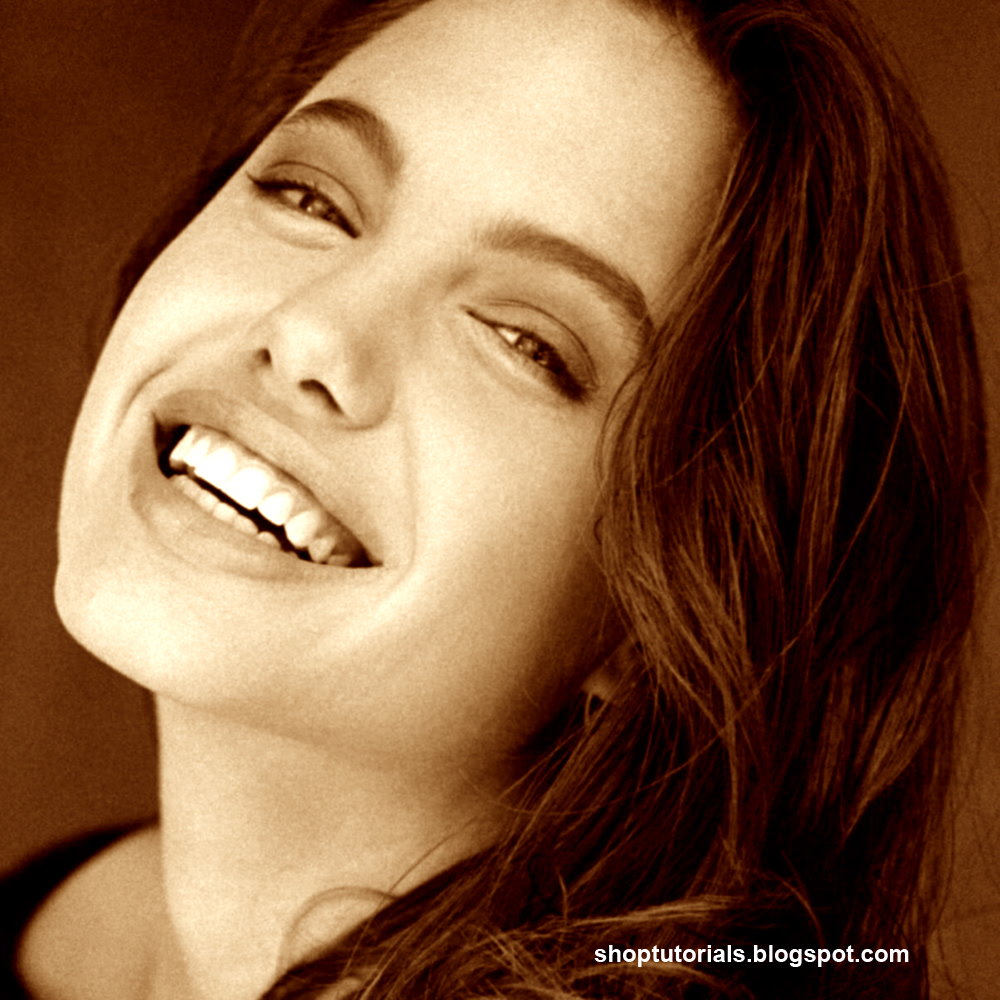
All the photos and images you captured are in different colors.. But if you have a black-white OR Old Photo, then you can fill the different colors in that photo and make that photo impressive..
Final view
Step 1:
Take a black-white photo to fill color.
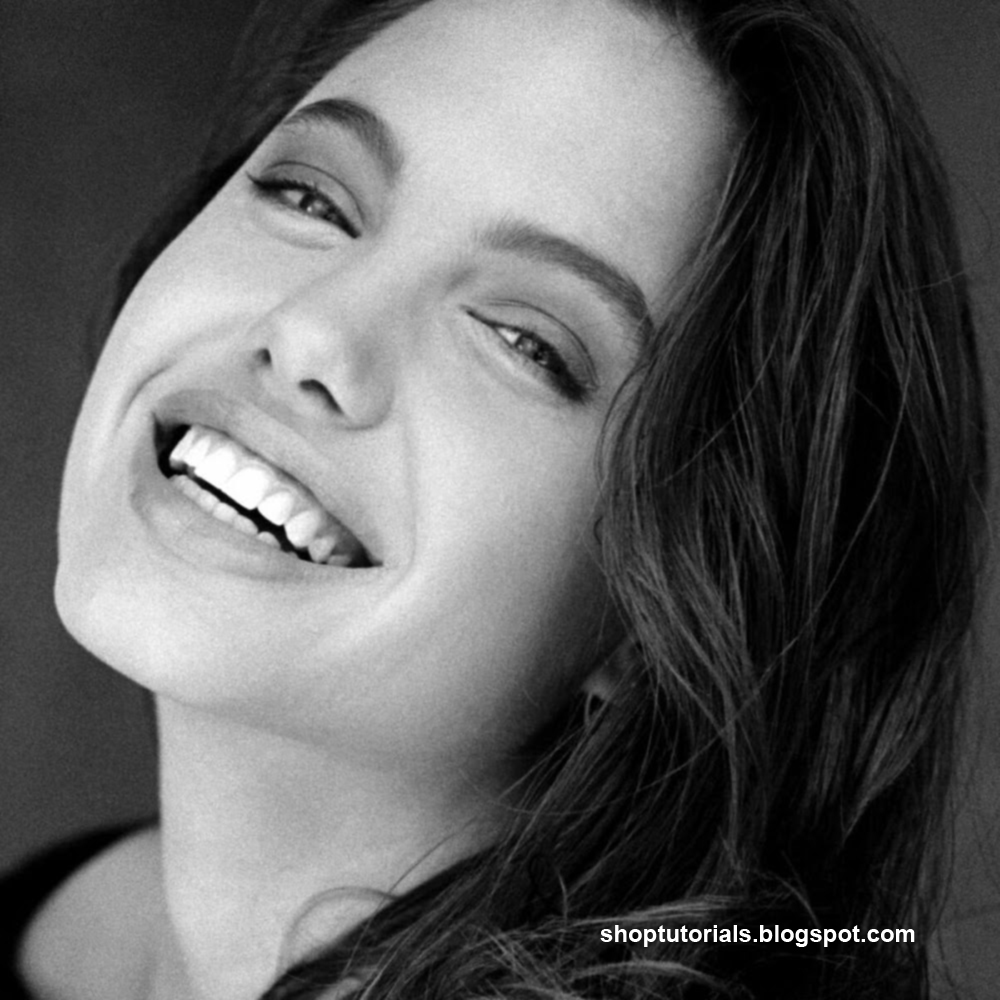
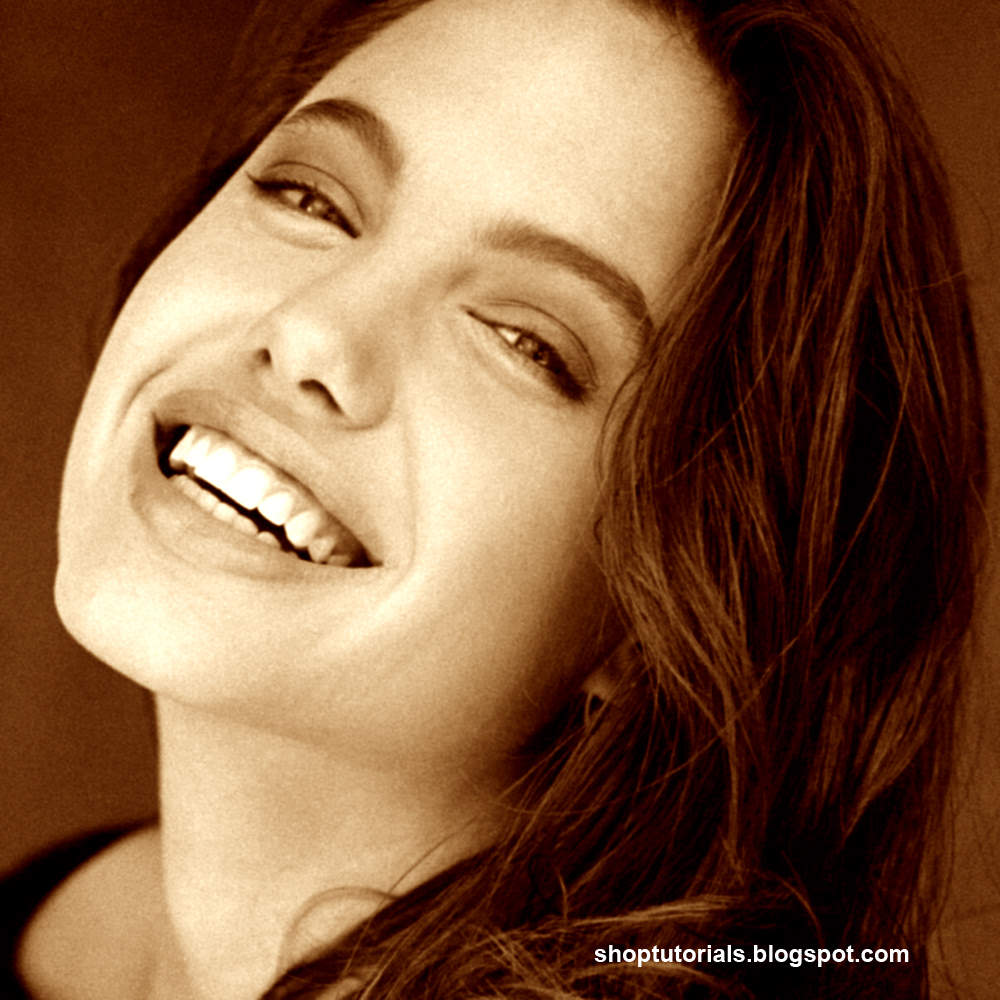
Take a black-white photo to fill color.
Step 2:
Press Ctrl+B (Color Balance).
and set the following setting for each option "shadows", "midtones" and "highlights".
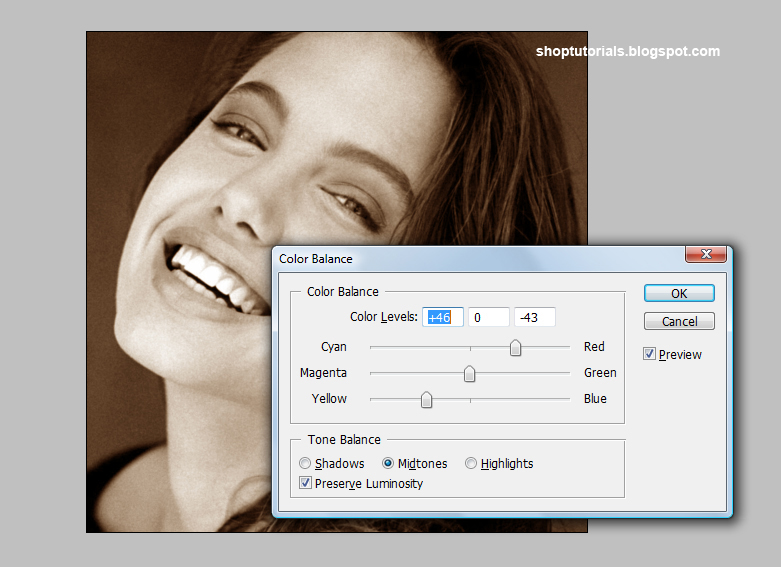
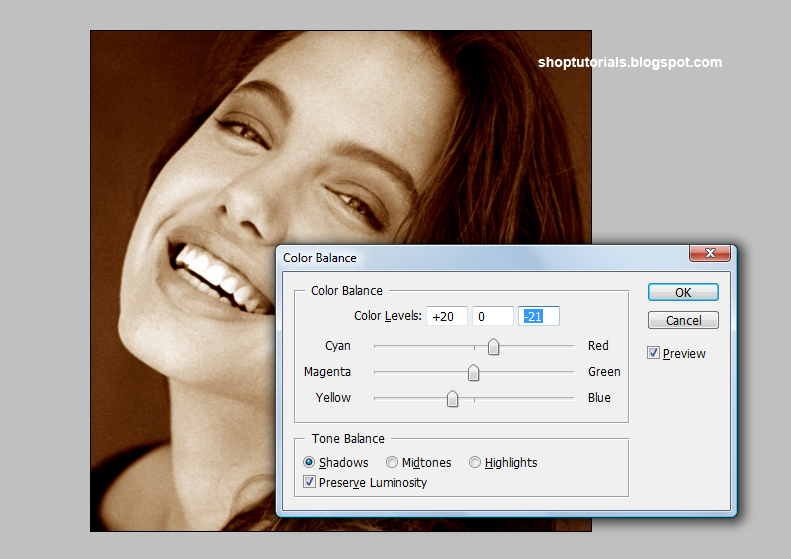
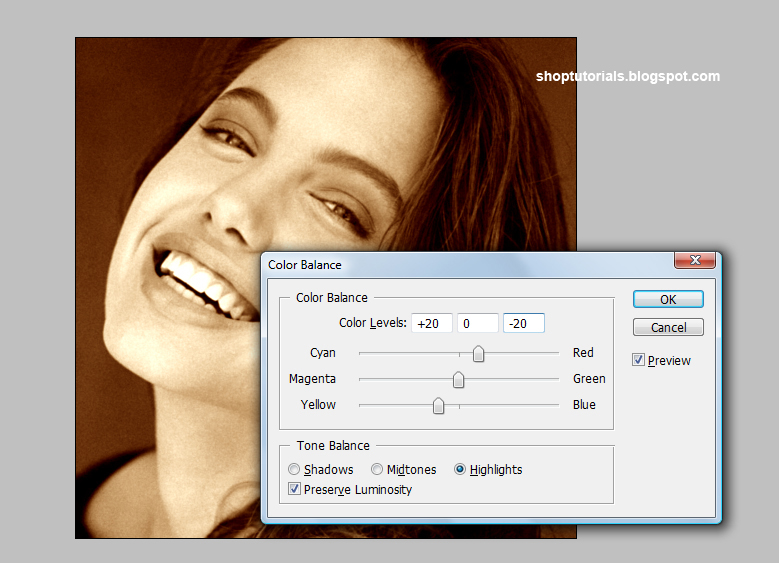
Hit OK.
Press Ctrl+B (Color Balance).
and set the following setting for each option "shadows", "midtones" and "highlights".
Hit OK.
You can give any color shade to the black white photo..
Examples :-
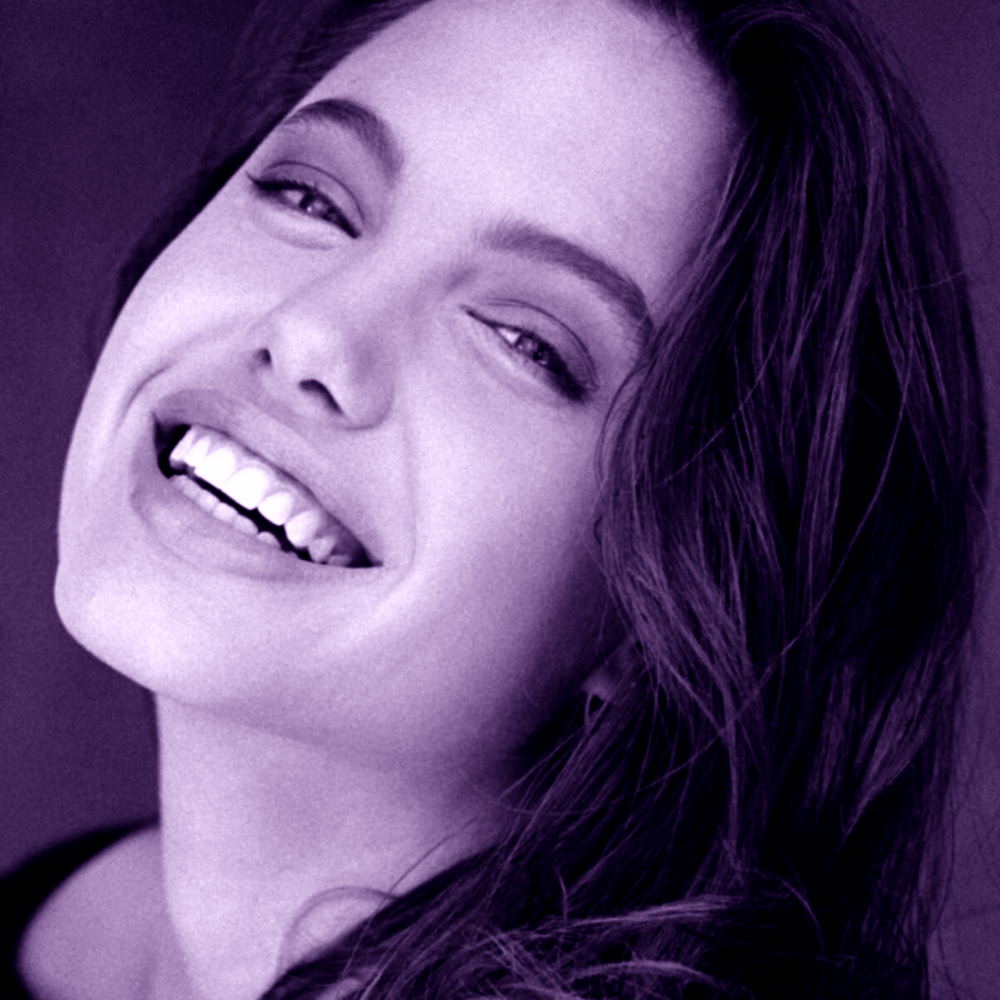
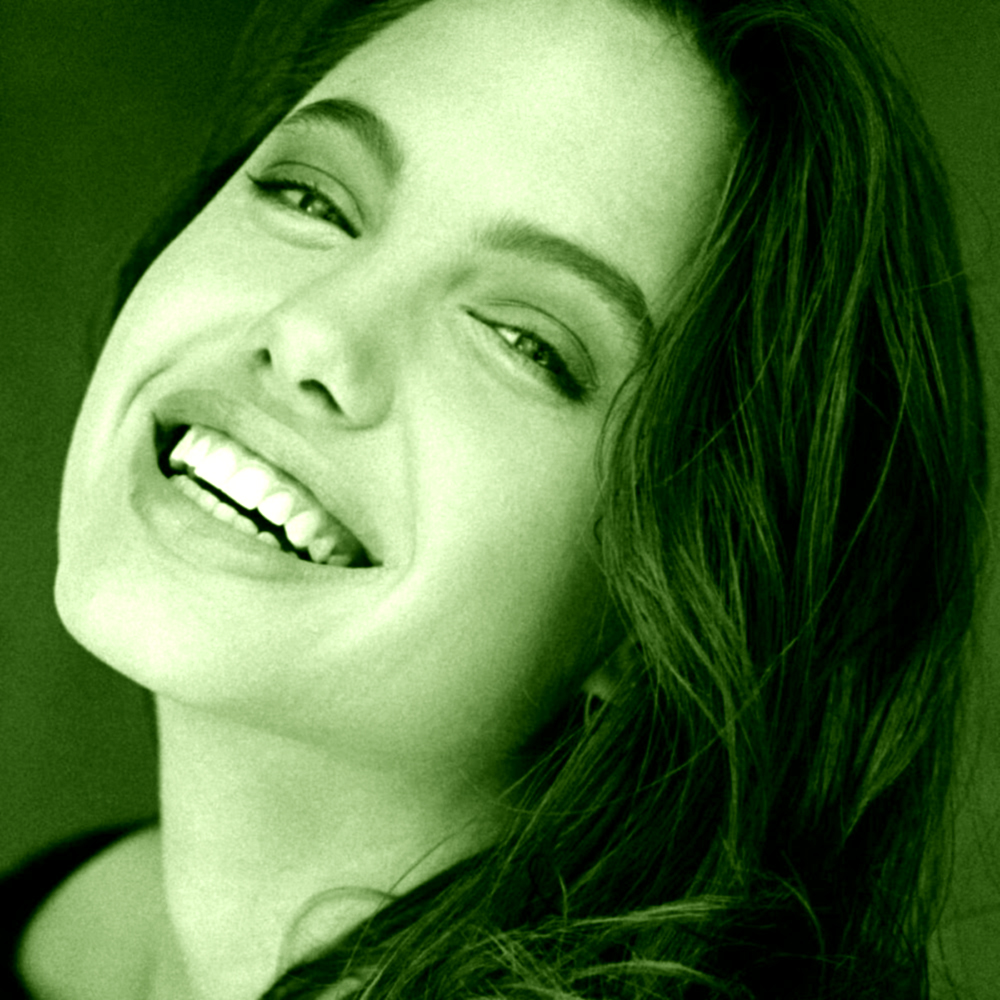
Done..!!
Dramatic Black & White Photos
Create dramatic black and white photos by splashing in color.
1. Open a color photo in Photoshop.
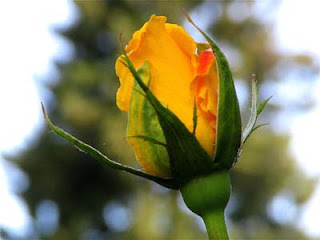
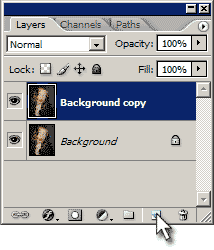
2. Duplicate the layer by dragging the layer to the "Create a New Layer" icon in the layers palette (or CTRL+J).
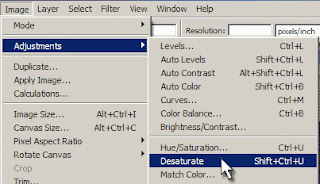
3. With the new layer selected, goto Image > Adjustments > Desaturate (or Shift+CTRL+U).
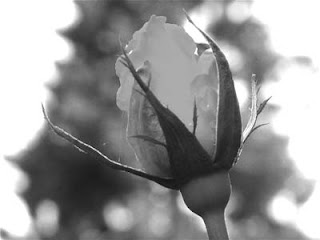
4. Goto Image > Adjustments > Brightness/Contrast and adjust the levels for each so that the black & white photo looks pleasing to your eye.
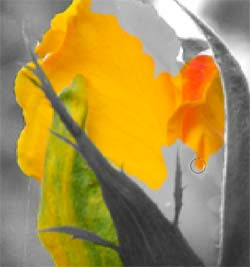
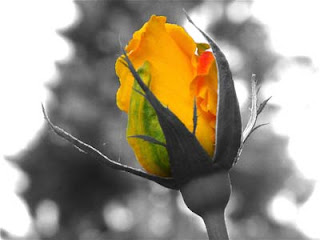
5. Now select the Eraser tool and erase whatever areas you want color. In this example, I erased the flower so that its color would shine through.
Read more »
Create dramatic black and white photos by splashing in color.
1. Open a color photo in Photoshop.
2. Duplicate the layer by dragging the layer to the "Create a New Layer" icon in the layers palette (or CTRL+J).
3. With the new layer selected, goto Image > Adjustments > Desaturate (or Shift+CTRL+U).
4. Goto Image > Adjustments > Brightness/Contrast and adjust the levels for each so that the black & white photo looks pleasing to your eye.
5. Now select the Eraser tool and erase whatever areas you want color. In this example, I erased the flower so that its color would shine through.
Monday, March 16, 2015
and,
black,
color,
conversions,
easy,
in,
make,
photo,
photoshop,
white
0
comments
Easy Make Color Photo Black and White Conversions In Photoshop
This Photoshop tutorial is so easy , we’ll look at an easy way to get fast yet high quality black and white conversions out of our color photos. Normally, for high quality black and white results.
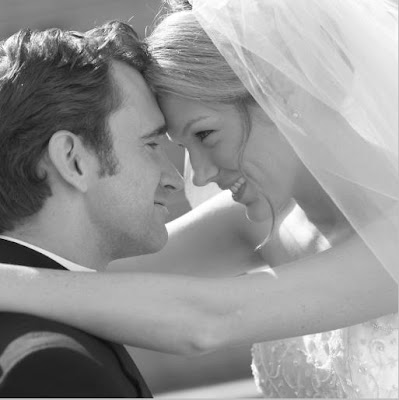
Final Image Result:
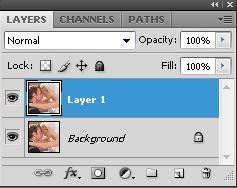
Step 1: Duplicate Background Layer
Shortcut Key.keyboard Press Ctrl+J
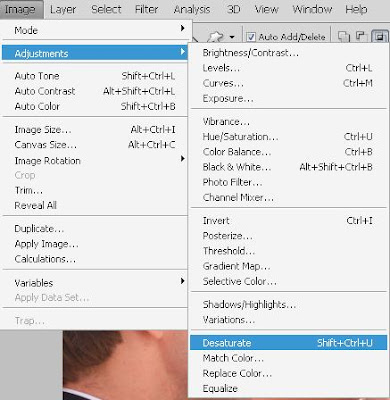
Step 2: Image > Adjustments > Desaturate.
keyboard shortcut, Shift+Ctrl+U.
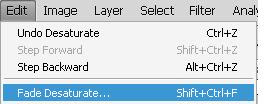
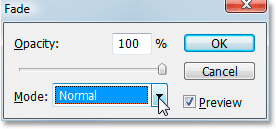
Step 3: Go Edit > Fade Desaturate
keyboard shortcut, Shift+Ctrl+F
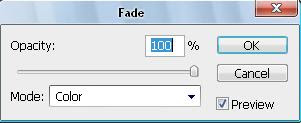
Step 4: Change The Blend Mode To “Color”
Opacity 100% Mode Color
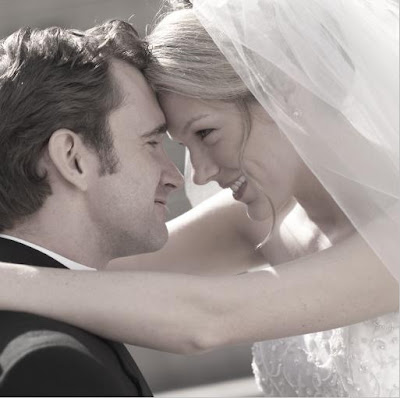
Than Here We Result:
Bonus Step: Bring Back A Hint Of Color
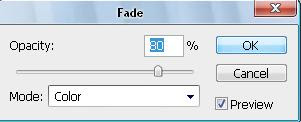
And here’s the result
Read more »
Final Image Result:
Step 1: Duplicate Background Layer
Shortcut Key.keyboard Press Ctrl+J
Step 2: Image > Adjustments > Desaturate.
keyboard shortcut, Shift+Ctrl+U.
Step 3: Go Edit > Fade Desaturate
keyboard shortcut, Shift+Ctrl+F
Step 4: Change The Blend Mode To “Color”
Opacity 100% Mode Color
Than Here We Result:
Bonus Step: Bring Back A Hint Of Color
And here’s the result
a,
adjustment,
black,
boost,
color,
contrast,
white,
with
0
comments
Boost Color Contrast With A Black White Adjustment
Ill be using Photoshop CS5 for this tutorial. Since the Black & White adjustment was first added in Photoshop CS3, youll need CS3 or higher to follow along.
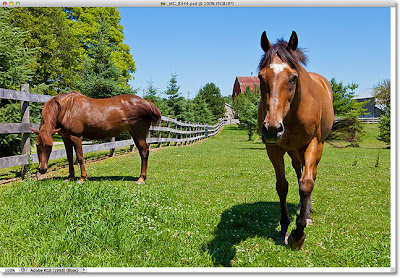
Heres the photo Ill be working with:
 Lets get started!
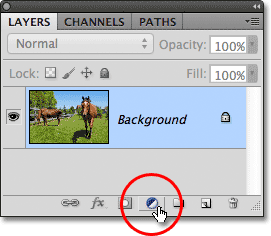
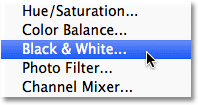
Then choosing Black & White from the list of adjustment layers that appears:
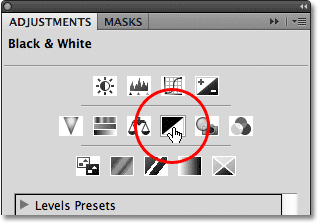
Or, if youre using Photoshop CS4 or higher, an easier way to add a Black & White adjustment layer is by simply clicking on the Black & White icon in the Adjustments panel:
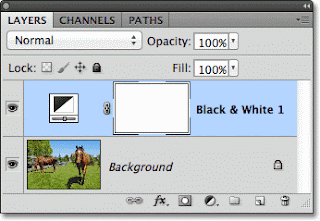
Either way adds a new Black & White adjustment layer above the image in the Layers panel:
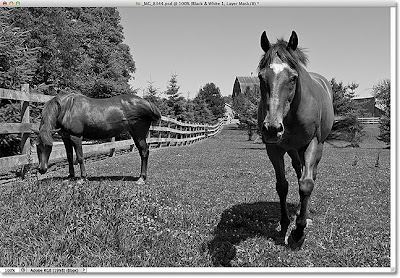
The adjustment layer will go ahead and do what it was originally designed for and convert your photo to black and white. Well bring the color back in the next step:
We can use these sliders to adjust the brightness of different areas of the image based on their color. Dragging a slider towards the left will darken all areas in the image that contain that color, while dragging the slider towards the right will brighten those same areas.
For example, lets say I want to darken the sky in my photo. The sky is blue, so all I need to do is click on the Blues slider and drag it to the left:
And just like that, the sky now appears darker, changing the overall contrast of the image:
If I want to brighten the grass and the trees, its as easy as dragging a different slider in the opposite direction. Theres actually more yellow than green in the grass and trees, so Ill click on the Yellows slider and drag it towards the right. Photoshop gives us a live preview of the results as were dragging the sliders, so keep an eye on your image in the document window to judge the results:
After dragging the Yellows slider, the grass and trees in my image are now lighter, again changing the overall contrast:
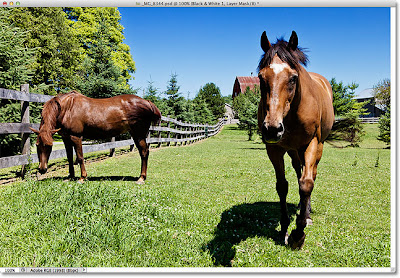
Heres the photo Ill be working with:
Step 1: Add A Black & White Adjustment Layer
Before we can do anything with a Black & White adjustment layer, we first need to add one. Theres a couple of ways we can do that. One is by clicking on the New Adjustment Layer icon at the bottom of the Layers panel:
Then choosing Black & White from the list of adjustment layers that appears:
Or, if youre using Photoshop CS4 or higher, an easier way to add a Black & White adjustment layer is by simply clicking on the Black & White icon in the Adjustments panel:
Either way adds a new Black & White adjustment layer above the image in the Layers panel:
The adjustment layer will go ahead and do what it was originally designed for and convert your photo to black and white. Well bring the color back in the next step:
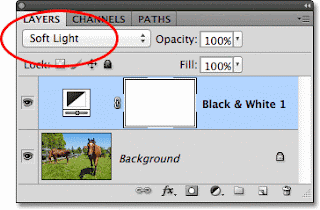
Step 2: Change The Blend Mode To Soft Light
To bring color back to the image, change the blend mode of the adjustment layer from Normal to Soft Light. The Blend Mode option is found in the top left corner of the Layers panel:
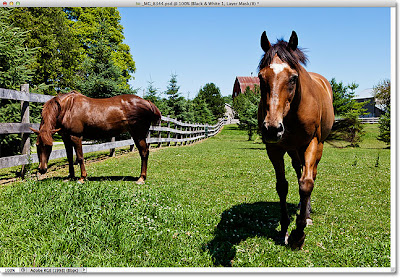
The color returns to the photo. You may already notice a change in the overall contrast of the image, but well make our own adjustments in the next step:
Step 3: Drag The Color Sliders To Adjust The Contrast
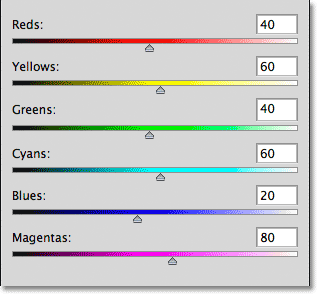
If youre using Photoshop CS3, the controls and options for the Black & White adjustment layer will appear in a dialog box. In Photoshop CS4 and higher, they appear in the Adjustments panel. In either case, youll see six sliders, each controlling a different color in the image (from top to bottom - Reds, Yellows, Greens, Cyans, Blues, and Magentas):
We can use these sliders to adjust the brightness of different areas of the image based on their color. Dragging a slider towards the left will darken all areas in the image that contain that color, while dragging the slider towards the right will brighten those same areas.
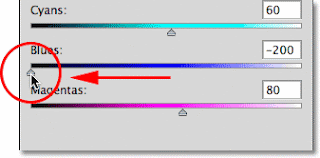
For example, lets say I want to darken the sky in my photo. The sky is blue, so all I need to do is click on the Blues slider and drag it to the left:
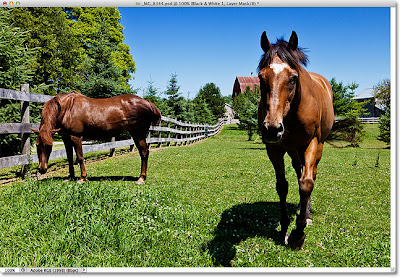
And just like that, the sky now appears darker, changing the overall contrast of the image:
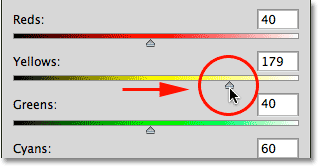
If I want to brighten the grass and the trees, its as easy as dragging a different slider in the opposite direction. Theres actually more yellow than green in the grass and trees, so Ill click on the Yellows slider and drag it towards the right. Photoshop gives us a live preview of the results as were dragging the sliders, so keep an eye on your image in the document window to judge the results:
After dragging the Yellows slider, the grass and trees in my image are now lighter, again changing the overall contrast:
Clicking And Dragging On The Image Itself
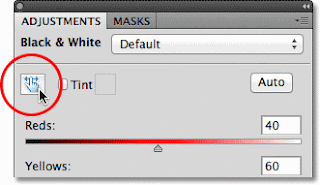
If youre using Photoshop CS4 or higher, its even easier to make changes to the image. In fact, theres no need to use the sliders at all! Just click on the slider icon (the hand with the left and right-pointing arrows) in the top left of the Adjustments panel:
With this slider option enabled, you can click directly on whatever area of your image you want to adjust, then just keep your mouse button held down and drag left or right to darken or lighten that area (along with any other areas of the image that share the same color).
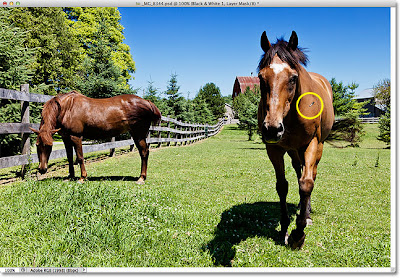
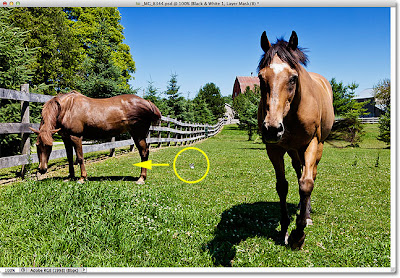
For example, to make the horses in my photo appear brighter, with the slider option enabled, Ill move my mouse cursor over one of the horses (Ill use the one on the right). Since both horses are the same color, brightening one of them will brighten the other at the same time. As soon as you move your mouse cursor over the image, it will turn into an eyedropper icon, ready to sample whatever color you click on:
Ill click on the horse and, with my mouse button held down, Ill drag towards the right to lighten the horse, as well as any other areas of the image that share the same color (the other horse on the left, plus the red barn in the background). If you watch the sliders in the Adjustments panel, youll see the corresponding color slider moving as you drag your mouse (in my case here, the Reds slider would be moving to the right):
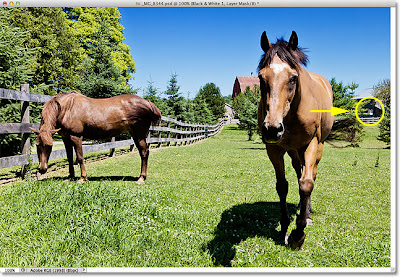
Since were using an adjustment layer, all of the changes were making here are non-destructive, which means we can safely experiment with the color sliders, or by clicking and dragging directly on the image itself, until were happy with the results. Earlier I lightened the grass and trees, but if I want to see how the image would look with the grass and trees darker instead of lighter, I can just click anywhere on the grass or trees in the image and drag my mouse towards the left:
Before And After
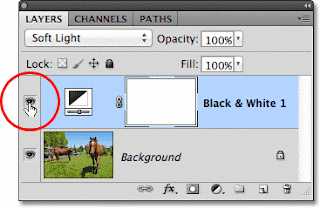
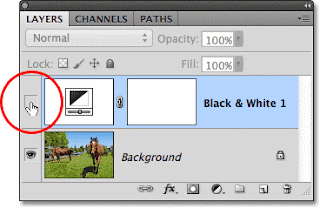
If, at any time, you want to compare the original and edited versions of the image, simply click on the adjustment layers visibility icon (the eyeball icon). This will temporarily turn the Black & White layer off:
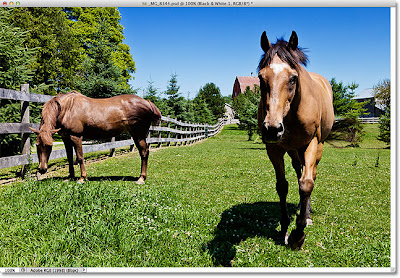
With the adjustment layer turned off, the original image re-appears in the document window:
Click on the visibility icon again (the empty box) to turn the Black & White adjustment layer back on:
The edited version re-appears:
For Photoshop CS3 users, click OK in the top right corner of the Black & White dialog box when youre done to close out of it and accept your changes. Photoshop CS4 (and higher) users can leave the Adjustments panel open.
Step 4: Lower The Layer Opacity (Optional)
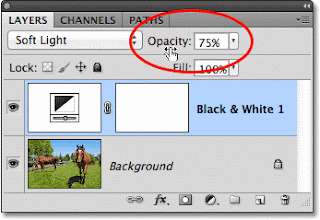
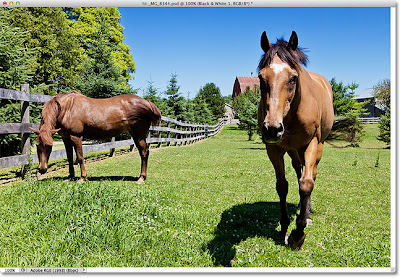
As a final step, if you think the image contrast is now a bit too strong, you can reduce it and fine-tune the results simply by lowering the opacity of the Black & White adjustment layer. Youll find the Opacity option directly across from the Blend Mode option at the top of the Layers panel. The further you lower the opacity value, the more the original image below the adjustment layer will show through. Im going to lower my opacity value down to 75% or so:
Heres my final result:
And there we have it! Thats how to quickly and easily make specific brightness and contrast changes to a full color image using a Black & White adjustment layer!
Subscribe to:
Posts (Atom)


- Follow Us on Twitter!
- "Join Us on Facebook!
- RSS
Contact