Showing posts with label from. Show all posts
Showing posts with label from. Show all posts
Thursday, June 18, 2015
a,
an,
and,
background,
content,
create,
fill,
from,
hole,
how,
object,
pse9,
remove,
scene,
the,
to,
using
0
comments
How to remove an object from a scene and create background content to fill the hole using PSE9
Is there a tool in PSE which can help you remove an object or a person from foreground of an image by filling it with the background content?
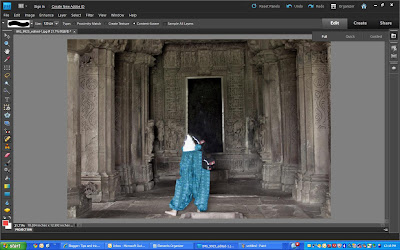
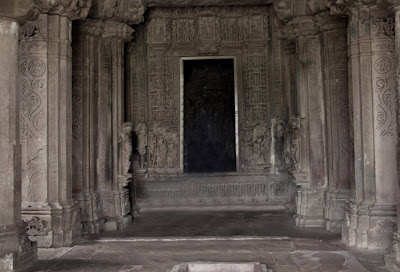
So in my source image above, I wanted to remove the girl from the temple and have just the building.
It may be achievable with clone tool, however it would really be a big time task.
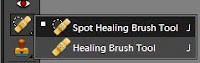
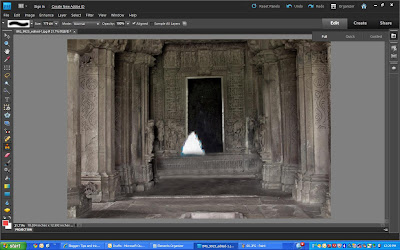
Yes, there is one which was introduced in PSE 9. So here are my initial and final images to show what this tutorial will help you achieve through this tutorial:
 |
| Initial image |
 |
| Final image |
So in my source image above, I wanted to remove the girl from the temple and have just the building.
It may be achievable with clone tool, however it would really be a big time task.
For non-complex images, it may just take seconds to fix that photo using content aware spot healing by doing just a couple of dabs
.
However, I choose an image which is complex as we need to remove a person whose background is not consistent throughout. It has the dark area inside the gate, the gate boundaries, the sculptured wall, the ground with variations in textures and colors. And spot healing from previous versions of PSE might not work since it does not have that intelligence to create content from background and fill it with it.
.
However, I choose an image which is complex as we need to remove a person whose background is not consistent throughout. It has the dark area inside the gate, the gate boundaries, the sculptured wall, the ground with variations in textures and colors. And spot healing from previous versions of PSE might not work since it does not have that intelligence to create content from background and fill it with it.
1. Open the image in Editor.
2. Select Spot healing tool from the left tool bar.
 |
| The spot healing brush properties in top properties bar |
3. Now keeping "Content-Aware" option selected in Properties panel, a keeping brugh size of the area not very big(which can be incremented and decremented using ],[ keys), start brushing(dabbing) over the object you want to remove.
So here are some tips which I have learnt on using this tool again and again :
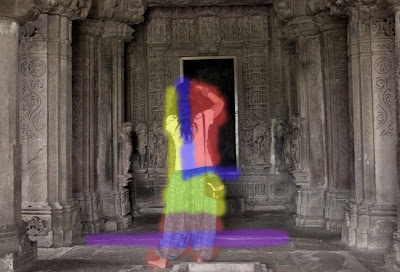
1. In the image above, for areas marked in red, I could use a bigger brush size without worrying much as the background behind the red mark is not very complex and is consistent, and I am not worried much as there are change in colors, no linear planes changing etc. So I can do this part quickly.
2. The areas marked in yellow are bit complicated as they have carvings on the wall. So would be good to start dabbing the brush with small size from the area near to the yellow area boundary in a linear manner. So if you see the carvings on the wall, they are horizontally linear. So it would be good if I start from the left near the boundary of the yellow area towards right horizonally.
3. The areas marked in blue(In L shape) is the area which should be taken care alittle meticulously since it has the frame of the door which has straight lines which need to be content created. So for this I reduced the brush size so that it did not cover the breadth of the frame and started from left such that the brush area includes the area of the existing frame(white frame area). However, this decision making may vary from image to image which would come to you as you try this tool a few times. For non-complex images, it may just take seconds to fix that photo using content aware spot healing and you may not have to do any such decision making. But for complex images, you might need a little thinking to get the best results.
4. For the area in purple, I used clone tool as it was quicker for that scenario. Spot healing content aware brushcould also have been used.
Here is my final result :
Hope this tutorial helps!!!
So here are some tips which I have learnt on using this tool again and again :
1. In the image above, for areas marked in red, I could use a bigger brush size without worrying much as the background behind the red mark is not very complex and is consistent, and I am not worried much as there are change in colors, no linear planes changing etc. So I can do this part quickly.
3. The areas marked in blue(In L shape) is the area which should be taken care alittle meticulously since it has the frame of the door which has straight lines which need to be content created. So for this I reduced the brush size so that it did not cover the breadth of the frame and started from left such that the brush area includes the area of the existing frame(white frame area). However, this decision making may vary from image to image which would come to you as you try this tool a few times. For non-complex images, it may just take seconds to fix that photo using content aware spot healing and you may not have to do any such decision making. But for complex images, you might need a little thinking to get the best results.
4. For the area in purple, I used clone tool as it was quicker for that scenario. Spot healing content aware brushcould also have been used.
Here is my final result :
Hope this tutorial helps!!!

Thursday, April 30, 2015
a,
adobe,
and,
cs6,
from,
illustrator,
navigating,
numerically,
panel
0
comments
Adobe Illustrator CS6 Navigating numerically and from a panel
Now lets say you want to magnify your illustration on screen, but none of the standard zoom increments
 are really working for you.
For example, here I am taken in the illustration wide and if I press Ctrl+Plus, or Command+Plus on the Mac, then Ill zoom to 100%.
And if I do it again, Ill zoom to 150% and then 200% and then 300% and so on.
So weve got some pretty big increments going on and these are the exact same increments we get with the Zoom tool and with the other zooming techniques.
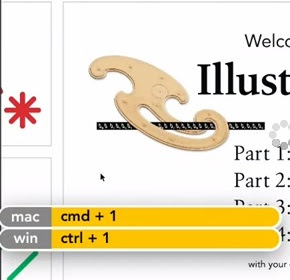
Im going to go ahead and press Ctrl+1, or Command+1 on the Mac, to zoom out to 100%.Illustrator cs6
If you want to dial in a custom zoom value then you can drop down here to this zoom option thats listed in the very bottom left corner of the document window.
Click on it, and then instead of entering a value, which you can do if you like, but my preferred method of working here is to press the Up arrow key in order to zoom in increments of one so you have very tight control.
You can also press the Shift Up arrow to move in 10% increments.
Illustrator CS6 Tutorial
And so at 120%, Im thinking Im zoomed in a little bit too far, Ill go ahead and take that down by pressing the Down arrow key until I reduce that value to 116% and that looks good to me.Now as I say, the other option of course is to dial in your own value.
For example, I could go ahead and zoom in to 2400%.
Now the problem becomes when youre this far zoomed into an illustration its difficult to get your bearings, you may not necessarily know where you are.
In that case, you want to bring up the Navigator panel, and you do that by going up to the Window menu and choosing the Navigator command, and then youll see this panel thats showing you your entire Illustrator cs6 and a tiny red thing right there that shows you the portion of theIllustrator cs6 that youre seeing right now.
All right, Im going to go ahead and expand this panel, like so so that I can see my Illustrator cs6 in a little more detail.
And by the way, working this way is great if you have two monitors, so you can go ahead and throw the Navigator panel on one monitor and of course have your document window open up in another.
Illustrator CS6 Tutorial
Anyway at this point, I could scroll inside the Illustrator cs6 by dragging this guy to a different location, or if I prefer I can just click somewhere in the illustration.You also have these zoom controls right here, so you can click on the little mountain to zoom out incrementally, or you can click on the big mountain to zoom in, you can also drag this zoom slider.
The only problem with this slider from my vantage point is it doesnt really show you a dynamic zoom, so you have to pause while youre dragging in order to update the screen.
It is a final way to work.
You can press and hold the Ctrl key or the Command key on the Mac, that will change your cursor to a little magnifying glass, and then you can drag around the portion of the Illustrator cs6 that you want to zoom.
As soon as you release Illustrator cs6 will show you that region on screen.
And then of course if the Navigator panel is getting too big for you, you can go ahead and drag a quarter or one of the sides in order to make it smaller.
And thats how you zoom to any degree you desire as well as get around using the Navigator panel here in Illustrator cs6 .
Wednesday, April 29, 2015
2,
cs6,
desktop,
from,
illustrator,
in,
opening,
the,
tutorial,
video,
windows
0
comments
2 Opening from the Windows desktop in Illustrator CS6 Tutorial Video
The main advantage of Adobe Illustrator CS6, and one of the things that differentiates it from its pixel pushing counterparts, is that it is a vector-based image editing program.
If youre new to Adobe Illustrator, you might not know exactly what that means.So in this movie, I will be walking you through exactly what a vector graphic is and how it can help you develop a more versatile graphic. So think of it like this. In traditional image editing applications like Photoshop, youre limited in terms of the output size or quality, based on the number of pixels or resolution that reside inside of an image. This means he must constantly be aware of the DPI or PPI settings of your document, because the files are inherently resolution dependent.
Now in some cases you cant get around this, like photographs for instance. Photographs cannot be taken in a vector format. Theyre made of pixels and they had to stay made of pixels. Therefore, thats when you would use a pixel-based image when youre working with photos or things that werent necessarily created on a computer.
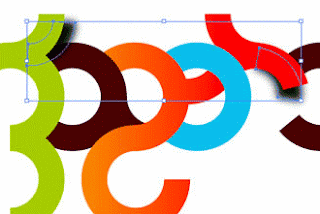
In Adobe Illustrator however, we are working with a vector artwork. Anything we create inside Illustrator is a vector object, and this type of graphic is resolution independent, meaning that it will be just as sharp and clean at 3 inches or 300 feet.
With Illustrator, you dont have to worry about the resolution of the file at all, because the artwork can be scaled infinitely without penalty. How cool is that? You can create artwork inside Illustrator that is vector based and then output it to applications like Adobe InDesign and use that for output on things like business cards, letterhead, et cetera, and the vector artwork maintains its vector nature all the way through the process. In the other instances though, you will have to take the artwork out of Illustrator and put it into a pixel- based format for going to areas like the web, or tablet devices and things like that. However, if you have a piece of artwork inside of Illustrator that you use for, lets say, a web button and lets say its 200 pixels by 200 pixels wide, you can then come back in at a later date and use that same image for a different project, like lets say a web banner, where you have the blow it up 300% and the artwork will scale perfectly to that size without losing any of its quality. Lets take a look at exactly what I am talking about with these graphics that I have on my screen.
As you can see I have two images on my screen that look pretty much the same, As you can see I have two images on my screen that look pretty much the same, have the vector equivalent. Lets first start off by taking a look at the raster-based image. If I grab my Zoom tool and I zoom in right here on the top part of this text, youll notice when I zoom in that the text is very choppy and the edge of the
Read more »
If youre new to Adobe Illustrator, you might not know exactly what that means.So in this movie, I will be walking you through exactly what a vector graphic is and how it can help you develop a more versatile graphic. So think of it like this. In traditional image editing applications like Photoshop, youre limited in terms of the output size or quality, based on the number of pixels or resolution that reside inside of an image. This means he must constantly be aware of the DPI or PPI settings of your document, because the files are inherently resolution dependent.
Now in some cases you cant get around this, like photographs for instance. Photographs cannot be taken in a vector format. Theyre made of pixels and they had to stay made of pixels. Therefore, thats when you would use a pixel-based image when youre working with photos or things that werent necessarily created on a computer.
In Adobe Illustrator however, we are working with a vector artwork. Anything we create inside Illustrator is a vector object, and this type of graphic is resolution independent, meaning that it will be just as sharp and clean at 3 inches or 300 feet.
With Illustrator, you dont have to worry about the resolution of the file at all, because the artwork can be scaled infinitely without penalty. How cool is that? You can create artwork inside Illustrator that is vector based and then output it to applications like Adobe InDesign and use that for output on things like business cards, letterhead, et cetera, and the vector artwork maintains its vector nature all the way through the process. In the other instances though, you will have to take the artwork out of Illustrator and put it into a pixel- based format for going to areas like the web, or tablet devices and things like that. However, if you have a piece of artwork inside of Illustrator that you use for, lets say, a web button and lets say its 200 pixels by 200 pixels wide, you can then come back in at a later date and use that same image for a different project, like lets say a web banner, where you have the blow it up 300% and the artwork will scale perfectly to that size without losing any of its quality. Lets take a look at exactly what I am talking about with these graphics that I have on my screen.
As you can see I have two images on my screen that look pretty much the same, As you can see I have two images on my screen that look pretty much the same, have the vector equivalent. Lets first start off by taking a look at the raster-based image. If I grab my Zoom tool and I zoom in right here on the top part of this text, youll notice when I zoom in that the text is very choppy and the edge of the
| circle around the flower is also really jagge and nasty looking. | |
| This is because this is a raster-based image that is based upon pixels, and those | |
| little squares youre seeing, those are the pixels. | |
| And so since its not comprised of vectors, I get this pixelation. | |
| Lets zoom back out a little bit and go over here to the vector object. | |
| I will zoom in on the same area over here. | |
| Notice how crisp and clean the text is and how nice the edge along the circle is as well. | |
| This is an example of vector artwork. | |
| Vector artwork is not made up of pixels at all. | |
| Vector artwork is actually made up of mathematical formulas that allow for the | |
| artwork to be scaled, up, down, whatever, and it doesnt lose quality. | |
| Thats the beauty of vector graphics. | |
| Lets take a look at that. | |
| Ill zoom back out and Ill grab my Selection tool and Ill select this | |
| raster object here. | |
| If I want to resize this object, I can do so. | |
| But when I do that youll notice that the quality gets significantly worse, and | |
| if I zoom in on it, same area where we were before, you can see, its so bad, | |
| pixelated and almost unreadable. | |
| Lets zoom back out and I will undo those changes, and I am just doing this with | |
| Ctrl+Z on my keyboard, Command+Z on a Mac. | |
| Ill go ahead and come over to the vector object and select it. | |
| Watch what happens when I scale this. | |
| Scale it up and Ill zoom into the same area. | |
| The text is still completely clean and crisp; | |
| the edge of the circle is as well. | |
| Let me click away from it to get the guidelines away from it. | |
| See how clean the edge of that circle is? Unbelievable! | |
| So I could use this on a business card, on a flyer, on a billboard, on the side | |
| of a blimp, it doesnt matter. | |
| This artwork is always going to crisp and clean, whereas over here on the | |
| raster-based image, I could only use this for an appropriate size based upon the | |
| resolution of the image. | |
| So if its a 900 pixel graphic, chances are Im only going to use it in | |
| something thats 900 pixels or smaller. | |
| In any case, there are uses for both raster and vector graphics, but hopefully, | |
| by now you have a better understanding of the differences between the two and | |
| how you can utilize vector graphics inside of Illustrator to create more | |
| flexible artwork and use them across multiple projects. |
Sunday, March 15, 2015
a,
from,
how,
make,
photo,
snapshot,
timeless,
to,
wedding
0
comments
How to Make a Timeless WEDDING Photo from a snapshot
Photoshop CS6 tutorial showing how to quickly transform any ordinary snapshot into a golden-hued, timeless image that will last forever. These techniques work especially well for wedding photos.
Subscribe to:
Posts (Atom)


- Follow Us on Twitter!
- "Join Us on Facebook!
- RSS
Contact