Tuesday, March 31, 2015
desert,
in,
photoshop,
scene,
surreal
0
comments
Surreal Desert Scene in Photoshop

Materials Needed:
- Desert 1
- Desert 2
- Iron mask
- Clock
- Bronze Hand
- Gearing Brushes
- Galaxy Brushes
- Bird Brushes
- Sky
- Tree texture
- Celtic Rune Charm Pack
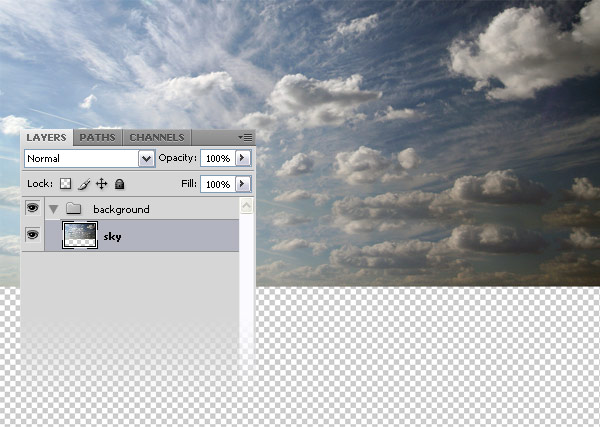
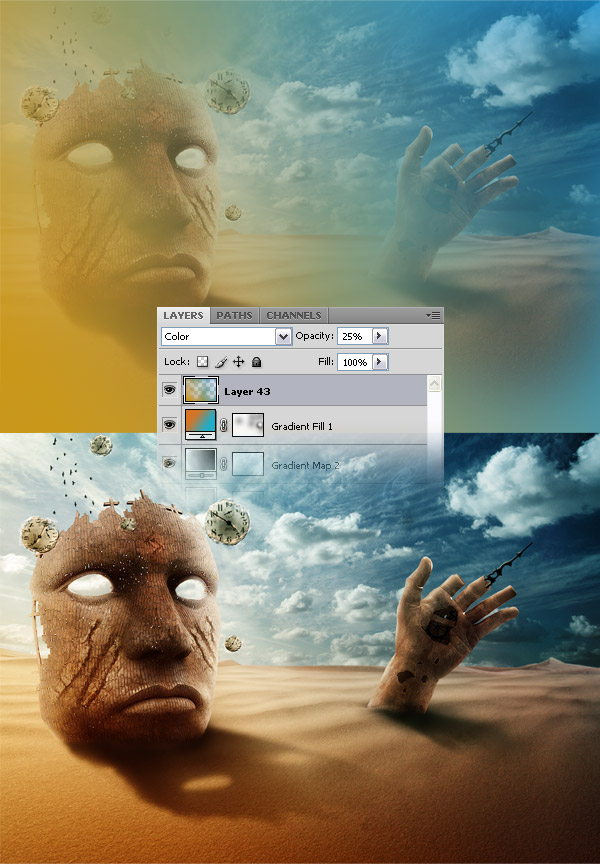
Step 1: Create a new document and add the sky
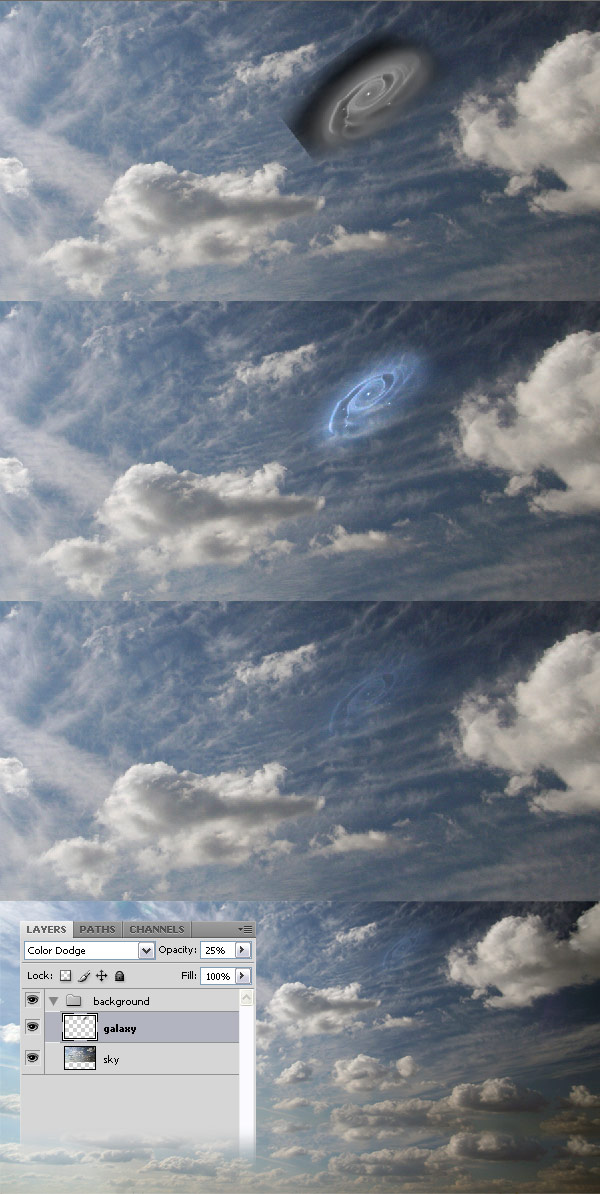
Step 2: Add a small galaxy on the sky
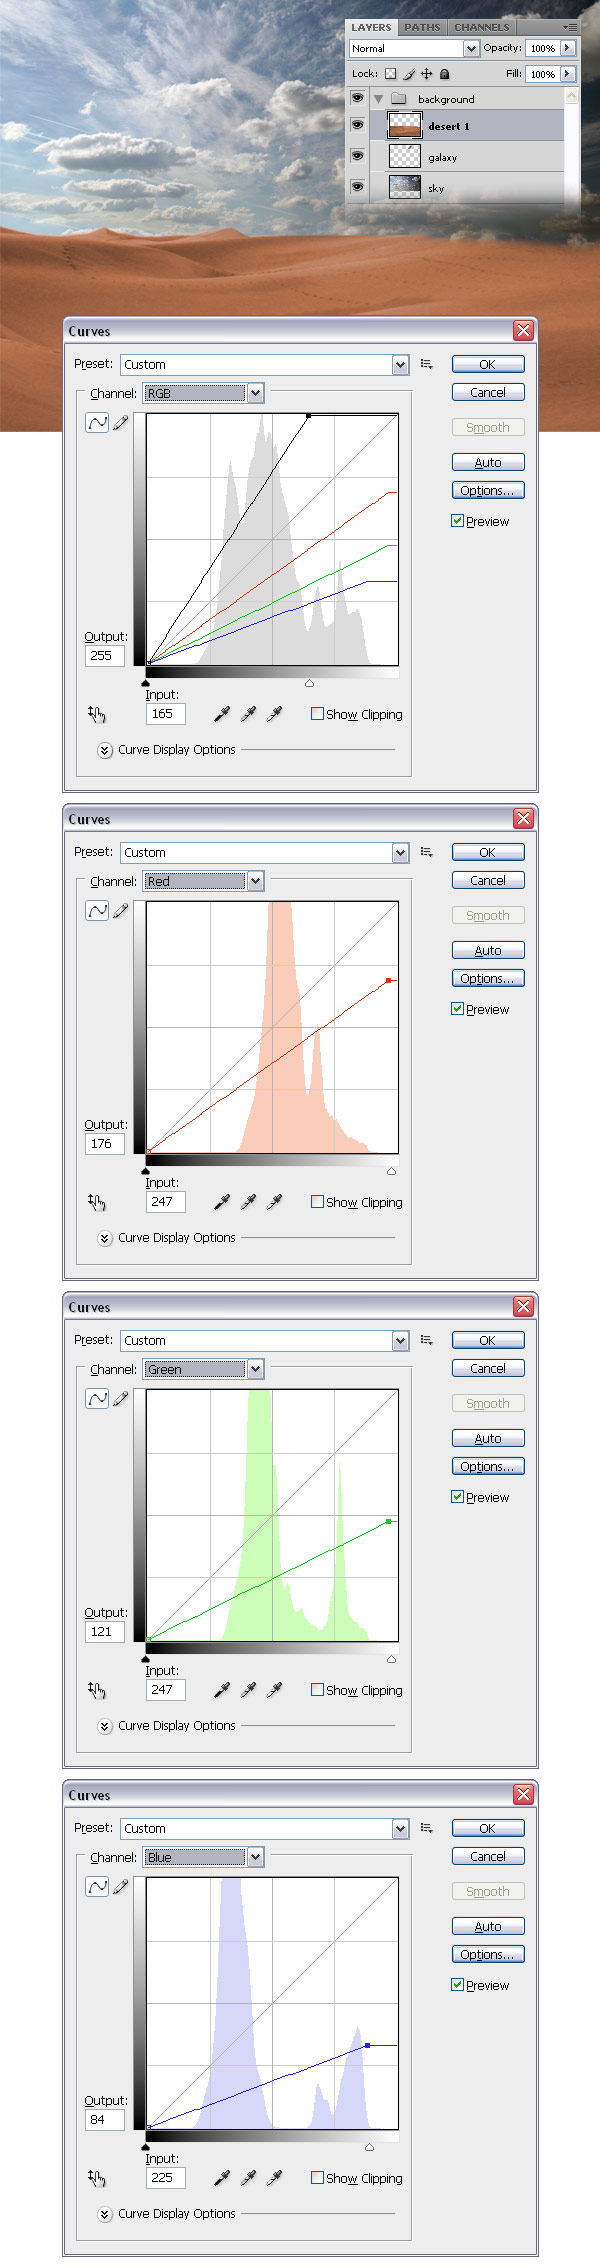
Step 3: Add the first desert stock photo
Note: You can also use the Eraser Tool (E) and a soft brush to erase some parts of the sky from this photo.
Step 4: Duplicate the "desert 1" layer
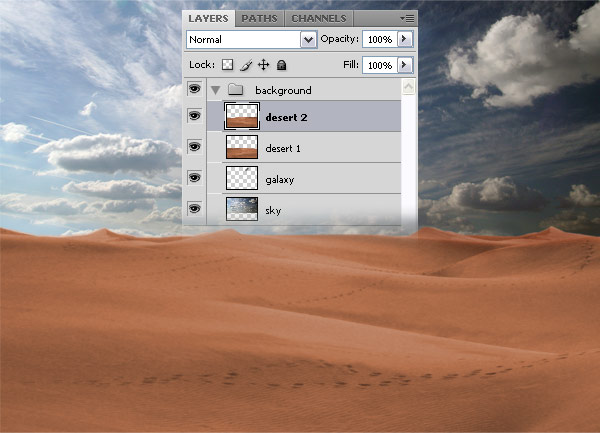
Step 5: Add the second desert stock photo
Note: Arrange the image from this step in a way that makes visible the hills of the other two desert photos beneath it.
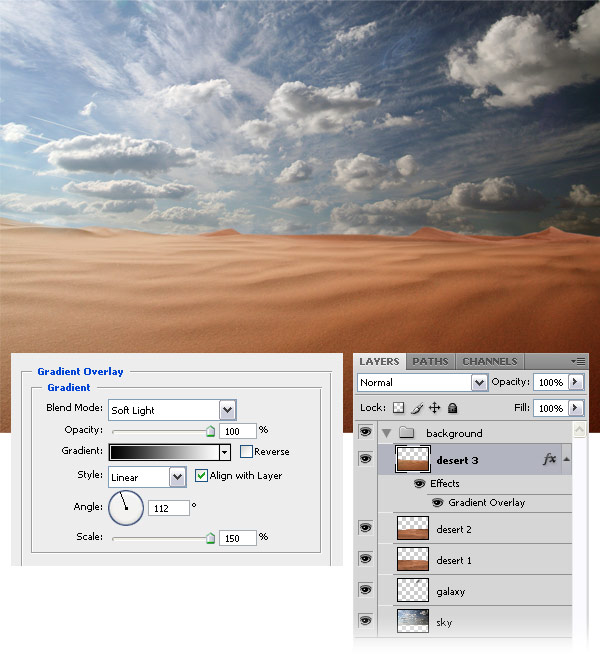
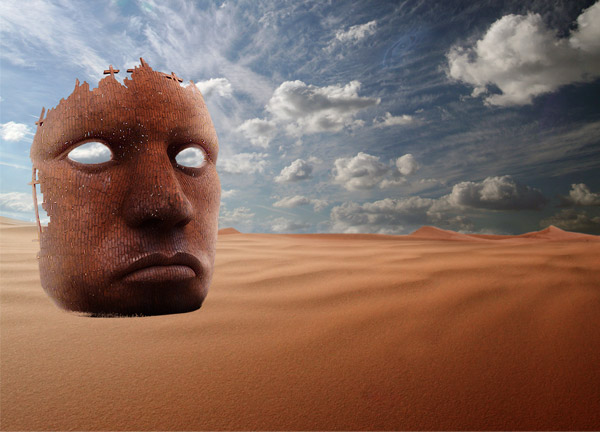
Step 6: Add the iron mask
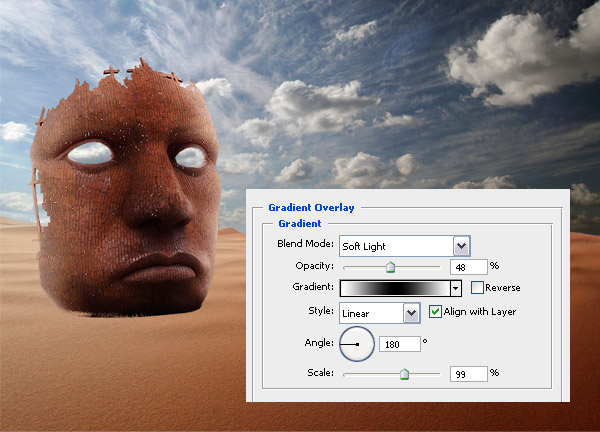
Step 7: Add a Gradient Overlay layer style to the iron mask
Step 8: Mask the bottom area of the iron mask

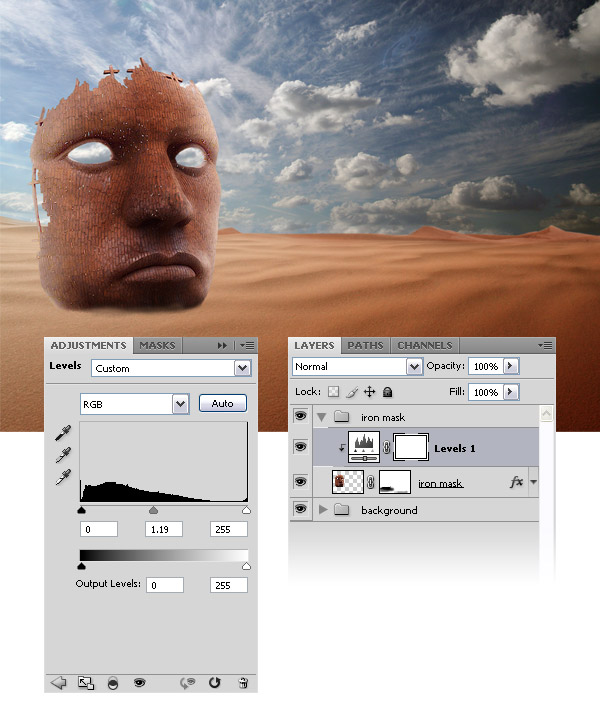
Step 9: Add a Levels adjustment layer
Step 10: Create a shadow for the iron mask

Step 11: Add a sign on the iron mask’s forehead
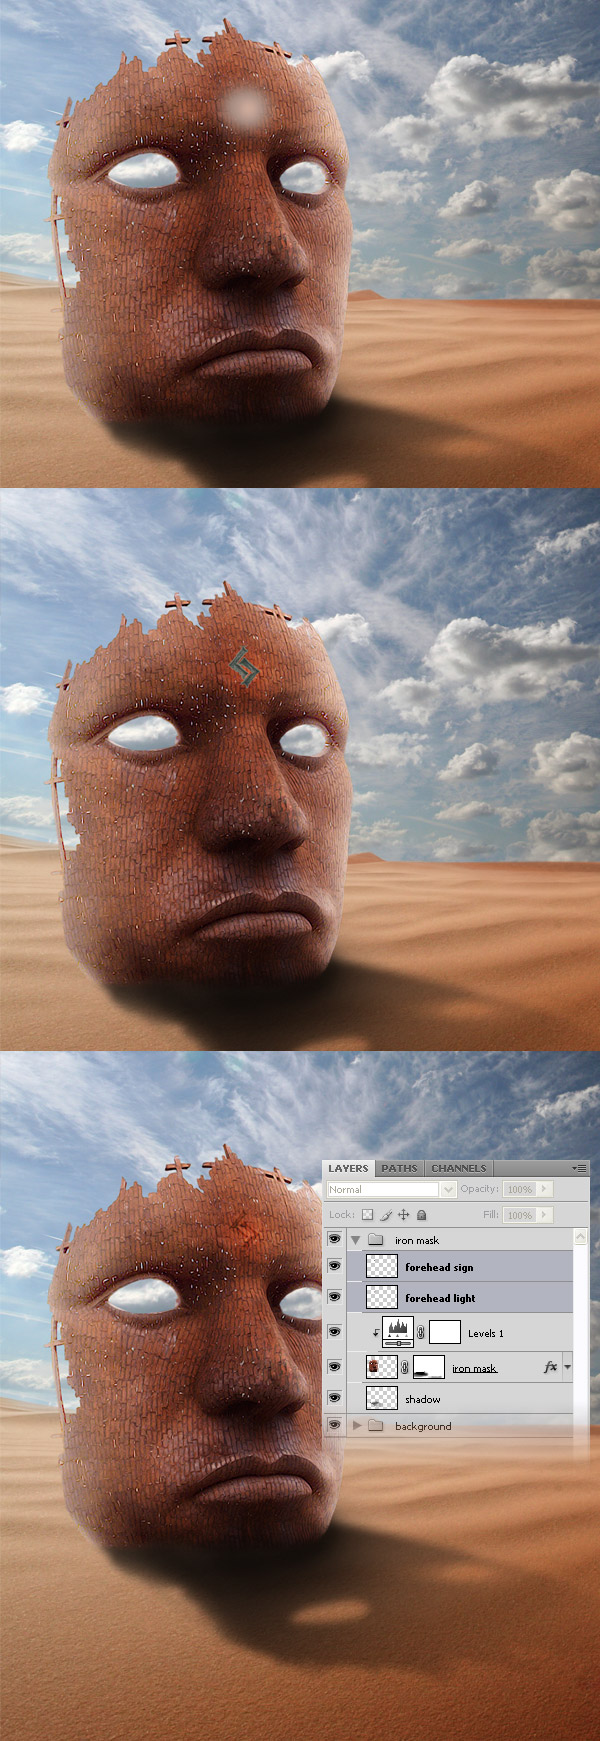
Step 12: Add two scars to the iron mask
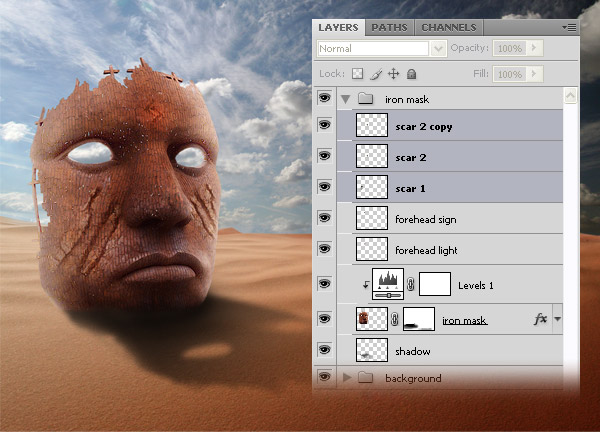
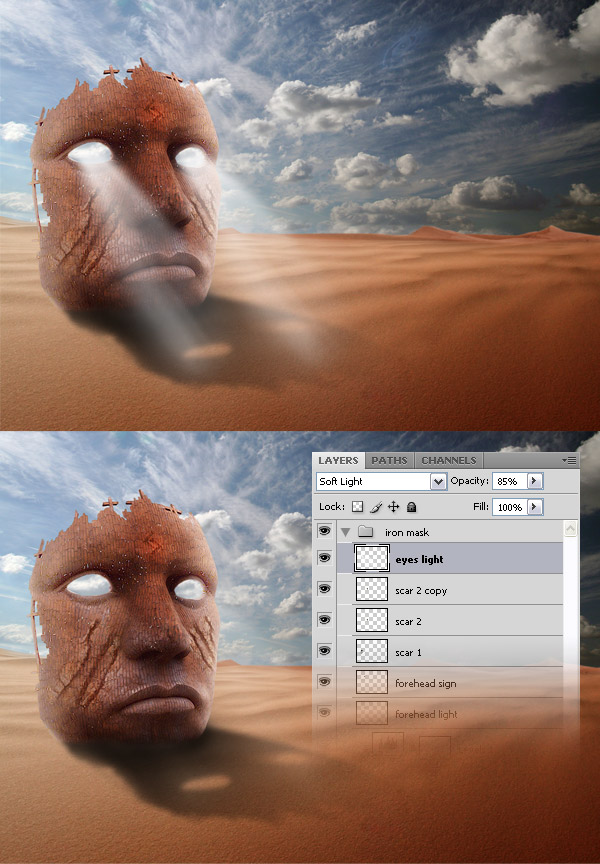
Step 13: Create some lights coming out of the iron mask’s eyes
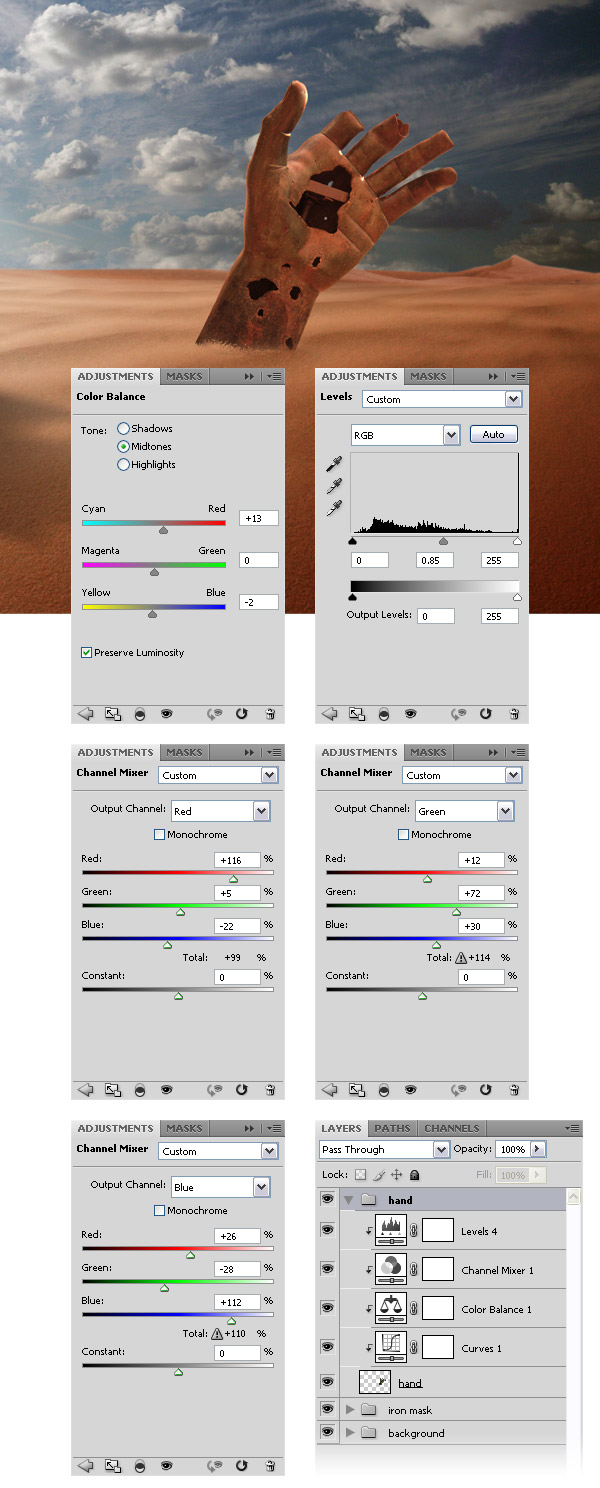
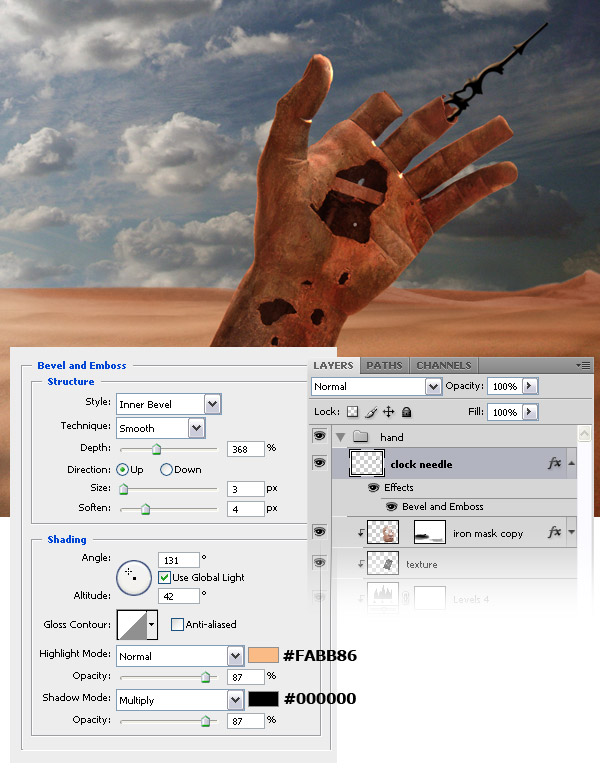
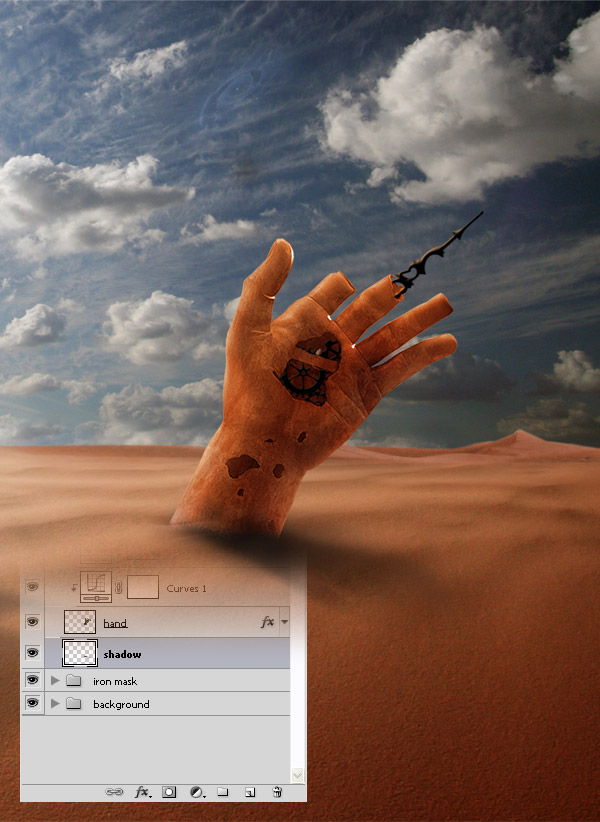
Step 14: Add a bronze hand
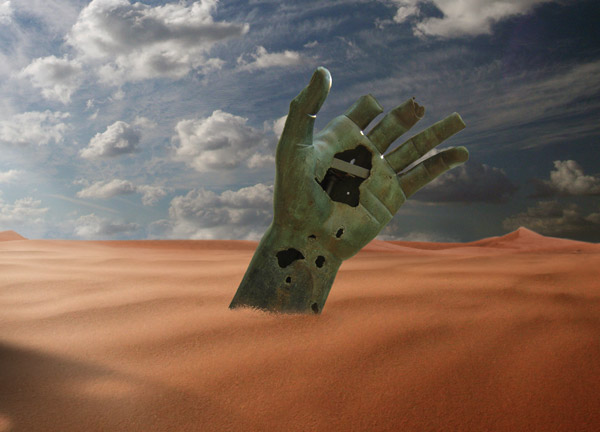
Step 15: Make some color adjustments to the hand
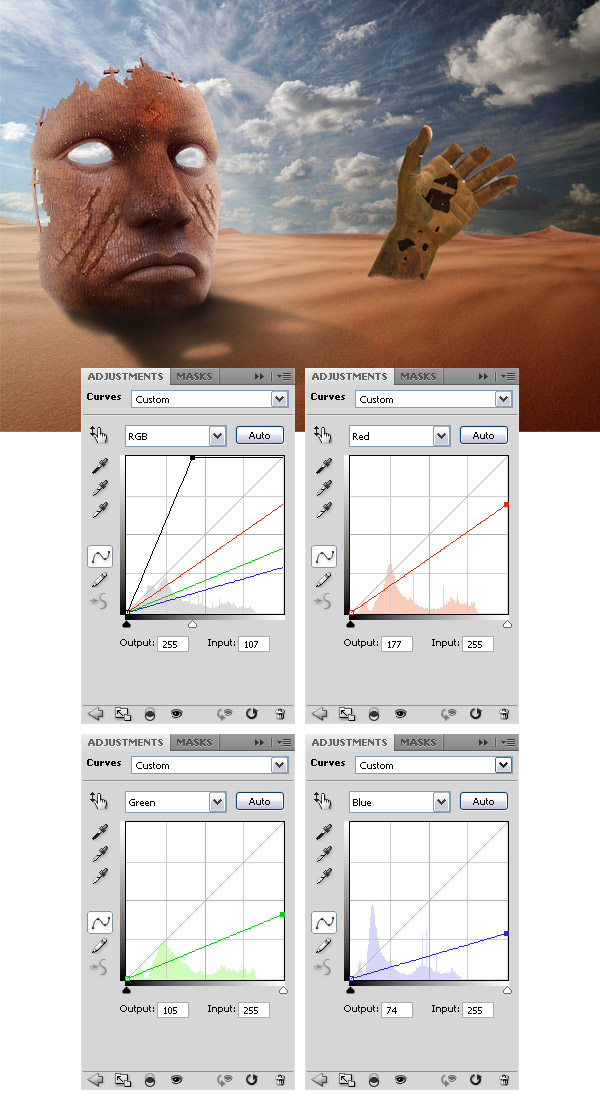
Step 16
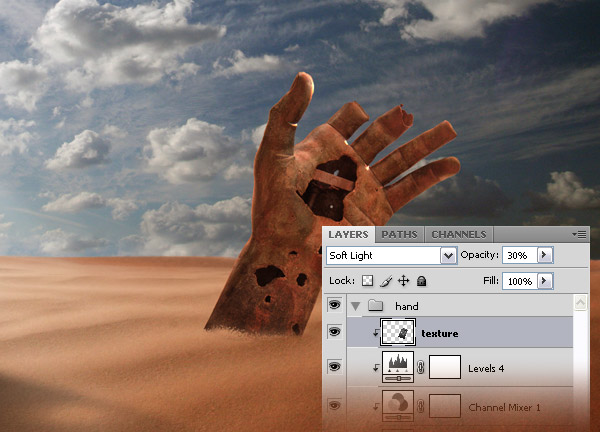
Step 17: Add a texture to the hand
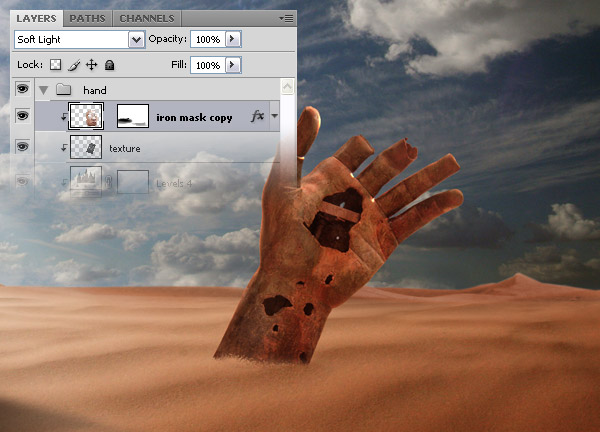
Step 18: Use the iron mask as a texture for the hand
Step 19: Create a clock needle
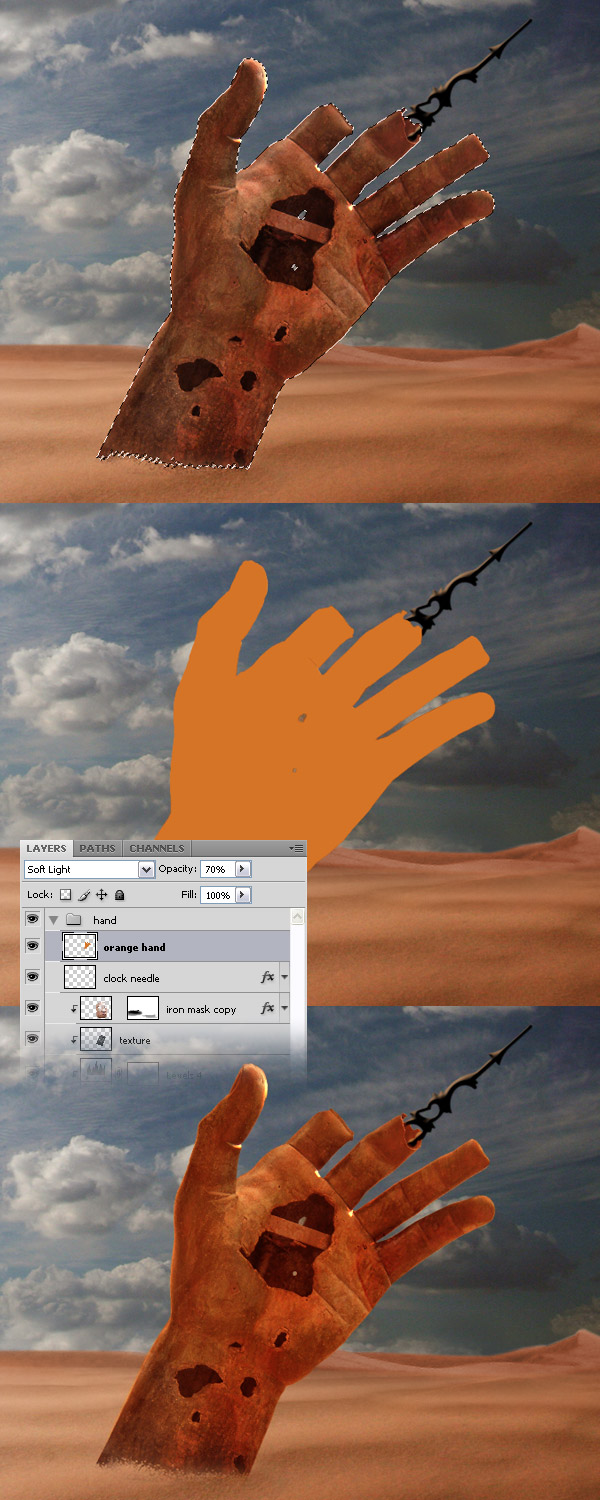
Step 20: Color the hand in orange
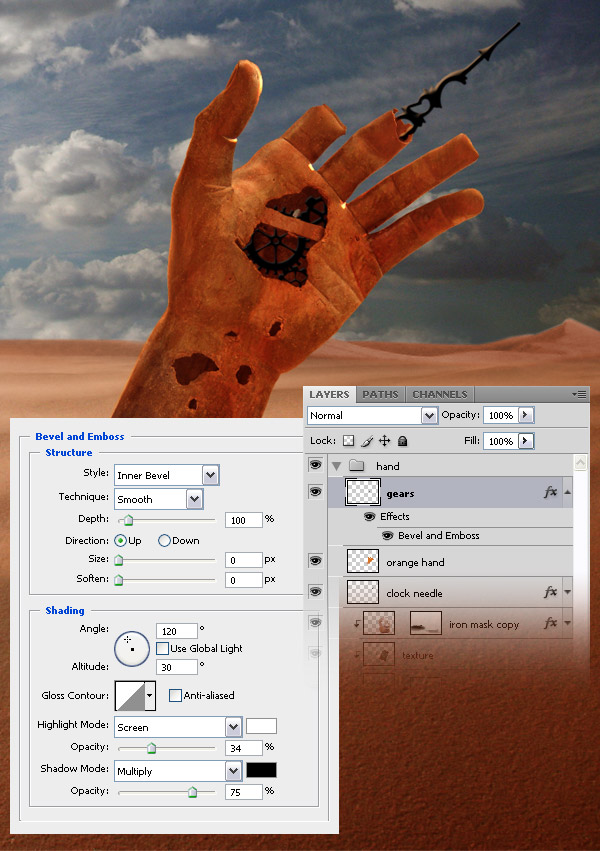
Step 21: Create some gears
Step 22: Adjust the lights and the shadows of the iron mask
Note: when you have the Dodge Tool or the Burn Tool selected you can use the Alt key to quickly shift between them.
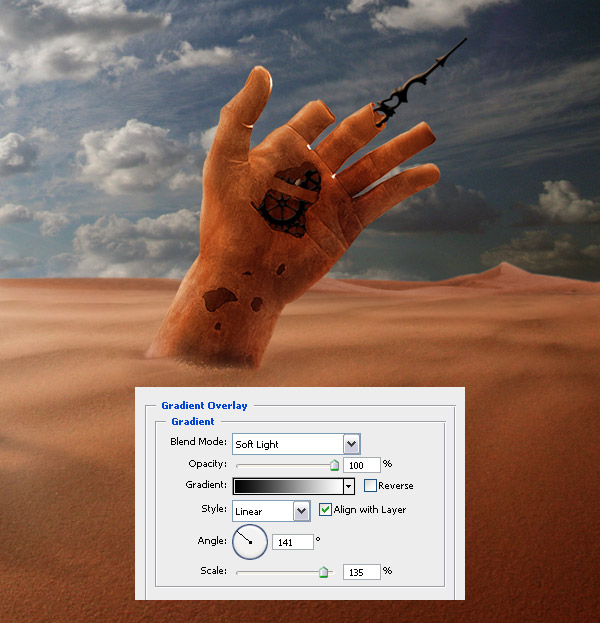
Step 23: Create a shadow for your hand
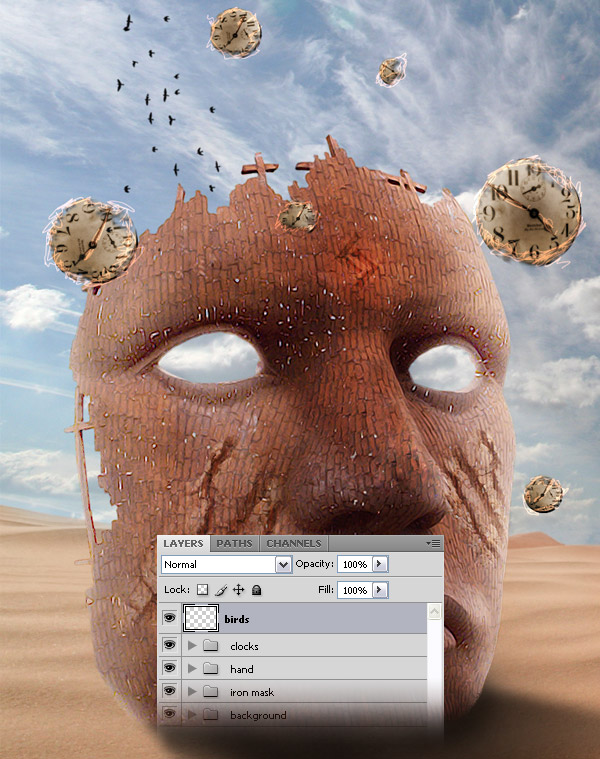
Step 24: Add some clocks
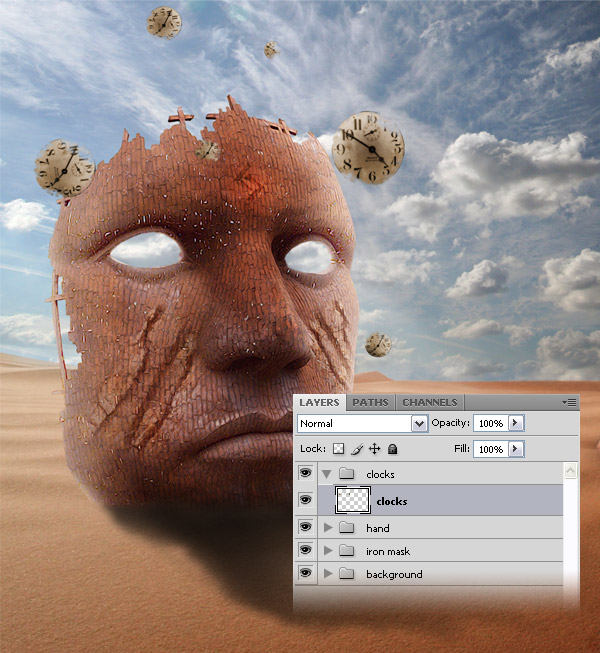
Repeat this step to add more clocks to your image. Change the size of each clock and rotate them. Take a look at the following image for reference. Select all your clock layers and merge them together (Ctrl+E). Name this layer "clocks."
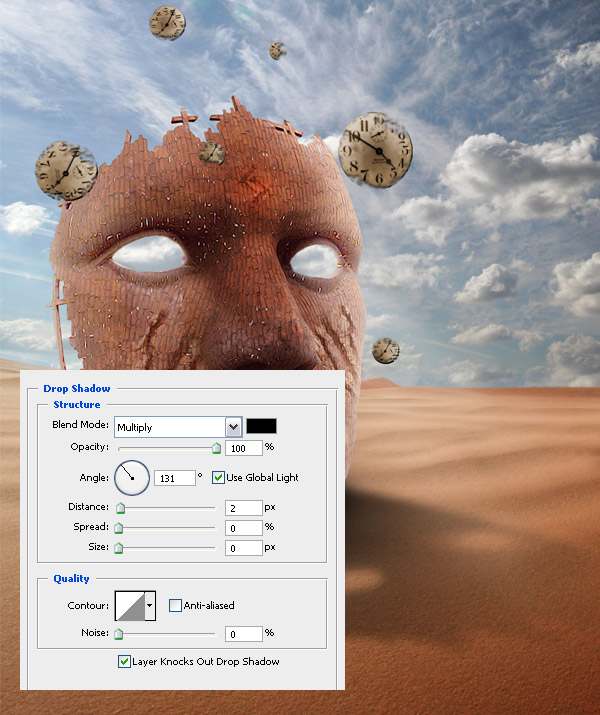
Step 25: Add a shadow to the clocks
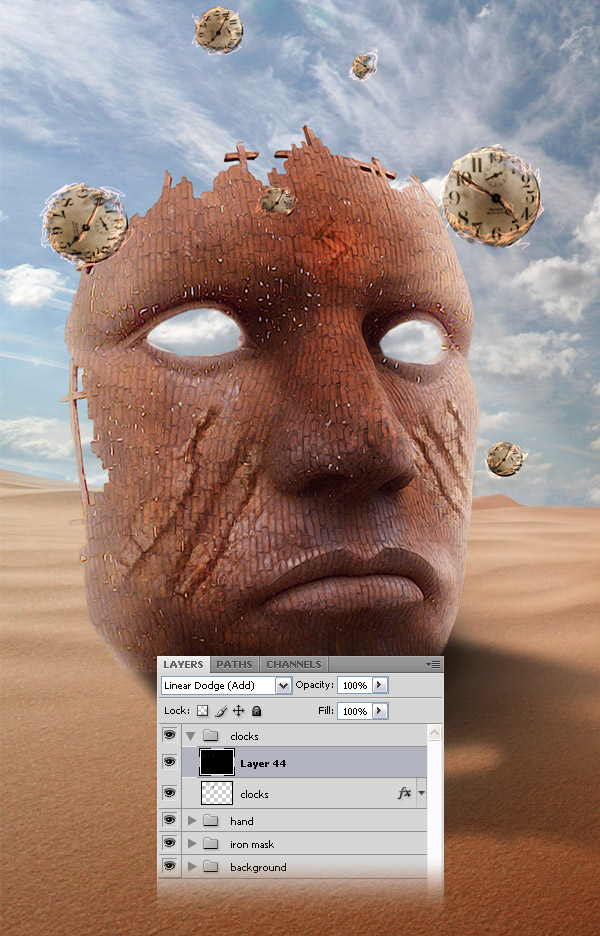
Step 26
Step 27: Add some birds
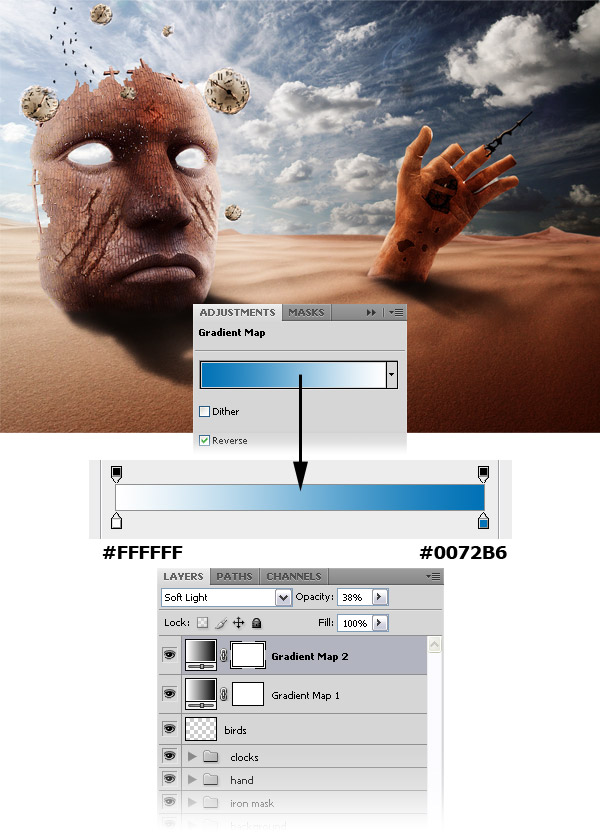
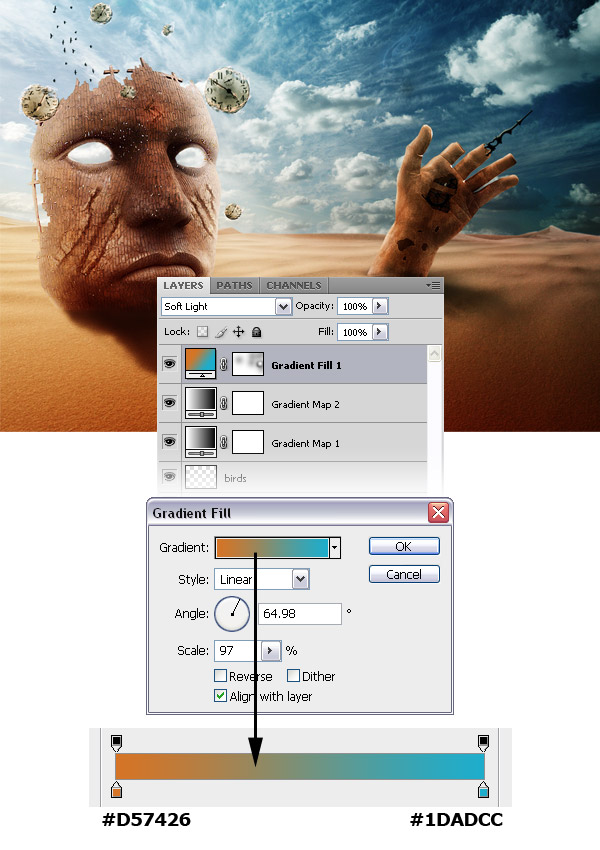
Step 28: Final color adjustments
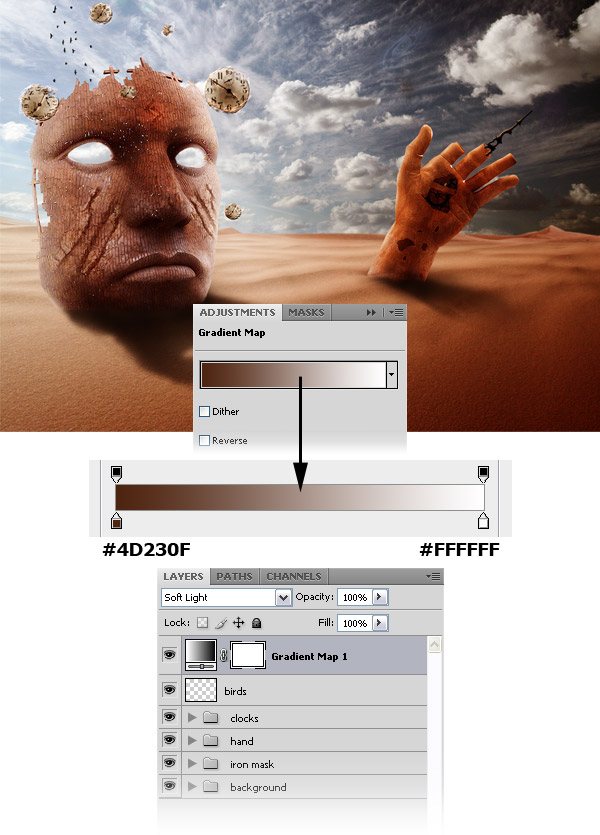
Step 29
Step 30
Step 31
Final Result
I hope you enjoyed this tutorial and that you learned something new. What we have obtained is a photo-manipulation with some ruins in the desert; the clocks, the gears and the clock needle make everything to gravitate around the time theme.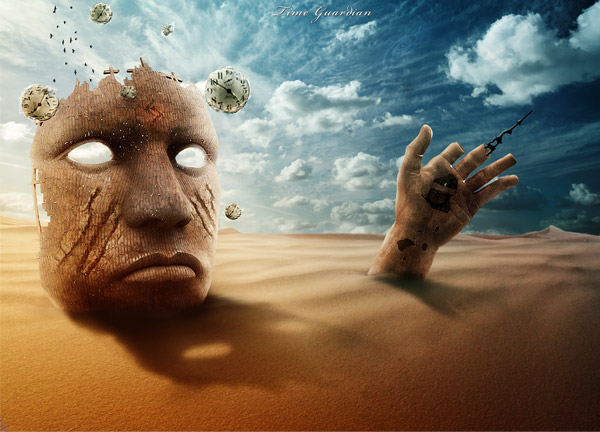
Author : Ciursa Ionut
Hello! My name is Tommy. Im a blogger, I love graphics design and now i went to Architechture Technical Senior High School. | Facebook |
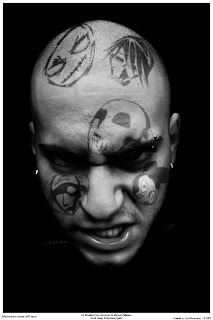
Next thing we need is a tattoo design. You can create your own but I am not only poor, I am lazy as well. Head over to gomedia.us and get your hands on their Vector Sample Pack (from the Freebie Section).
Step 1
Ok, open up your stock image and duplicate it by clicking on the layer and dragging it to the New Layer icon down the bottom (it’s the one to the left of the trash can). Name this layer Base, desaturate it (Ctrl+Shift+U) and duplicate it again. The reason I am doing this is that I like to have multiple stages of my base image, just in case I mess up, so that I can come back at any given time and fix errors.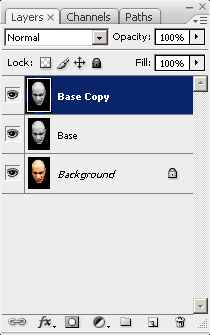
Step 2
Time to prepare our image. I really want to bring out the detail in the skin, so I am going to up the contrast and adjust the tones a little bit. Let’s add three adjustment layers: First, a Levels layer, then a Brightness/Contrast layer, and last a Curves layer. You can add each by going to Layer > New Adjustment Layer > Levels/Brightness/Curves depending on which you’re adding. Adjustment layers allow you to change the properties of the image below without actually destroying or changing image data.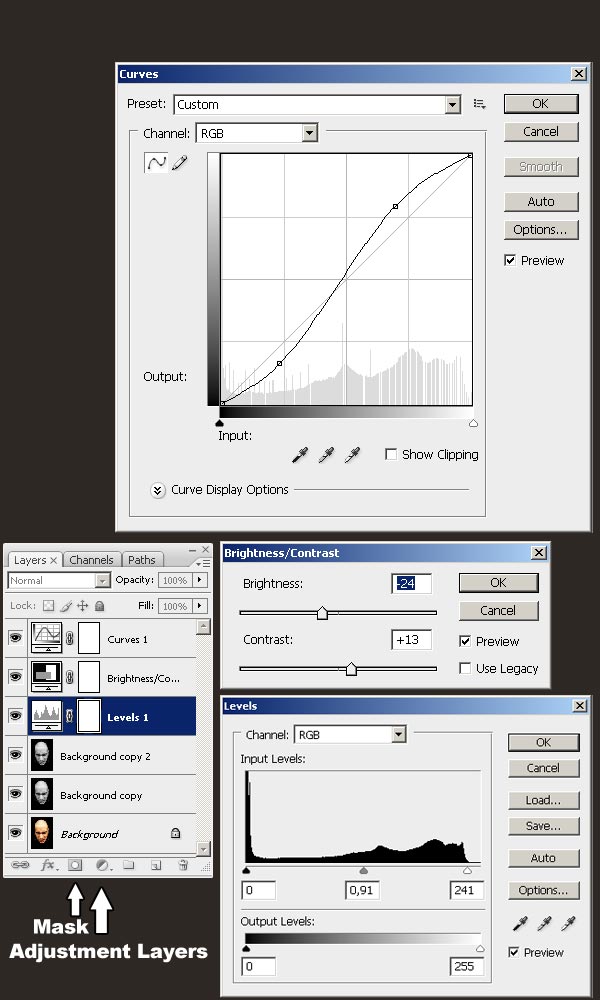
Step 3
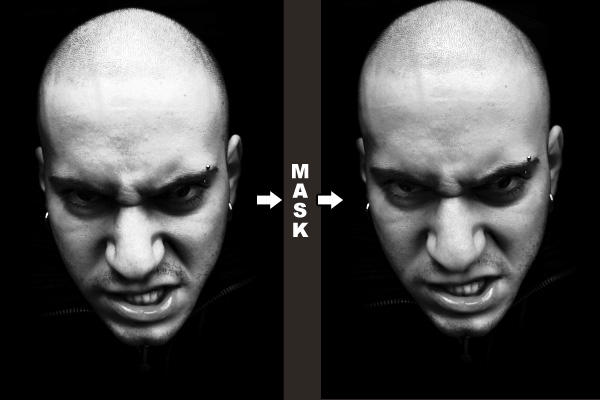
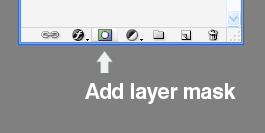
The well known ‘S-shape’ in the curves layer enhances contrast but may have a downside. As you can see, some parts of the stock are affected heavily by the light. These parts include the forehead and parts of the cheeks. The curves layer can make these parts too light and eliminate their detail. To solve this, you need to apply a layer mask to the curves layer and brush up those parts.You can do this by going to your layers palette, clicking on the curves layer, then down the bottom clicking on the button third from the left to add a Layer Mask. Once you’ve added a layer mask, you’ll see an extra mask clipped on to the layer. Click on that mask, and then using a softish brush gently paint black over the areas where you do not want the curves layer to show through. Remember that when you add a layer mask, white lets the layer show through and black hides it.
Step 4
I was not all too happy with what I had, so I decided to use the Burn Tool (O) to touch up the image manually. I used a large, soft brush and set the range to Shadows with an Exposure of 32% (shown)Now go to Layer>Flatten Image and save the file as Displacement.psd. DO NOT CLOSE THE FILE, as you will lose everything. Hit Ctrl+Z to undo the ‘Flatten Image’ command and now go to File > Save As and save the file as Tattoo.psd or any other name apart from Displacement.psd
We will be using the Displacement.psd file as a displacement map. Therefore we shouldn’t edit it any further, and any change we apply to our image from now on will be saved into the Tattoo.psd file. Ok, on to the fun part…

Step 5
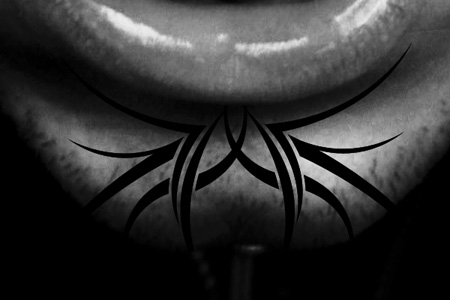
Now that we’ve finished prepping our image, we can finally start applying the tattoo. Open up your Gomedia free vectors file in Illustrator (preferably, but you can also open it in Photoshop). Copy and paste a design of your choice onto the face. Rotate it and adjust it accordingly, so that it fits more or less. Mask out any parts that should not appear to have a tattoo on them. In my case these are the lips. Rename the layer to ‘Tattoo’ so that you can find it easier. Close the vector eps file and do not save the changes. Here is how my design (tribals, set 3) looks applied.I masked out the top part so that it doesn’t go over the lips, and I got rid of the tips that stick out beyond the face.
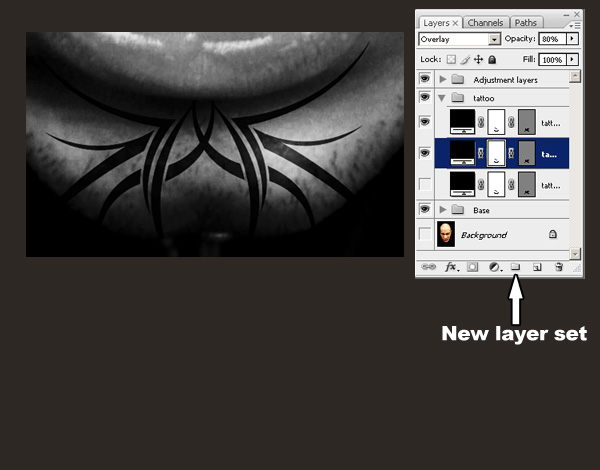
Step 6
Duplicate the shape layer twice. There now should be a ‘tattoo copy’ and ‘tattoo copy 2′. Set the ‘tattoo copy’ layer to Overlay at 80% Opacity. Set the ‘tattoo copy 2′ layer to Soft light at 64% Opacity. Hide the original ‘tattoo’ layer.For organizational purposes, I have created several layer sets and dropped my layers into those sets. You can create a layer set by clicking on the icon in your layers palette that is located between the ‘new adjustment layer’ icon and the ‘new layer’ icon. Using layer sets will smooth your workflow.
Step 7
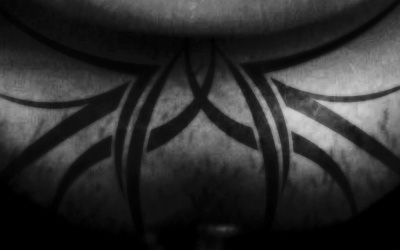
Rasterize your ‘tattoo copy’ layer by right-clicking on it in the layers palette and selecting Rasterize layer. This process will return the blending mode to Normal so we must set the blending mode back to Overlay and the Opacity back to 80%. Now go to Filter > Blur > Gaussian blur and blur the layer with a value of about 2.0 pixels.Next, this is where your creative mind steps in. You will have to mask away parts of both ‘copy’ layers until you have found a satisfying result regarding the opacity of the tattoo. I prefer to use a big brush and alter in between 10 and 20 percent opacity while brushing. Here is how my result looks:
Congratulations, you have just gone beyond the part that is covered in any other tutorial. You have created something that looks more or less real. But we are not done yet.
Step 8
We are almost there–time to apply our displacement map. Select your ‘tattoo copy’ layer and go to Filter > Distort > Displace. Leave the default settings and hit ok. A window will come up prompting for a psd file. Now navigate to your Displacement.psd file and select it. Select your ‘tattoo copy 2′ layer and hit Ctrl+F. This will repeat the filter for this layer giving you something similar to this: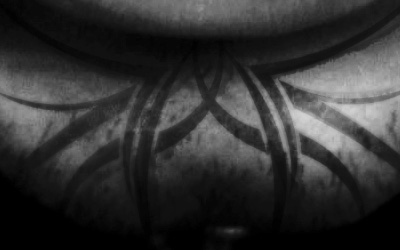
Well Done
Author : Arik
Hello! My name is Tommy. Im a blogger, I love graphics design and now i went to Architechture Technical Senior High School. | Facebook |
Tutorial Assets
The following assets were used during the production of this tutorial.- Ironing Board
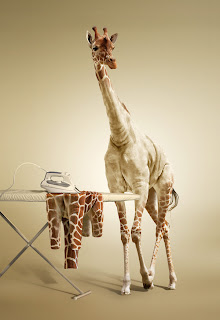
- Giraffe
Step 1
Let’s start by creating a new document in Adobe Photoshop. The size of document is 2200×3200 pixels at 72 px/inch of resolution. Start by filling the background with any color (white for example).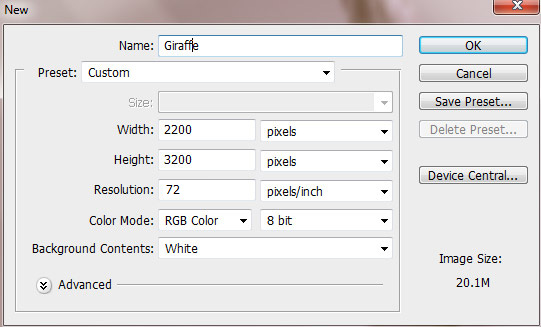
Step 2
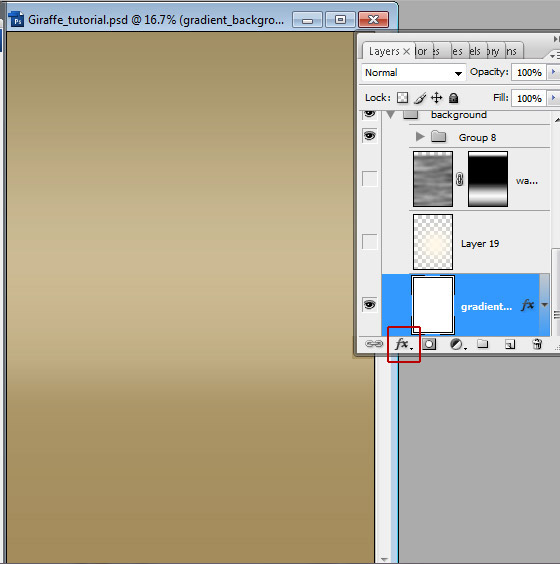
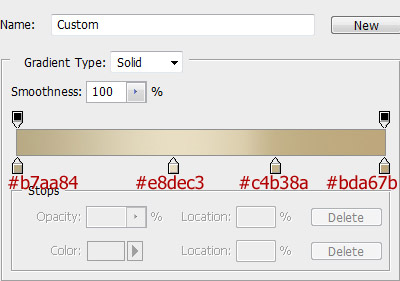
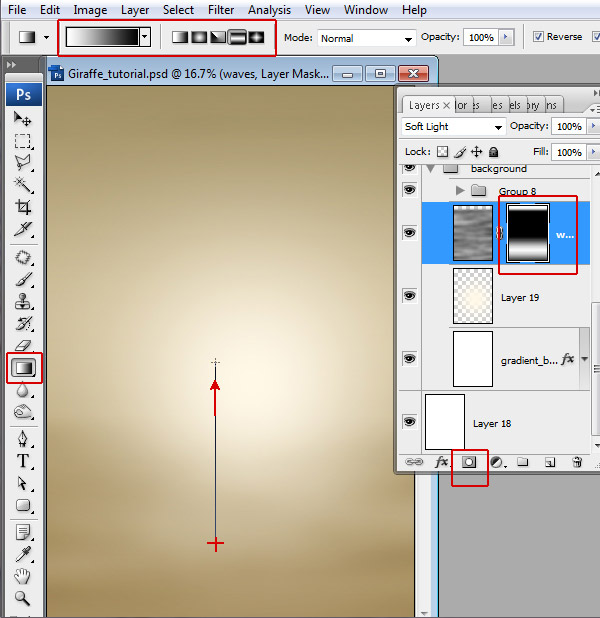
First of all let’s create a simple and plain background. You may crate your own more interesting and multi-layered background – old style wallpapers or may be savanna landscape.We will use gradients and filters. Unlock the "Background" – right click on background thumbnail and choose "Layer from background", click "Add a layer style" small icon


Step 3
Create a new empty layer above background layer – click "Create a new layer" icon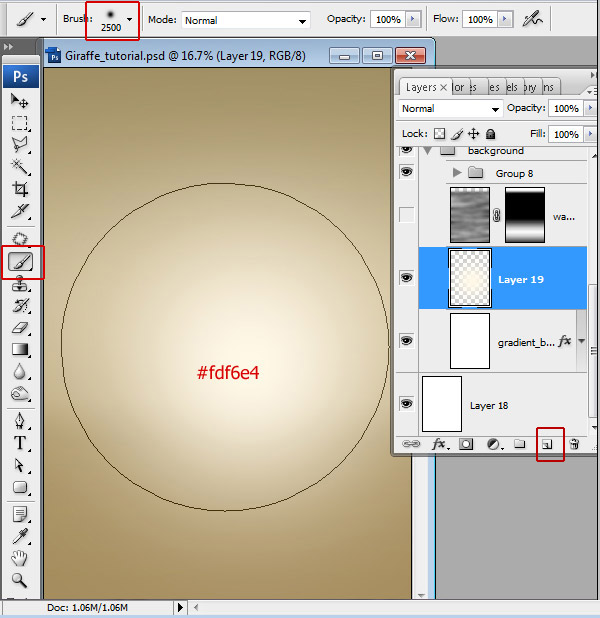
Step 4
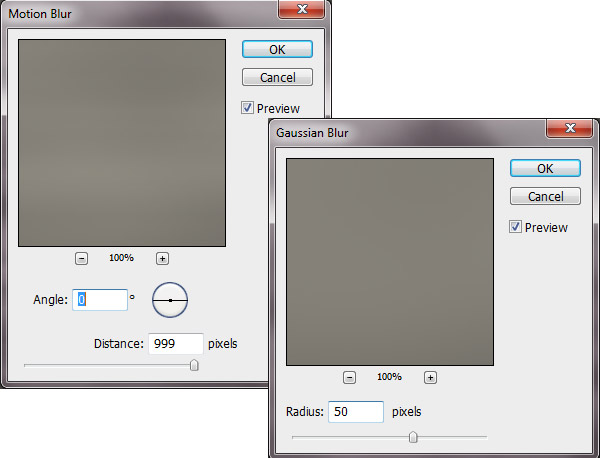
Create a new layer above light spot layer. Go to Menu > Filter > Render > Clouds.Choose Filters menu again and find Blur filter, apply Motion Blur and Gaussian Blur filters to clouds layer one by one. Add Layer Mask to blurred layer, click "Add Layer Mask" icon
Step 5
In order to create Vignette effect, choose Menu > Filter > Distort > Lens Correction > play with Vignette Amount & Midpoint settings.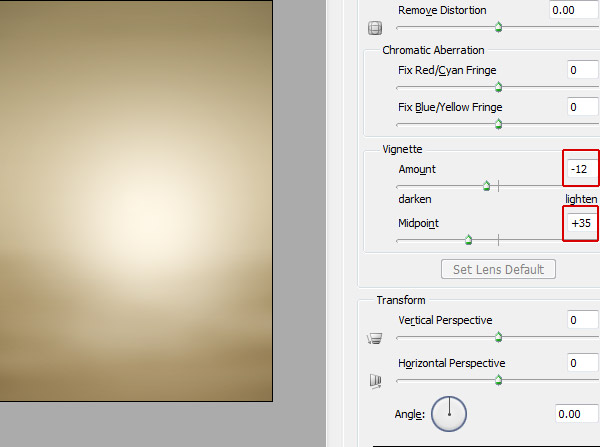
Step 6
Merge all created layers. Make lighter the right part of our background, the light source will be directed from right. Make active Quick Mask Mode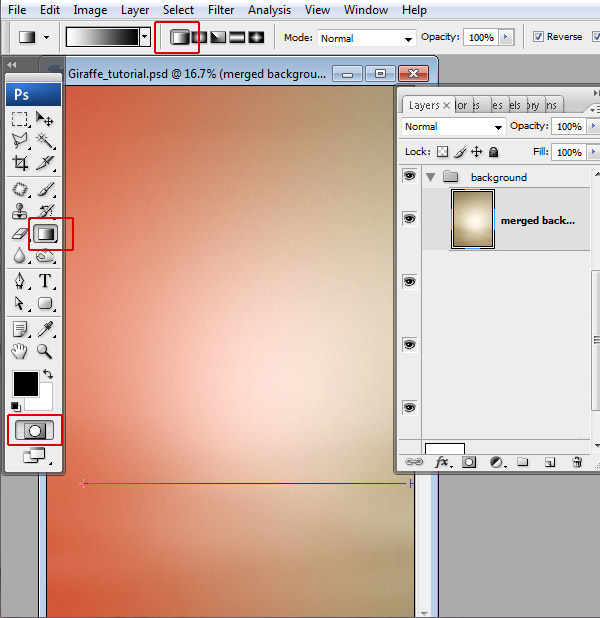
Step 7
You will have selected area like on the screen shot. Play with Levels settings. Menu > Image > Adjustments Levels, move gray marker left. You can add small noise effect, to the created background layer. Go to Menu > Filter > Noise > Add Noise > 4; Uniform.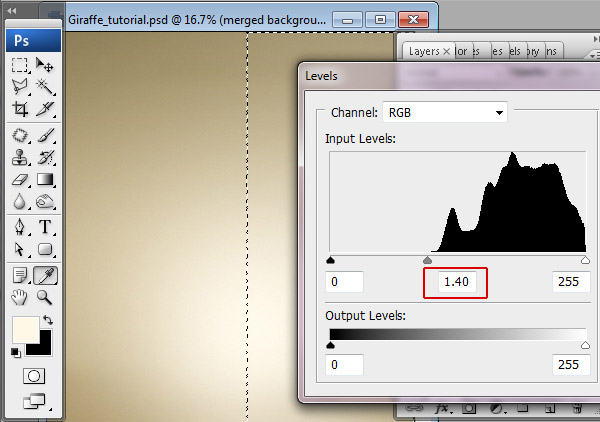
Step 8
Insert giraffe image. Menu > File > Place – choose giraffe .jpg file. In order to separate giraffe silhouette from background, choose Polygonal Lasso Tool. You may use other methods, but this one is pretty easy and convenient. Click in the giraffe silhouette area to set the starting point. Continue clicking to set endpoints for subsequent segments. To close the selection border click over the starting point.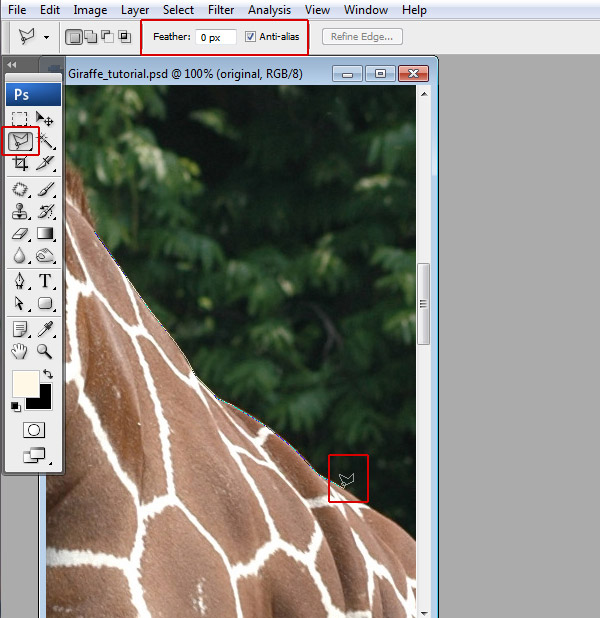
Step 9
Click Refine Edge to improve the quality of a selection’s edges.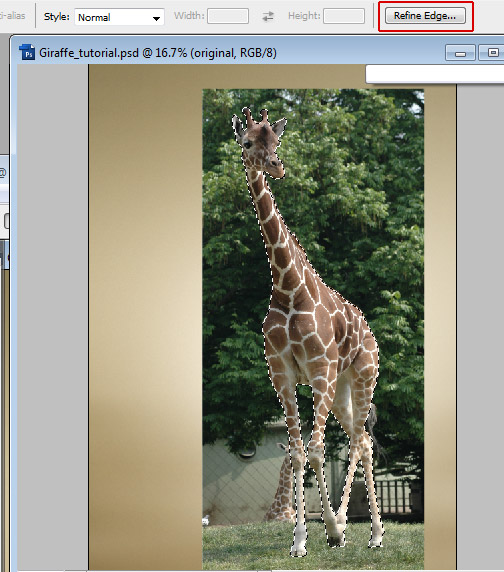
Step 10
Use following Refine Edge settings. Click "Ok" and inverse selection: Menu > Select > Inverse. Erase or clear selected background area (Menu > Edit > Clear).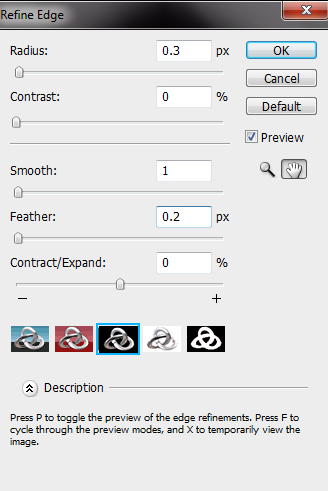
Step 11
In order to retouch and improve color balance of the Giraffe image choose Shadows /Highlights from Image > Adjustments menu. Apply following settings: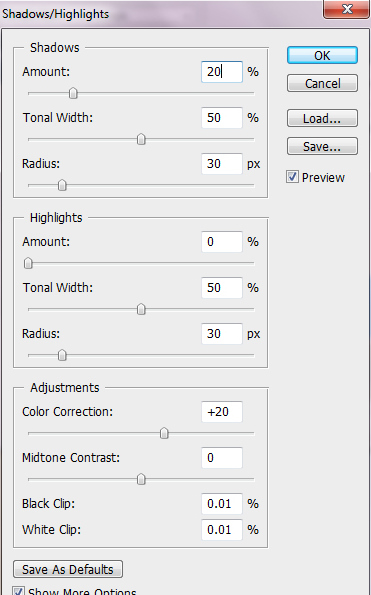
Step 12
Add the new adjustments layers above Giraffe layer- "Levels", "Color Balance", "Selective Color Options", click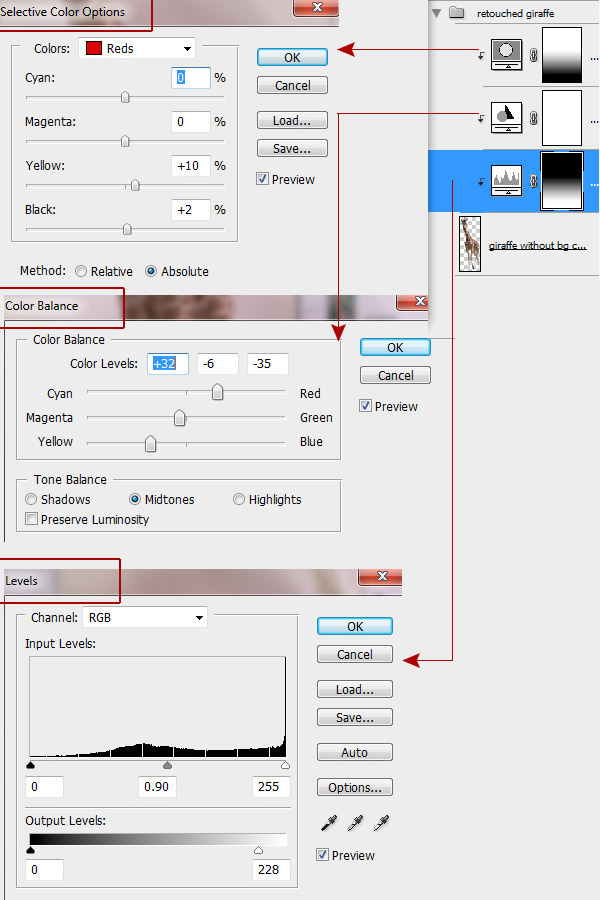
Step 13
Load selection for white stripes with Magic Wand Tool. It is not necessary to load selection for all white spots at once, you may do this work by portions. Go to Menu > Select > Modify > Expand (expand by 1px).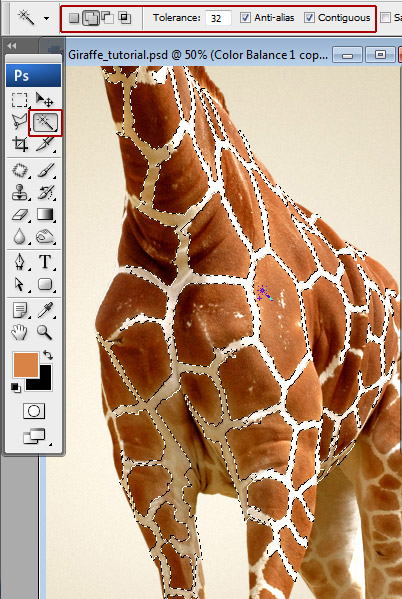
Step 14
Duplicate the retouched Giraffe layer and fill selected stripes with brown color in the duplicated layer, name it "Clean skin layer". The original retouched Giraffe layer will be needed in the future steps, be sure that the original layer is below duplicate). Use 0% hardness brush and hold down the "Alt" key to activate Eyedropper Tool and find right color next to each stripe.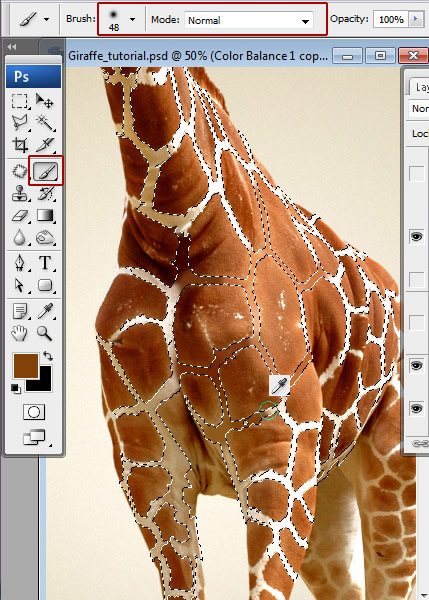
Step 15
You should have something like this and you may fill out white areas with color step by step. Brown color stripes will be helpful to create more accurate result.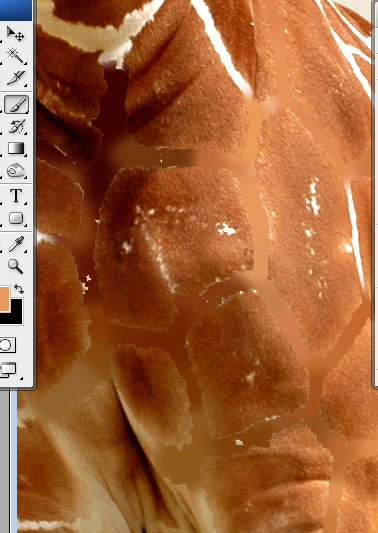
Step 16
To remove stripes traces, use Patch Tool. Drag the selection border to the clean and textured skin area. When you release the mouse button, the trace of the selected area is patched with the sampled pixels. Repeat these actions to mask all stripe traces.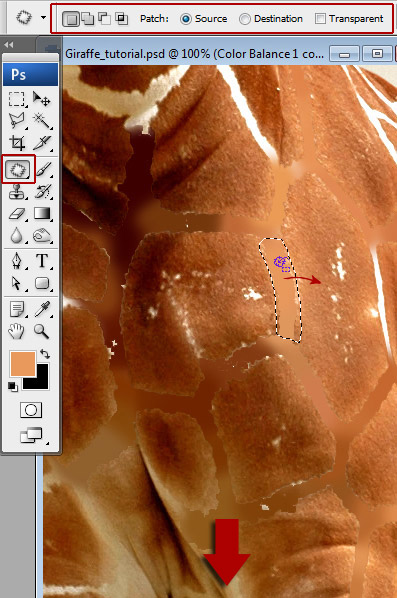
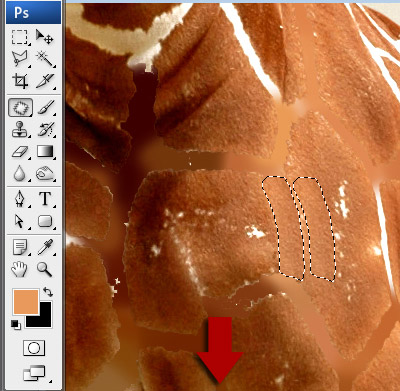
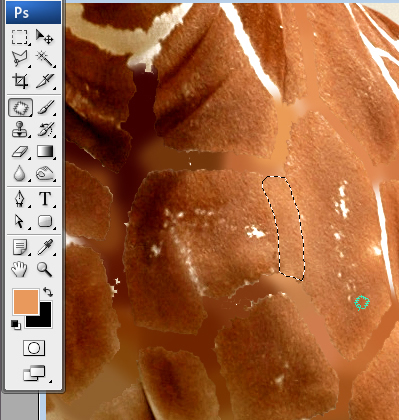
Step 17
You will have giraffe body without spots.
Step 18
Correct the "Clean skin" layer edges with smooth Eraser Tool to create blending effect between original (spotty) bottom layer and "Clean skin" layer.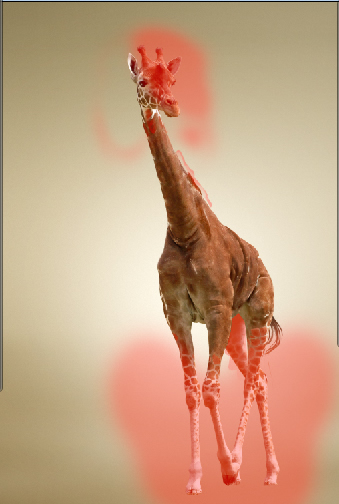
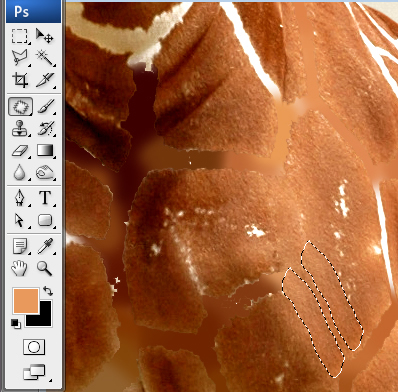
Step 19
Mask the small defects with Patch Tool and Spot Healing Brush Tool. Choose a brush size in the options bar. A brush that is slightly larger than the area you want to fix works best so that you can cover the entire area with one click.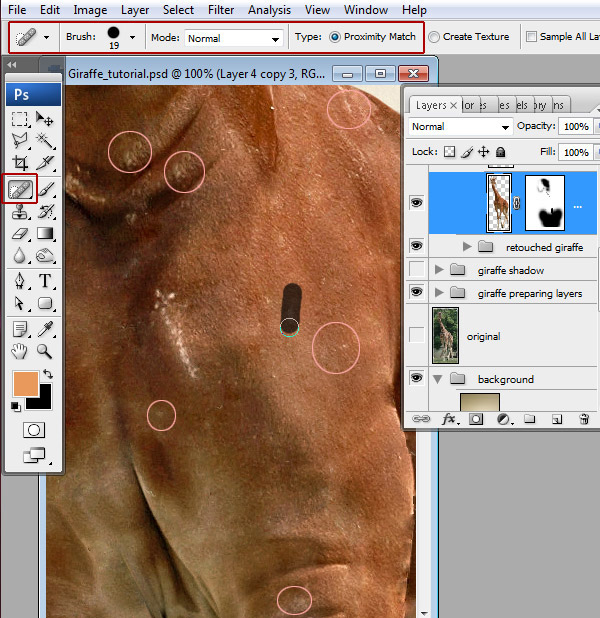
Step 20
Now we can change skin color and levels balance. Add "Gradient Map", "Levels" and "Black and White" adjustment layers and create Clipping Mask for "Clean skin" layer. Apply following settings.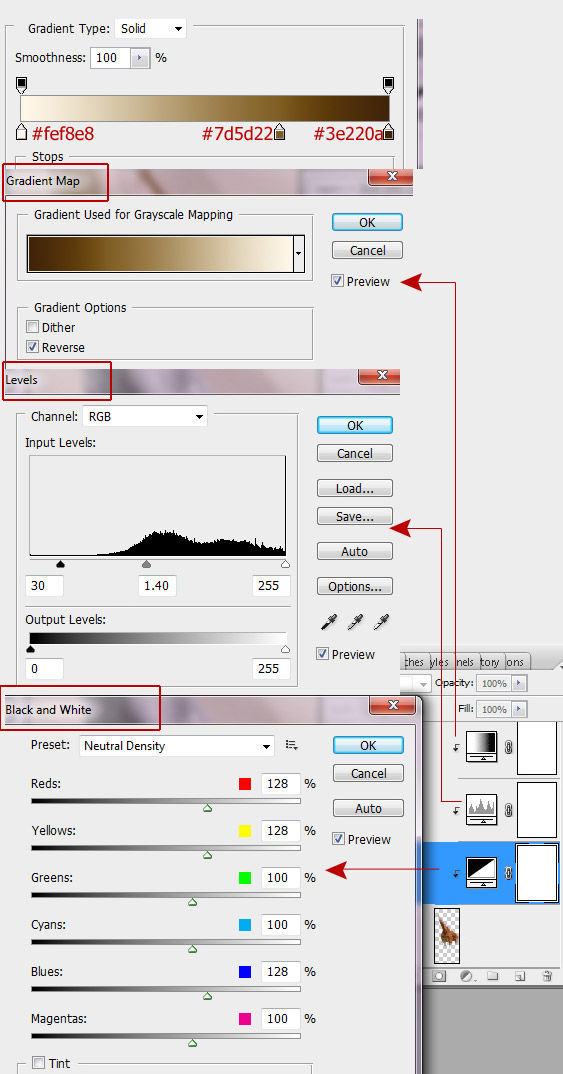
Step 21
Insert Ironing Board image, it doesn’t require any changes and adjustments.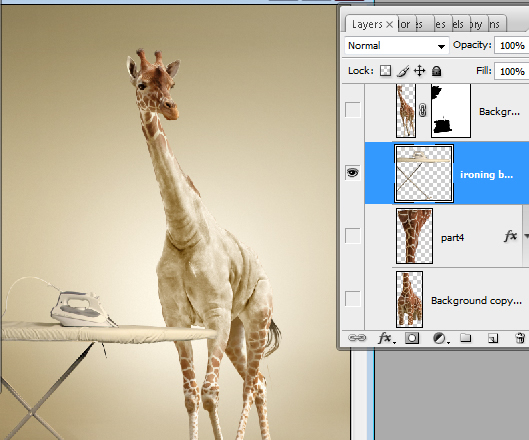
Step 22
Return to the retouched Giraffe layer and duplicate it once again. We will make Giraffe’s jacket using a new copy. Erase head and legs area.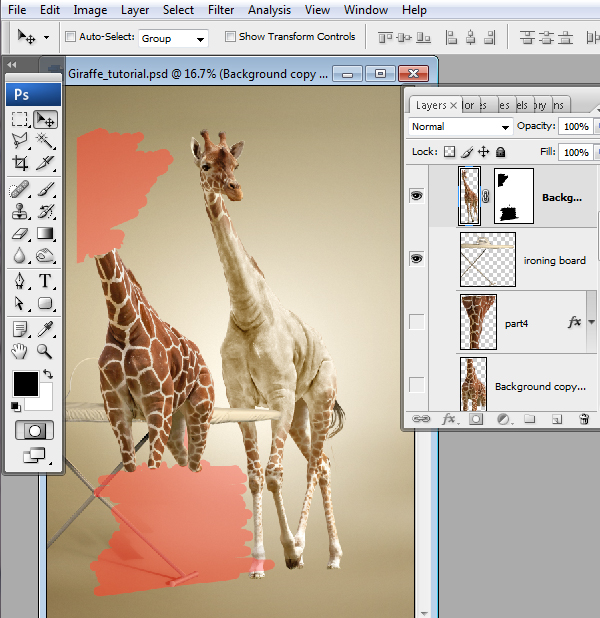
Step 23
This is a shape for our future jacket.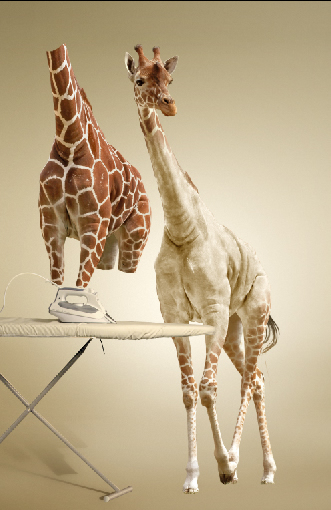
Step 24
Correct the shape of the spotty jacket using Warp Transformation. Make a shape flatter. Go to Edit > Transform >Warp.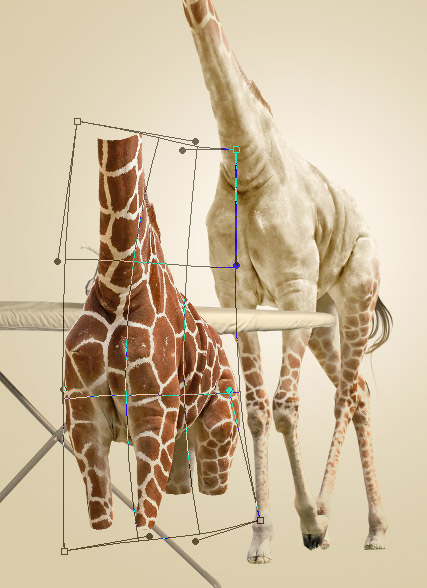
Step 25
Liquify filter from Filters menu will help you to create flat shape effect. Use large Forward Warp Tool to correct large areas and smaller Warp Tool size to work with parts such as legs or skin wrinkles.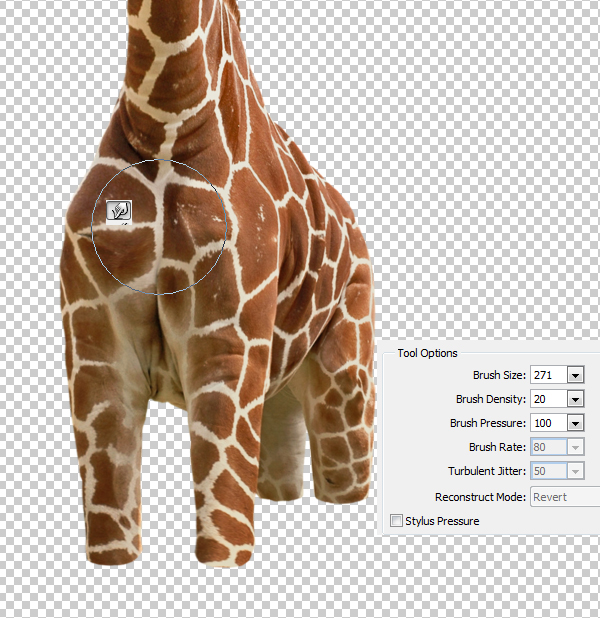

Step 26
Now we have flatter shape for the jacket.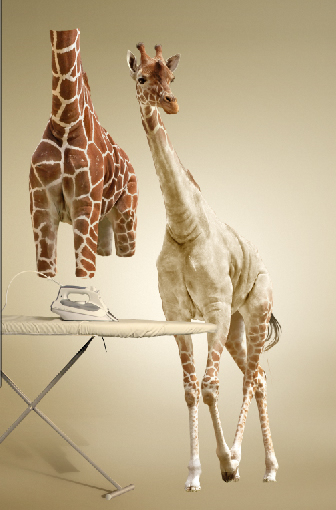
Step 27
Apply Free transformation to jacket shape, make it smaller and little bit stretched by horizontal.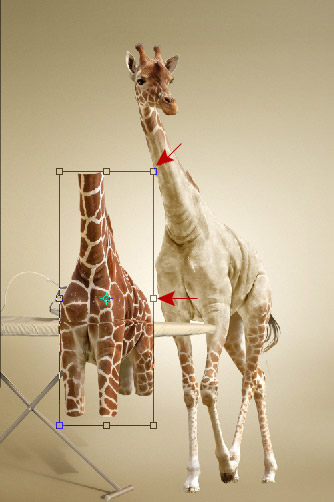
Step 28
Select top part (above ironing board bottom edge) of the spotty jacket, cut out this part and paste it into a new layer. Stretch it by vertical using Free Transformation like on the example below.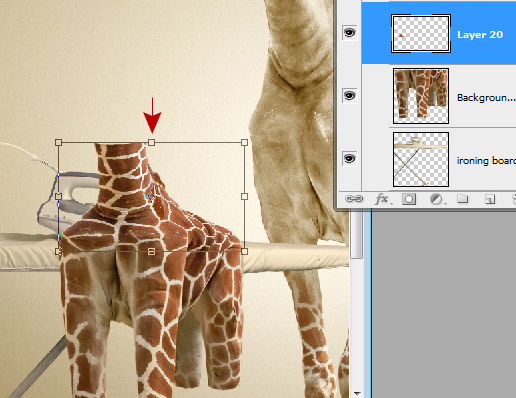
Step 29
Apply Perspective Transformation to the top edge, Menu > Edit > Transform > Perspective.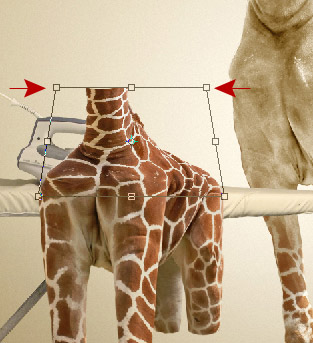
Step 30
Keep active modified top part of jacket layer. Cut out top part again (above ironing board top edge), just leave stripe above trouser-legs ("Layer 20" on the screen shot below). Stretch top part by vertical again.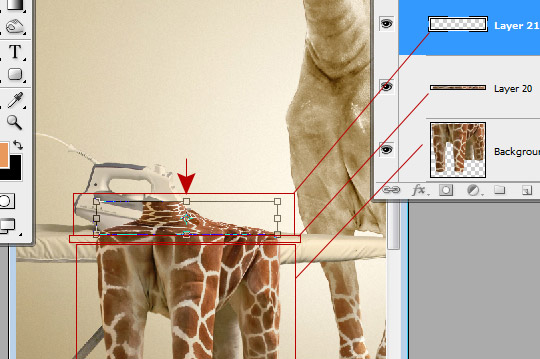
Step 31
Apply Perspective transformation.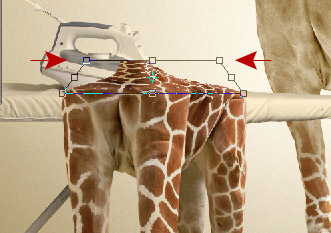
Step 32
Make active top layer of the jacket layers. Erase iron and area above ironing board. Try to imitate skin wrinkles shape.

Step 33
Draw white line with Line Tool in a new layer above giraffe jacket, use weight around 13 px and apply Gaussian Blur Filter (R=10px).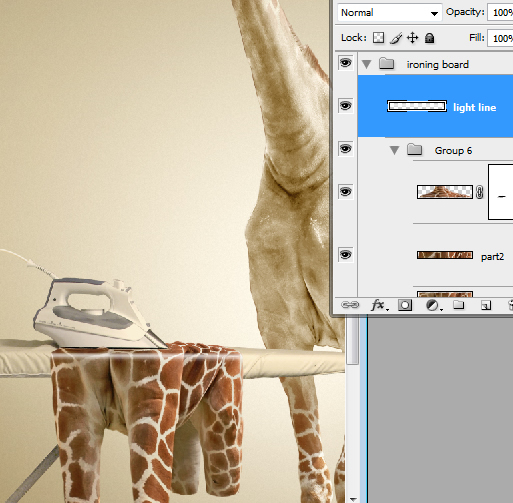
Step 34
Change Blending Mode for this layer on "Overlay".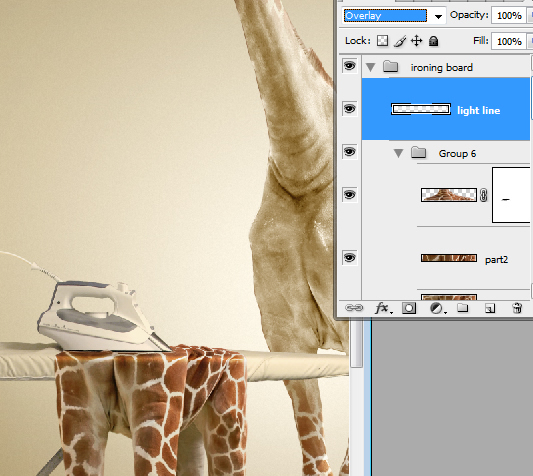
Step 35
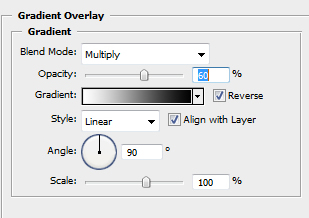
Copy neck area from the original retouched Giraffe layer. Paste it into a new layer below ironing board layer. Apply flip Vertical transformation to this shape and Gradient Overlay layer style effect with settings like on the screen shot below.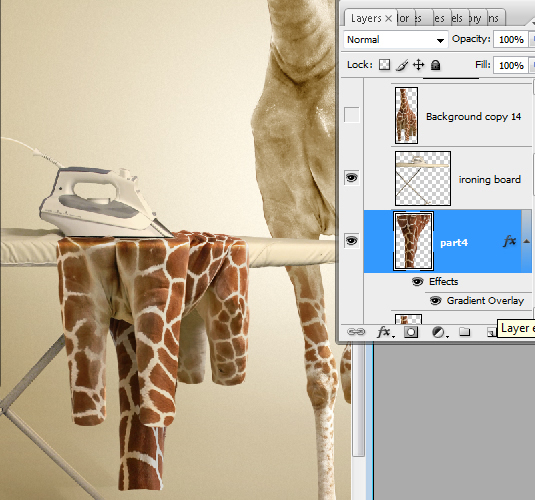
Step 36
The final part of our work is creating the drop shadow effect for Giraffe and Ironing board. Load selection for Giraffe shape (Command/Ctrl + click Giraffe layer thumbnail). Create a new layer below of the all visible giraffe layers. Fill selection with any color.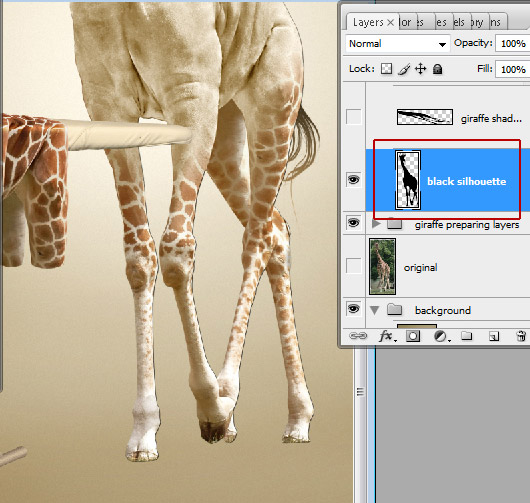
Step 37
Apply Distort transformation to created shape. Edit > Transform > Distort. Move top edge and left bottom corner left and down. Try to combine drop shadow and legs in same points. Correct central legs shadow with Eraser Tool.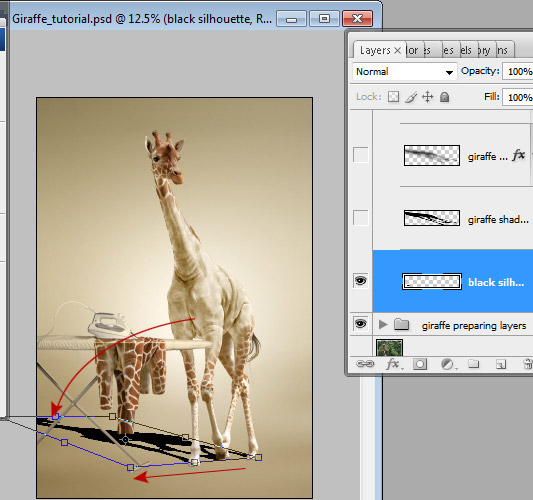
Step 38
This is result of our transformation.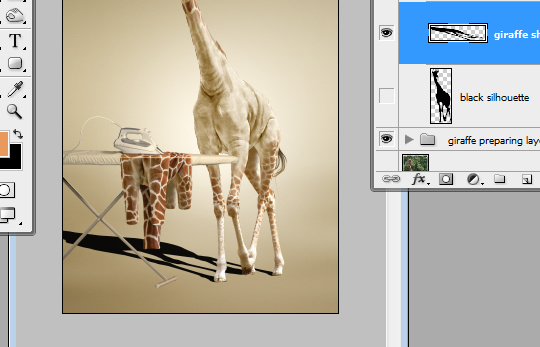
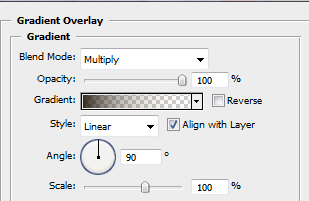
Step 39
Set Fill parameter 0% and Opacity around 20% for the shadow layer. Apply Gradient Overlay layer style effect. Make active Quick mask Mode, fill layer with linear gradient like on the example below.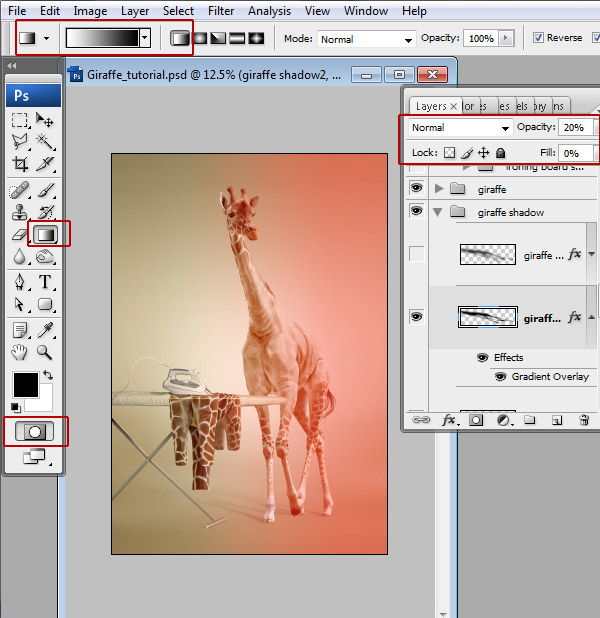
Step 40
Click Quick Mask icon and apply Gaussian Blur to the selected area of the shadow layer.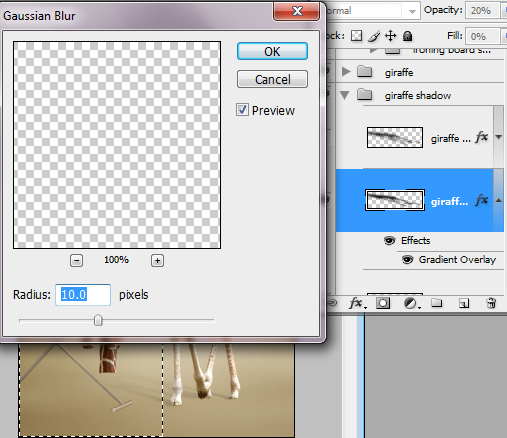
Step 41
Duplicate shadow layer and apply Gaussian Blur filter with radius = 50 px and change Opacity to 70-75%.
Step 42
Create shadow effect for the ironing board using the same method. Load selection for ironing board and jacket, Apply Fill = 0%, Gradient Overlay effect with the same parameters. Apply Blurring 10 px and duplicate shadow layer with Opacity 75% and More Blurring.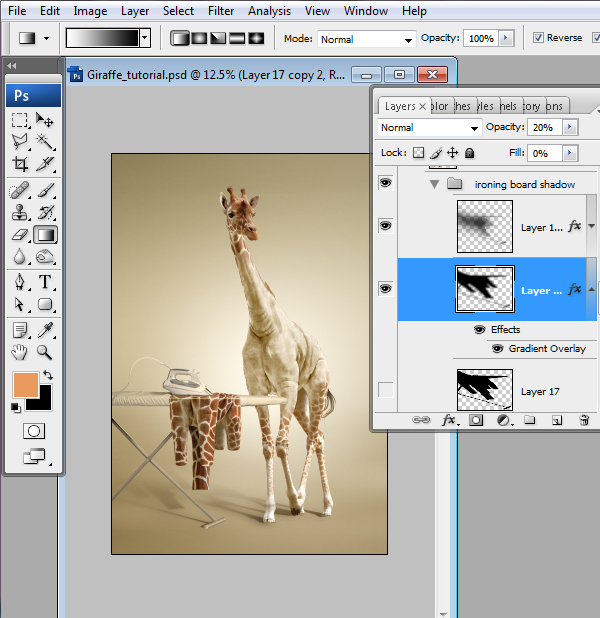
Final Image

Author : Alexandra Formicheva
Hello! My name is Tommy. Im a blogger, I love graphics design and now i went to Architechture Technical Senior High School. | Facebook |
Subscribe to:
Posts (Atom)


- Follow Us on Twitter!
- "Join Us on Facebook!
- RSS
Contact