
To complete this tutorial, you will need the following stock:
Font
Step 1
Create a new document (sized doesn’t really matter here), fill the background layer with the gradients shown below: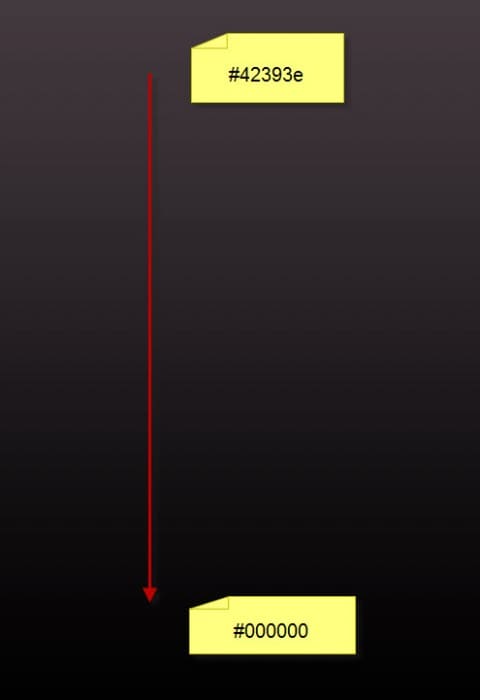
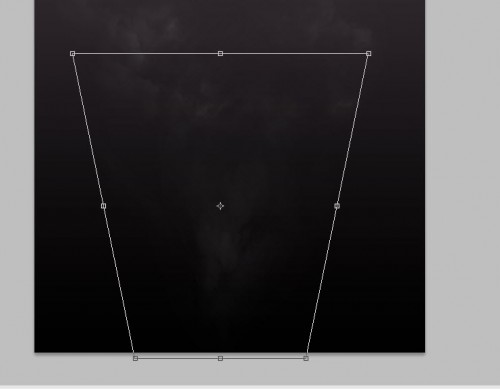
Create a new layer on top of the background layer, either paint or render some cloud on the center and bottom – this acts as the foundation of the text effect:
Hint: don’t paint or render too much cloud, a subtle effect will do.

You can use the perspective option via Ctrl + T (right-click) for the cloud on th
e bottom to adjust its shape:
Step 2
Use the font we downloaded, type some text to the center of the canvas: (I used a yellowish colour)
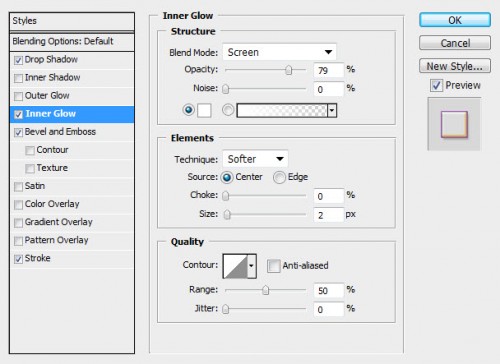
Apply the following layer blending options to this text:
Drop Shadow

Inner Glow
Bevel and Emboss

Stroke

and you will have the following effect:

Duplicate this text layer twice and move each duplicated layer towards the top left a little, reduce their layer opacity to 15% and 40% respectively – this creates a layered text effect:

Step 3
Now let’s get to create the stripe brush :) Create a new document with the same size as our text document, add a new layer on top of the background layer.Choose the slice tool from the toolbox:

Right-click on the canvas with the slice tool selected, choose “divide slice … “:

Tick the “Divide vertically into” box and enter “10″ into the textbox, click on “OK”:

Then use the rectangular marquee tool to draw selection for every second slice: (make sure you hold down “shift” key for multiple selection)

Fill the selection with black colour:

and you will have the following effect:
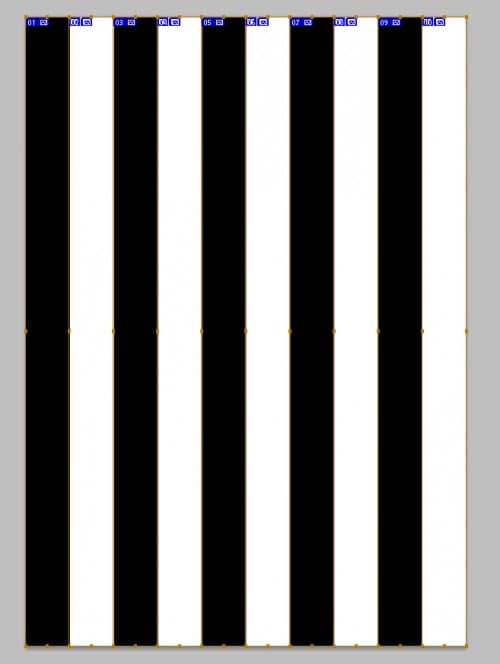
Turn off the background, and go to Edit > Define Brush Preset and define a vertical stripe brush set:
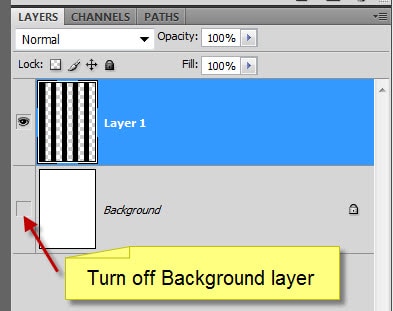
Now we can also rotate this stripe layer a bit and define another brush set:

Then we can use it to paint some stripe pattern on top of the text: (make sure you reduce the brush flow and opacity to be both around 30%)

Step 4
Now let’s create a base for this text effect. Create a new layer under the text layer and use the vertical stripe brush to paint the following pattern:
Go to Filter > Distort > Twirl and apply the following settings:
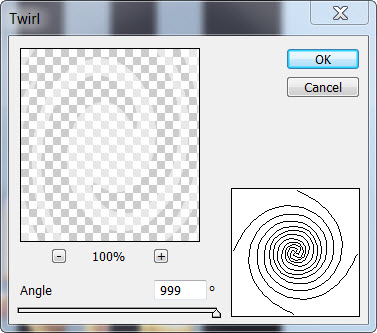
Hit Ctrl + F and re-apply the twirl filter, you will have the following effect:

Use the Free Transform tool to compress it down, and reduce the layer opacity to around 30%, then use a soft eraser to remove its edges. You will have the following effect:

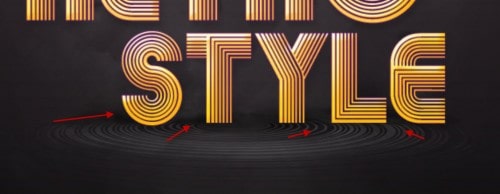
Create a layer on top of the base layer, use a soft black brush to gently paint some shadow under the text:
Step 5
Now let’s create another abstract pattern with the stripe brush we created. Create a new layer and make a selection with elliptical tool, grab the vertical stripe brush (reduce brush tip size) and paint inside the selection: (Make sure you set the brush opacity to 50%)
Then duplicate this layer once, rotate the duplicated layer 90 degree CW:

Merge the two layers, you will have the following effect:

Then we can use the warp tool to manipulate its shape, as shown below:

Once you finish the warping, duplicate this pattern layer a few times and resize each of them, scatter them around the canvas as shown below:
Hint: make sure you adjust the layer opacity, or use a soft eraser with 50% flow and opacity to remove some part of the pattern, in order to create more depth for the image.

Step 6
OK we’re almost done! For the final touches, I added a new layer on top of all previous layer and use a small soft white brush, and painted some shining dots around the text, as shown below:
I also created another new layer on top and set its blending mode to “overlay”, use a soft white brush to paint around the edges of the text to add a glowing effect:

I added some more colours to the text, as well as using the Lens Flare filter to further highlight certain parts of the text:


If you wish to find out how to apply this Lens Flare filter to the text, check out this tutorial here on psdvault.com.
I also added some particle effect around the text, and here is my final effect for this tut: (click to enlarge)

That’s it for this tutorial! Hope you enjoy this tutorial and find it useful! Till next time, have a great day!
Source : PSDVault.com
Hello! My name is Tommy. Im a blogger, I love graphics design and now i went to Architechture Technical Senior High School. | Facebook |
Subscribe to:
Post Comments (Atom)


0 comments:
Post a Comment