Tutorial for Lightning Effect
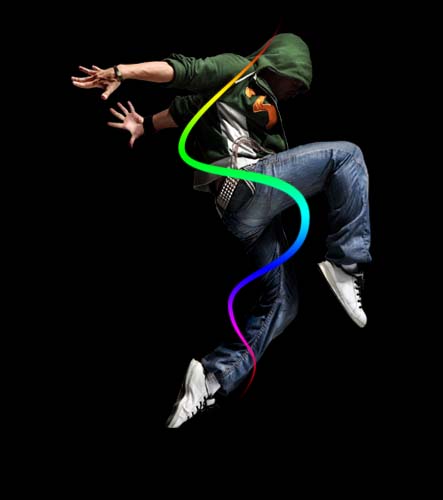
Final view

Step 1:
Create New File.
Paint The background with Black color.

Step 2:
Add your image/object on at center .

Step 3:
Now Make a new layer by pressing Ctrl+Shft+N. Name the layer (layer1).
Now Make a new layer by pressing Ctrl+Shft+N. Name the layer (layer1).
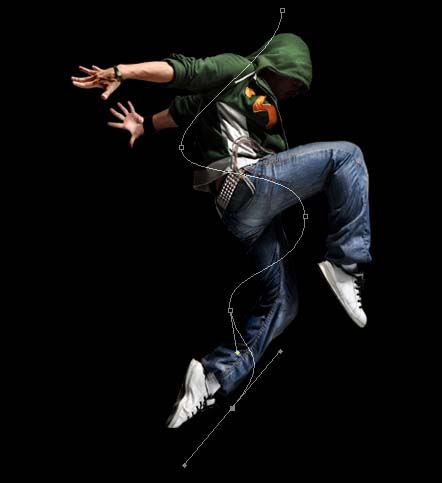
Take the Pen Tool and create a Path around the objectivr or image.
Note : Before selecting Pen Tool Select Brush tool and set the radius of normal brush to 9px and the color to white.

Step 3:
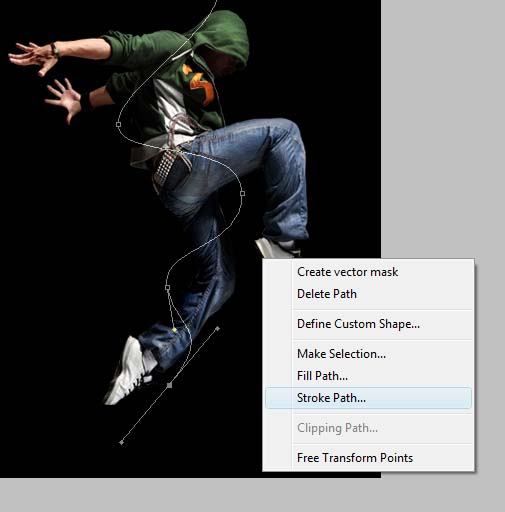
Now right click on the image and select Stroke Path.
Note : Before selecting Pen Tool Select Brush tool and set the radius of normal brush to 9px and the color to white.
(Pen Tool)
Step 3:
Now right click on the image and select Stroke Path.
Select Brush for stroke as shown below.
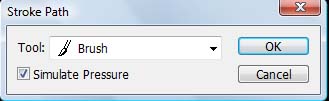
Note : This will take 9px brush and white color as we set earlier..
Press ok.
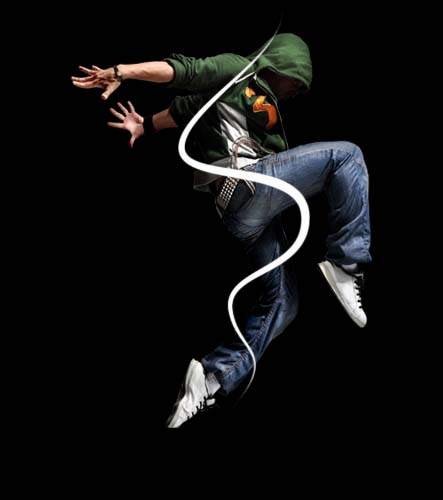
You will get the white stroke around your path.
Step 4:
Now make Duplicate layer of this Layer1 by pressing Ctrl+j (copy of layer1) and hide this layer.
Now select Layer1 and Goto Blending Options ---> Gradient Overlay ---> Select rainbow colors(R,Y,G,SB,V,P,R) and click ok.
Step 5:
Now go to Filter ---> Gaussian blur
Set the radius to "4 to 4.2". press OK. and make the hidden(Layer1 copy) layer visible.

Step 6:
Now select "Layer1 copy" layer.
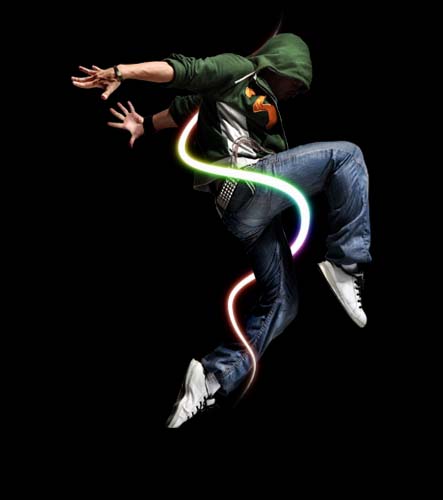
Go to Blending Options ---> Outer Glow ---> set the Blend Mode to "Color Dodge".
Go to Blending Options ---> Outer Glow ---> set the Blend Mode to "Color Dodge".
Set Opacity to 50%.
Set size to 20px.

Step 7:
Now Merge bote Path layers (Layer1 + Layer1 copy).
select Eraser tool and erase the the area of path.
Now You can create one more path like this..
Note : Make New layer While Creating another path. so that it doesnt affect on old one..

Subscribe to:
Post Comments (Atom)


0 comments:
Post a Comment