Tutorial Resources
- Water Background – knightfall-stock
- Model– xstockx
- Skull – christasvengel-stock
- Texture – shadeybabey
- Webs – redheadstock
- Skull 2 – fantasystock
Step 1- Choose the Model.
This Picture is great to create this type of manipulation, because the model’s make up help a lot.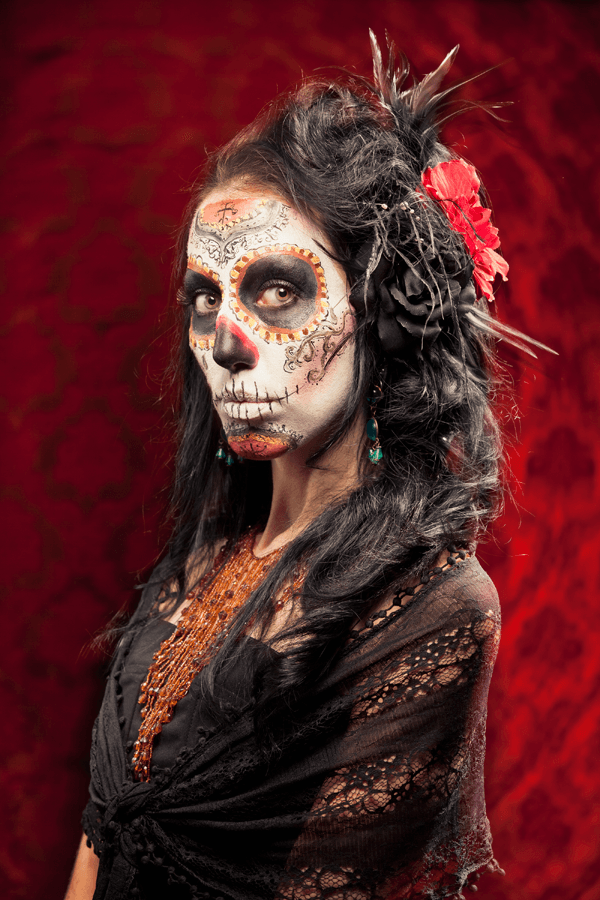
Step 2 – Change the size.
To do this go to Image -> Image size. Or Press (Alt+Ctrl +I). Resize the image to: Width:837 X Height: 1300 pixels and press ok.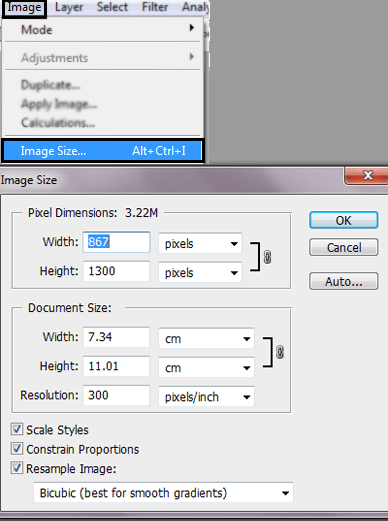
Step 3- Select the Model.
Use the Lasso tool to Select the model.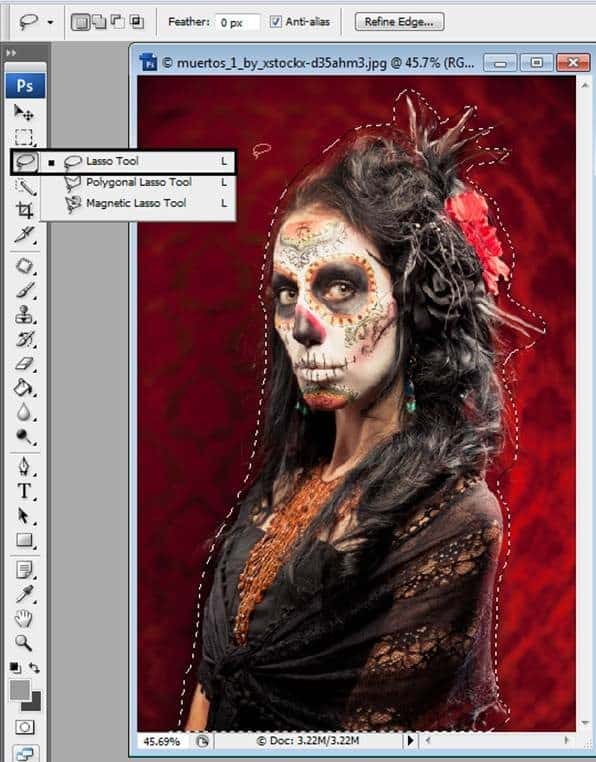
Step 4- Duplicate a Layer
To duplicate that selection press Ctrl + J. Also you can give a right click in the selection and press the option Layer via copy.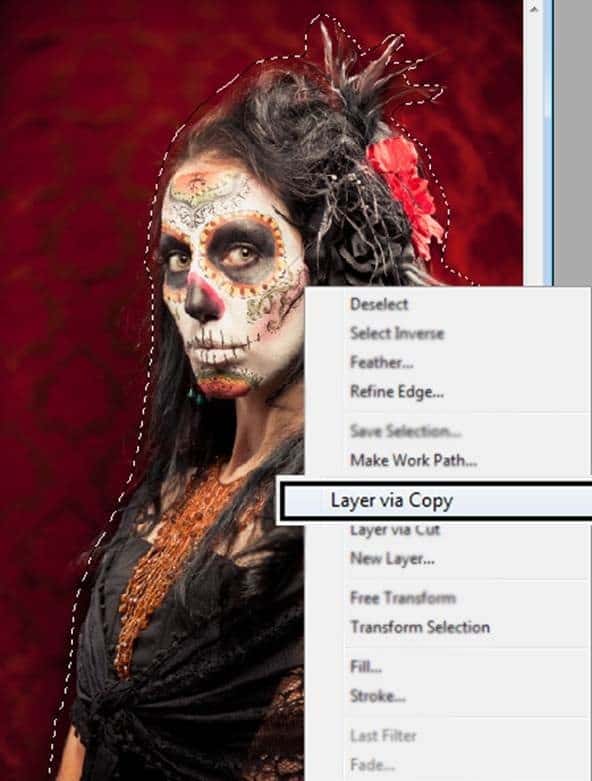
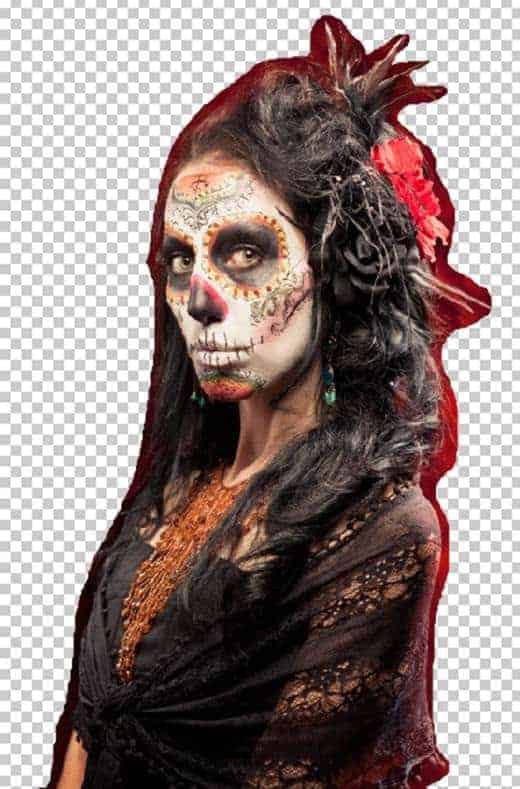
Step 5 – Less Saturation
Duplicate the layer once again (Ctrl + J). In this layer reduce the Saturation (Ctrl + U) option Saturation: -100.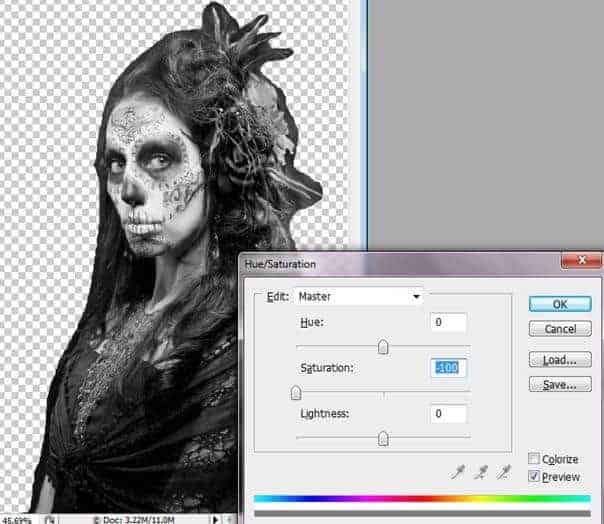
Step 6- Set the layer blend mode in Soft light.
To get more contrast use the layer in soft light mode with and reduce the opacity by: -50.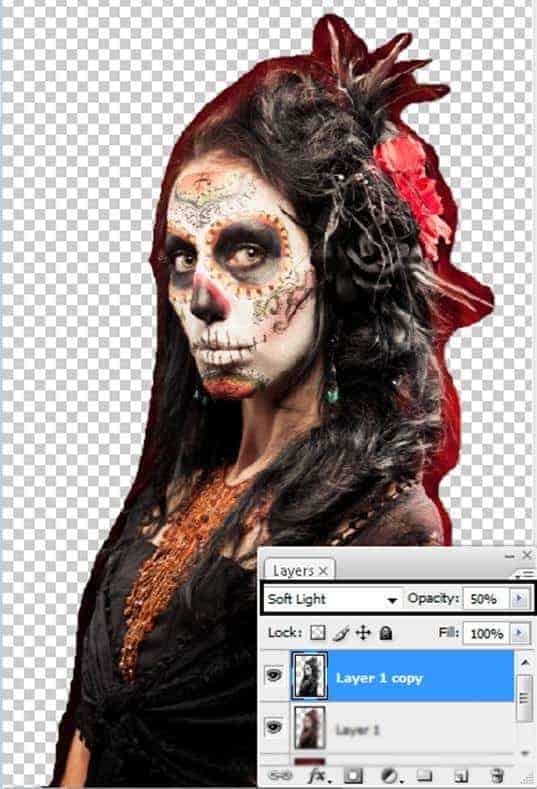
Step 7- The Skin
Use the Lasso tool to select the model’s skin and duplicate the layer (Ctrl +J).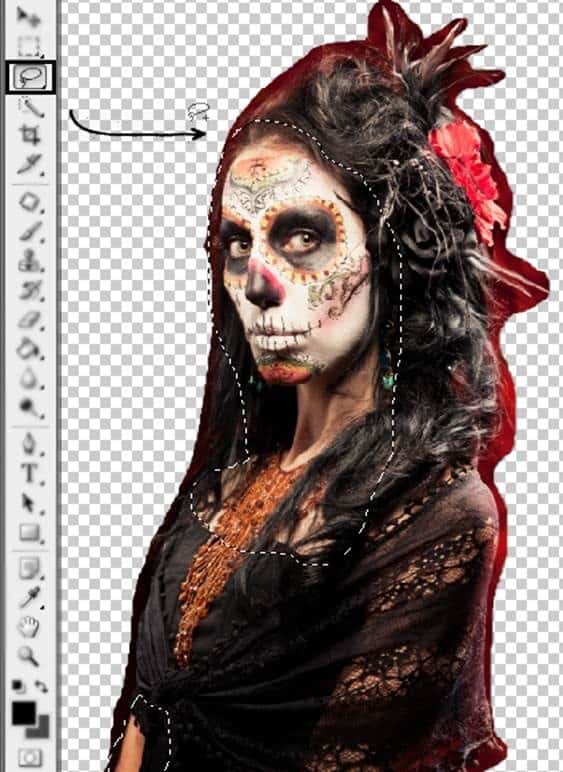
Step 8- Reduce the Saturation
Press Ctrl + U. Or go to Image -> Adjustments -> Hue/ Saturation. In the option Saturation reduce at -50.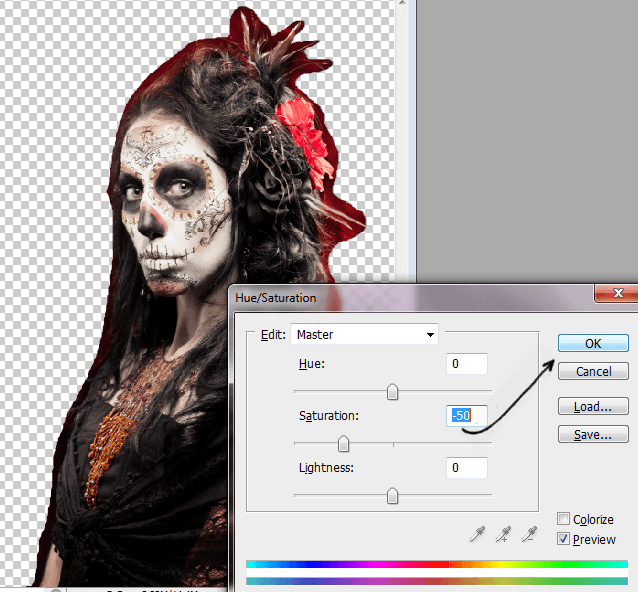
Step 9- Multiply
Duplicate once again the model’s layer, but the one you desaturate earlier(Ctrl+J). And change the mode to Multiply.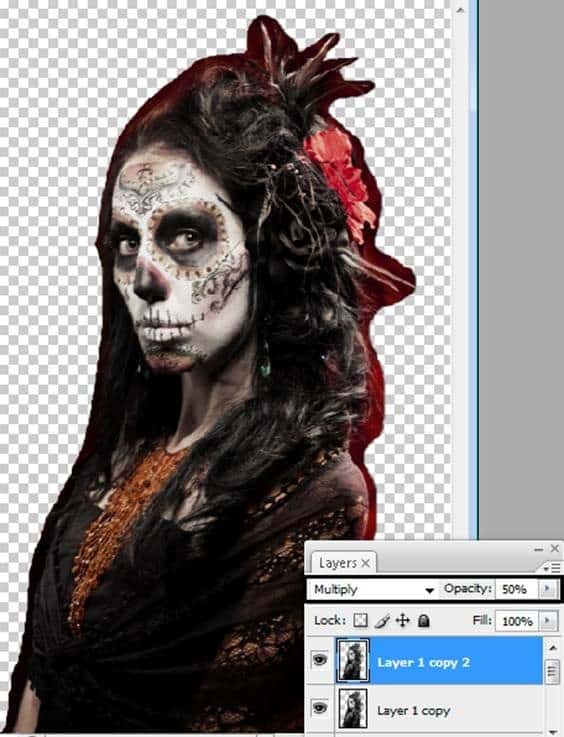
Step 10- Blending the layers.
Now you need to blend this three layer together. With the right click underneath the layer choose the option “Merge Down.” Do this also with the multiply layer. At the end you will have just one layer.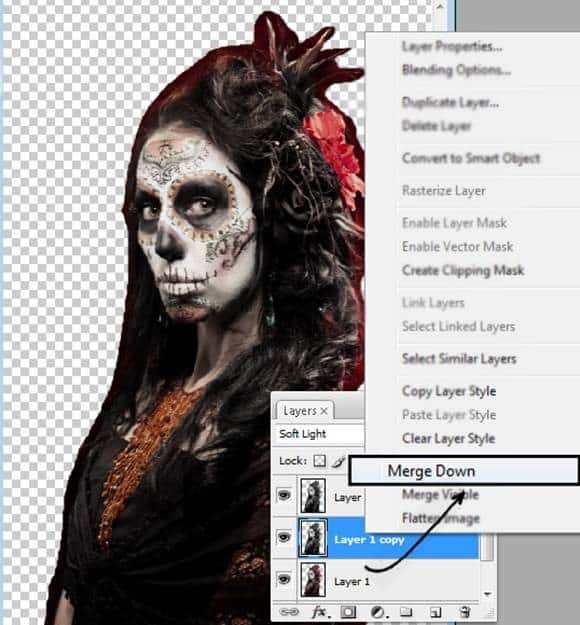
Step 11- Using eraser at the edges.
Pass the eraser tool in the model’s outline, to get a softer look at the edges.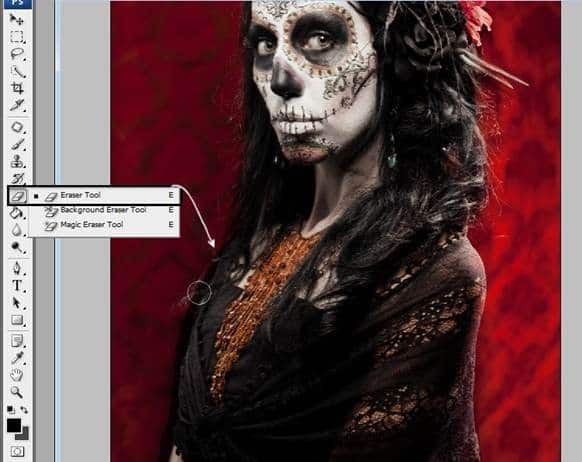
Step 12- Skull
Open the skull layer and put over the model’s face.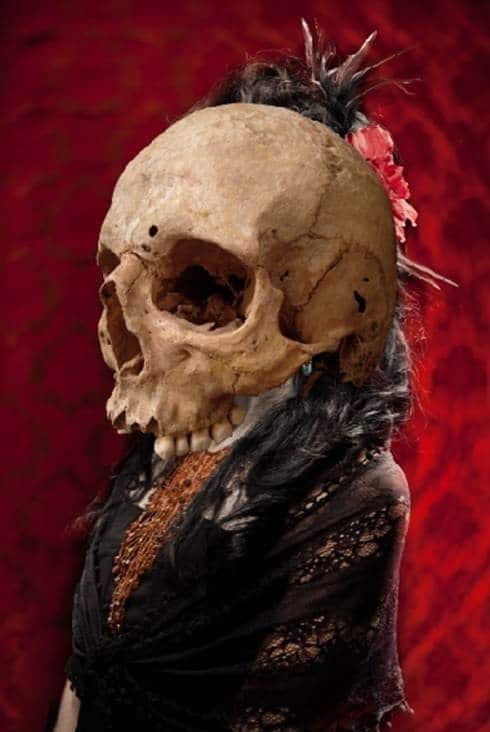
Step 13- Reduce the size of the skull
Press Ctrl+T and reduce the skull size ultil it fits with the model.You can reduce the opaticy to see through the skull layer.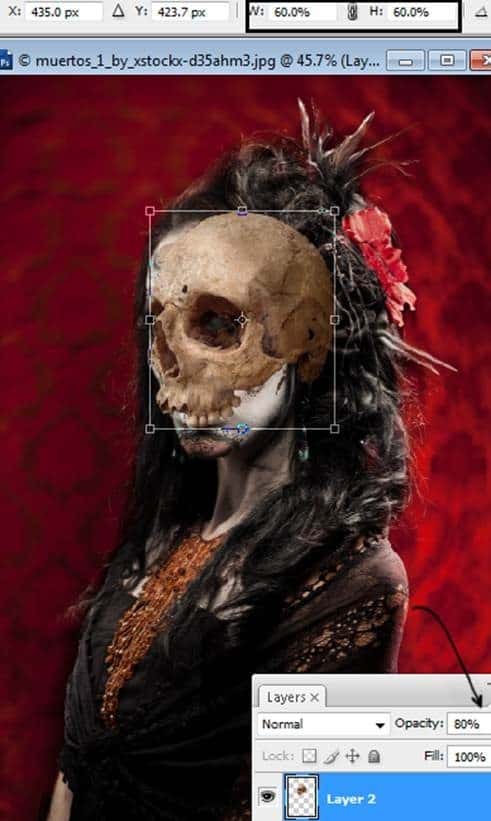
Step 14- erase the parts you don’t need
Leave just the “eye” of the skull, erase the rest with the eraser tool.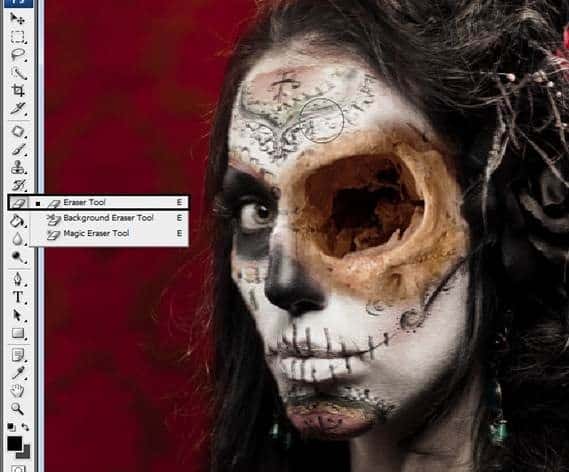
Step 15- making the other eye.
Duplicate the layer (Ctrl+J) to make the other eye, and change the size (Ctrl+T)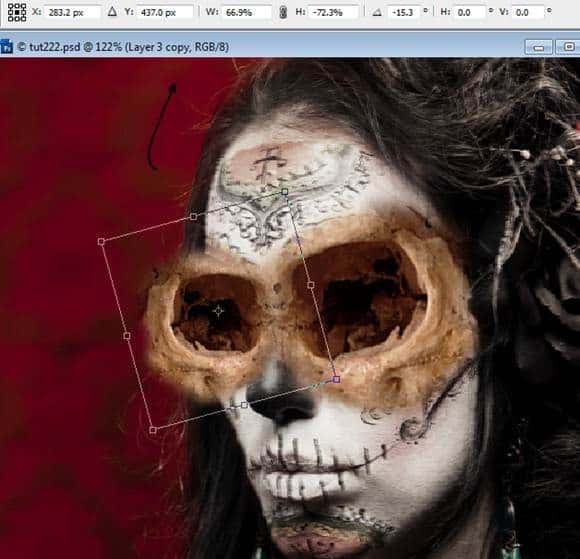
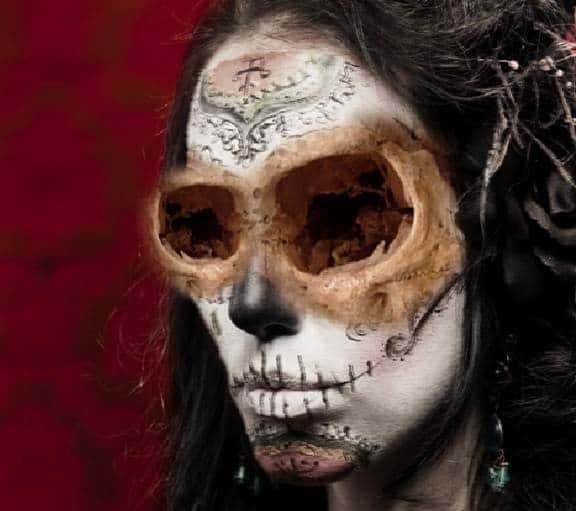
Step 16 blendig the eyes
Reduce the saturation (Ctrl+U) or Image – Adjustments- Hue/Saturation. Saturation at: -53.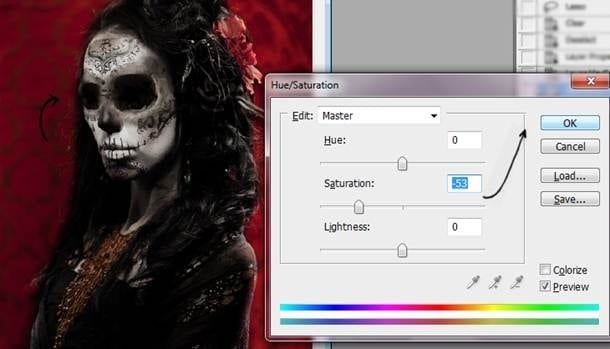
Step 17 – keep blending
Duplicate the eyes layer and use the layer in soft light mode with 30% of opacity.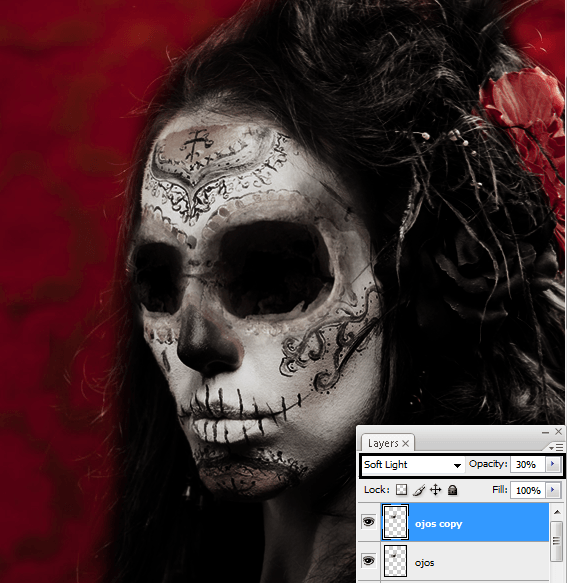
Step 18- Finding the nose
Pick the nose from another skull, and select it with the lasso tool, press Ctrl+J to copy the selection.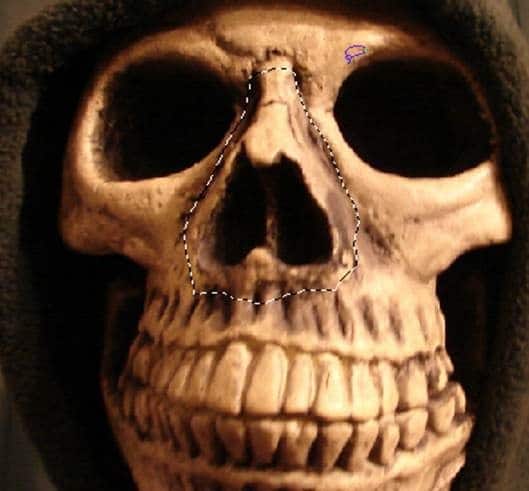
Step 19- reduce the nose
Make the nose smaller with free transform (Ctrl+T).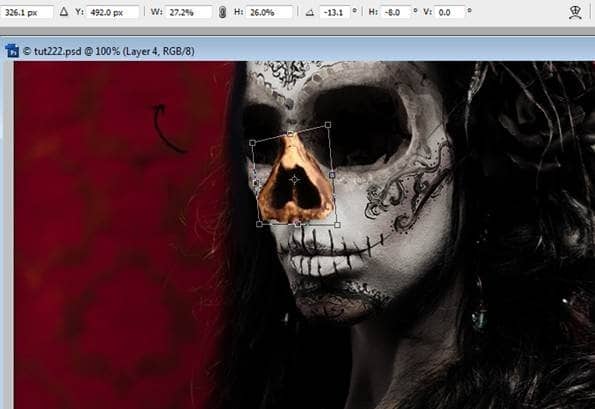
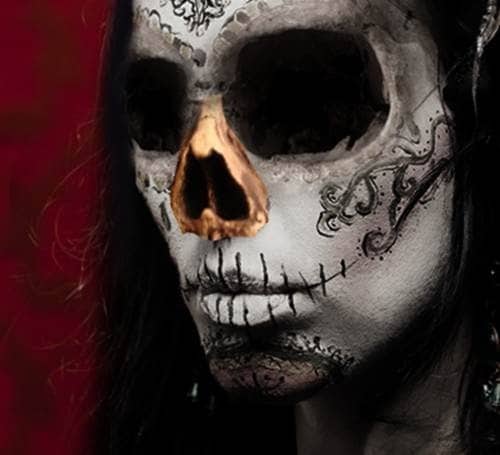
Step 20- less saturation
Reduce the saturation of the nose (Ctrl+U) or Image- Adjustments- Hue/ Saturation. In the option Saturation: -70.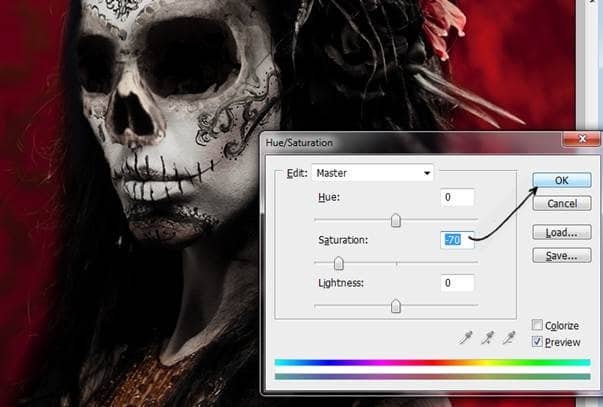
Step 21- more details
Fix the nose with the smudge tool.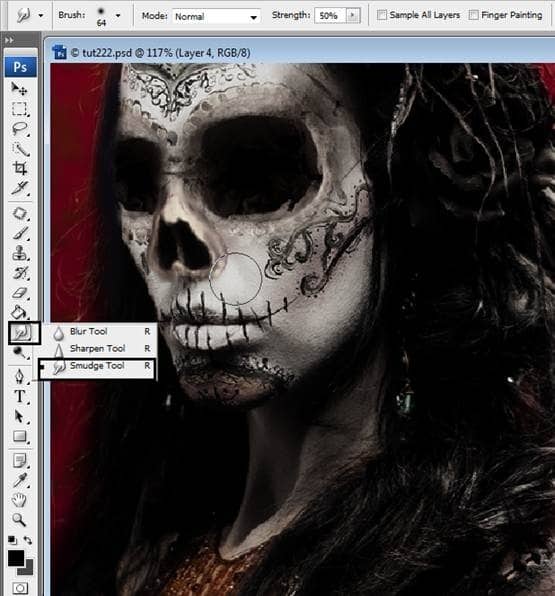
Step 22- Working with Colors
Go to the original layer of the model. And Duplicate (Ctrl+J). Change the color of that layer pressing (Ctrl + U) or go to Image- Adjustments – Hue/ Saturation.Change the Hue at 233 to get a purple tone.Then press ok to save the changes.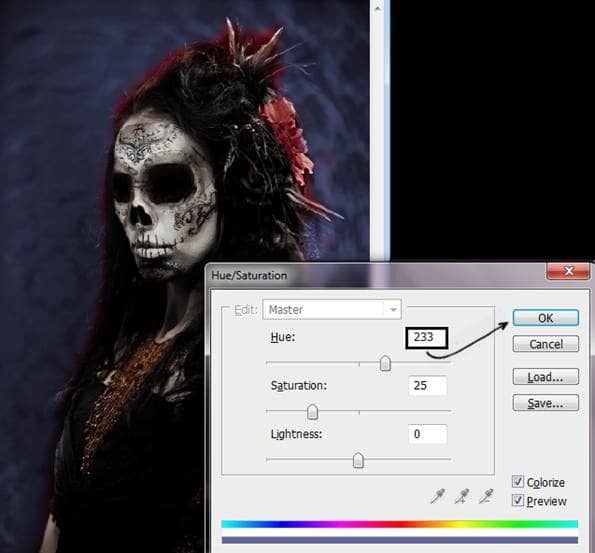
Step 23- Change the opacity of the layer.
Reduce de opacity of the layer to 40% to get this result.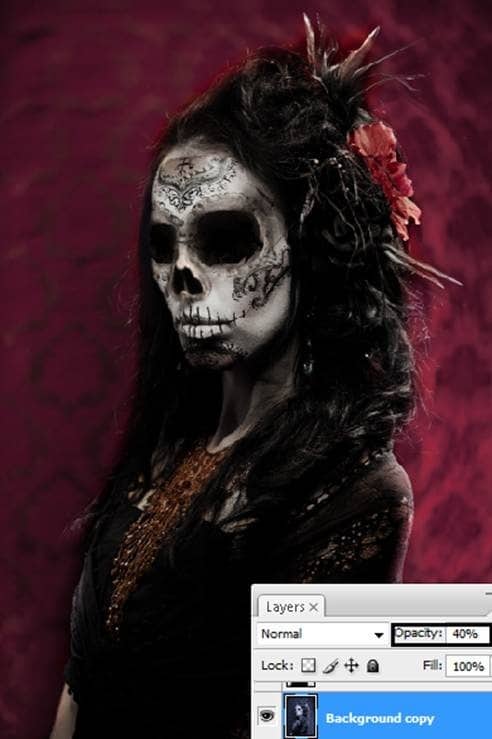
Step 24- Another Layer.
Duplicate that layer (Ctrl+J) and change the color (Ctrl+U) or Image – Adjustment – Hue/ Saturation. In the option Hue put 200. You have to be in the colorize option. To save changes press ok.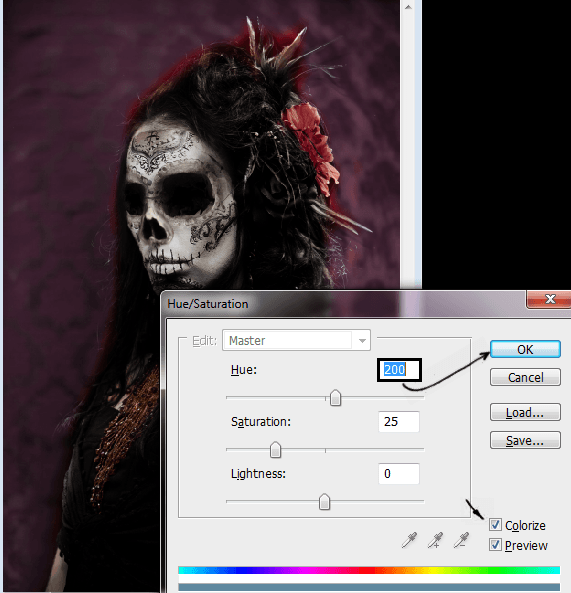
Step 25- Use the layer in soft light mode.
Change the layer mode to soft light to get this result: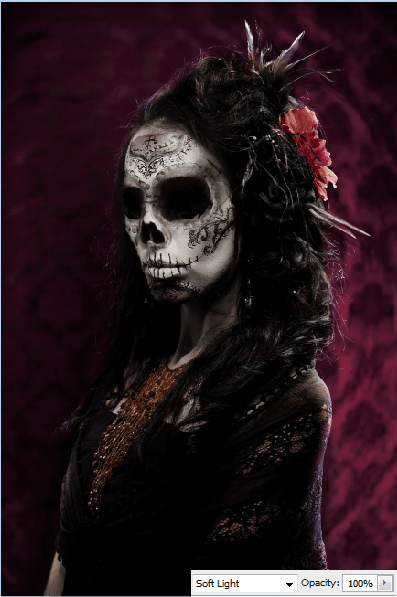
Step 26 – make the model stand out
Add a new layer (Shift+ Ctrl + N) and paint it with a soft brush using white, black and violet like this: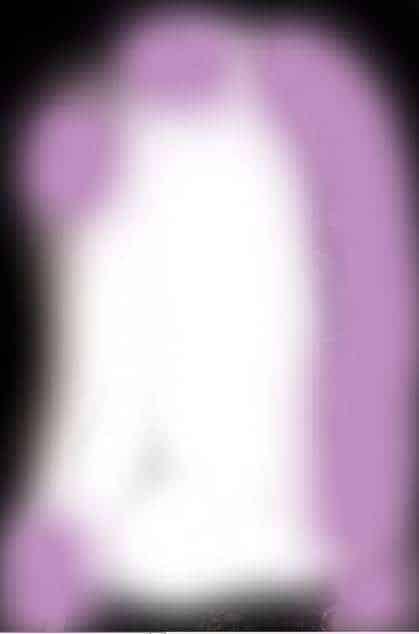
Step 27- Add some blur
Use Gaussian Blur – Filter – Blur – Gaussian Blur: 150 of radius.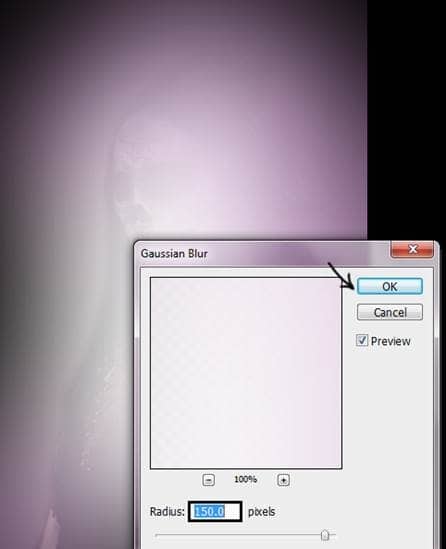
Step 28- Changing layer order.
Put the layer under the model’s layer and change the mode from normal to soft light.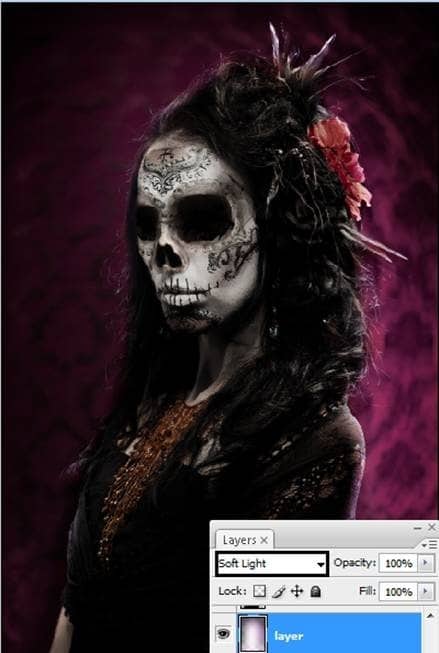
Step 29 – Add some webs
You can used spider-webs brushes. Create a new layer (Shift+ Ctrl+ N) then reduce the opacity to 50%. Select the brushes and paint over the new layer.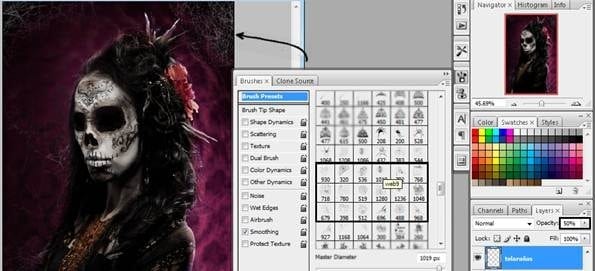
Step 30- Add some fog
To create the fog you can used brushes of clouds of foggy brushes. Paint over the layer and then change the opacity of the layer to 80%.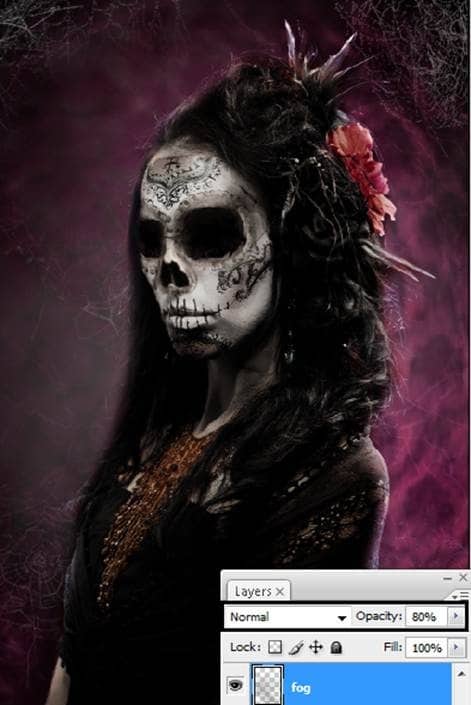
Step 31- More fog.
Add another foggy layer but in this case change the layer’s mode to Color Dodge to get something like this: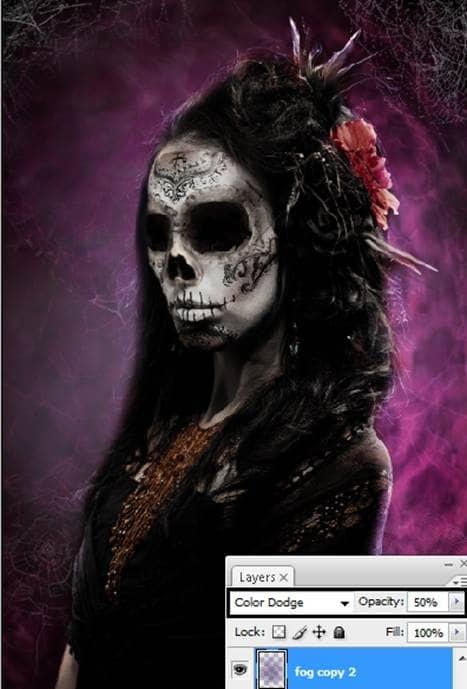
Step 32- Crazy Layer
Add a Layer like this one: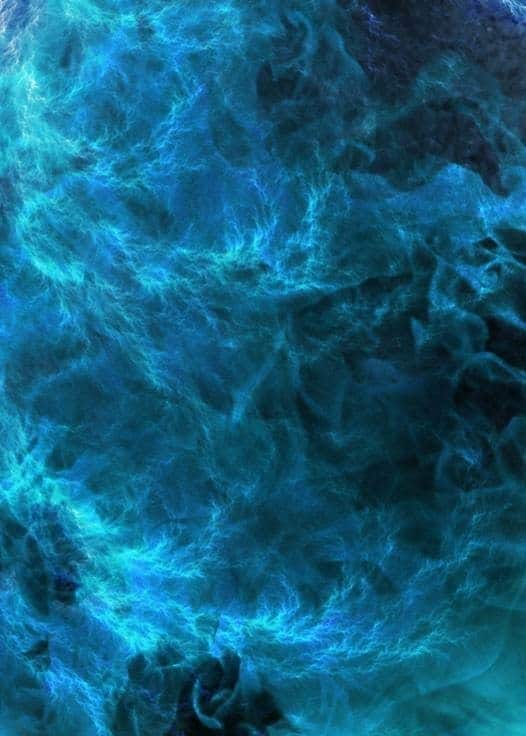
Step 33 – More effects
Change the layer color (ctrl + u) or Image – Adjustments – Hue/ Saturation. Use the menu In colorize option. Then in Hue change it to: 260 and Saturation at: 40.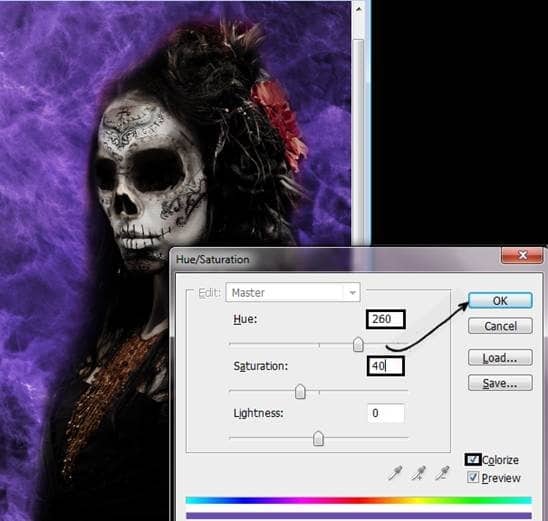
Step 34- change layer mode
Use Layer in soft light mode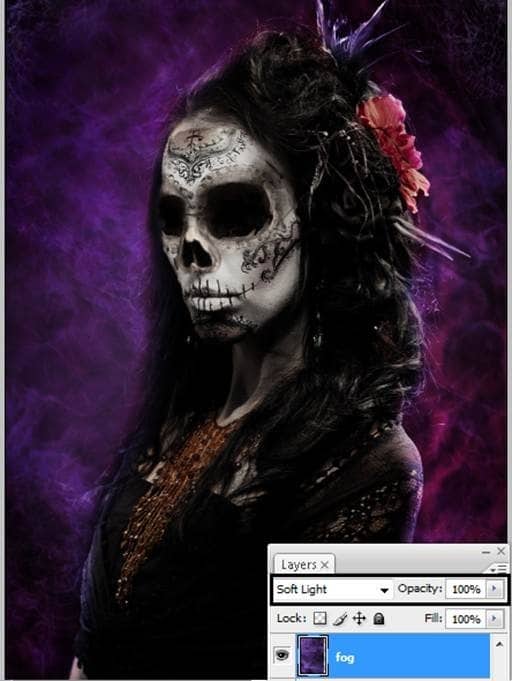
Step 35 – Light
Add a new layer (Shift+ Ctrl + N) and use it in soft light mode with 70% of opacity. And paint around the model with a white soft brush.The diameter of the brush in this was 300 pixels.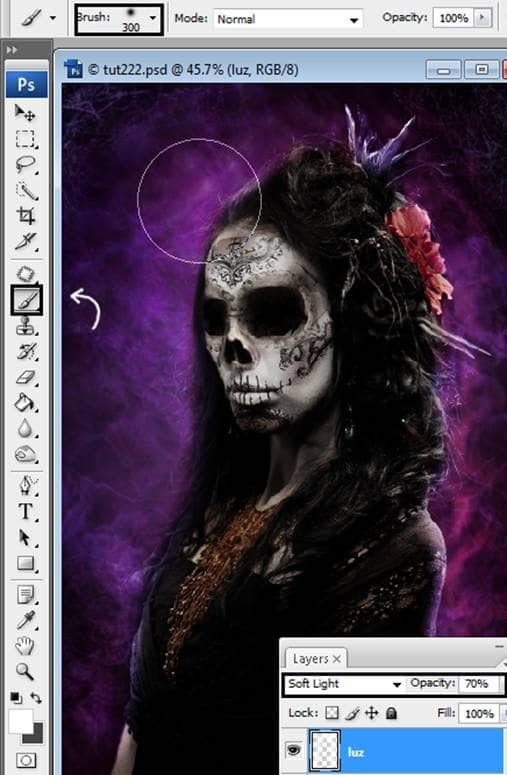
Step 36 – more lights
Create a new layer (Shift +Ctrl + N) in the top. Then used the paint bucket to apply gray to the layer.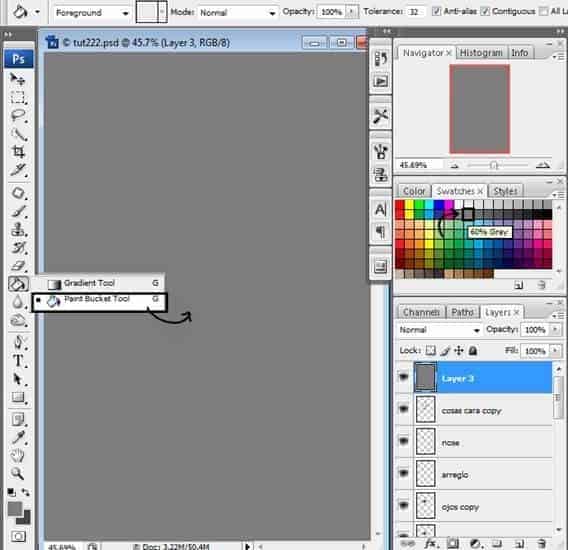
Step 37 – change to overlay and paint with dodge and burn
Used layer mode in overlay, and paint with dogde tool to create light and with burn tool to create shadows. In this case use the dodge tool in the righ side and the burn tool in the left side.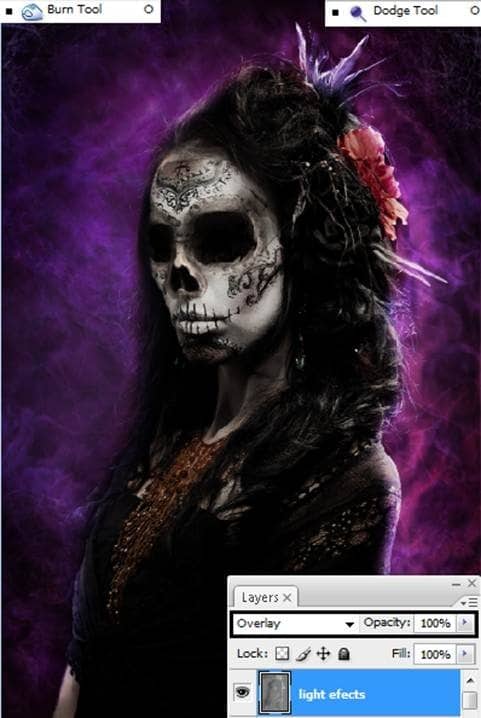
Step 38- High Pass
In that same layer apply a High Pass Filter. To do that go to Filter- Other – High Pass. Change the Radius to 50.0 and press ok to see the changes.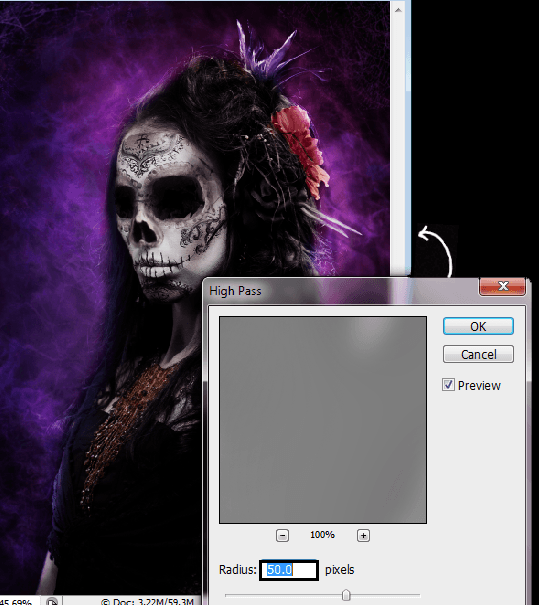
Step 39 – Photo Filter
Apply a photo filter to the image. Go to the layer menu and press the icon “Create New Fill or Adjustment Layer”. Then press the option Photo Filter.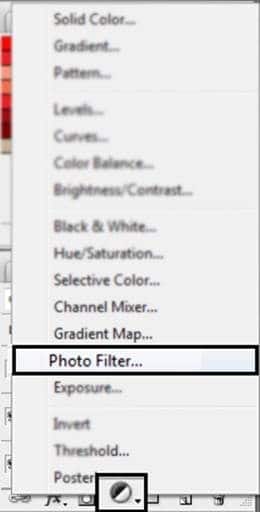
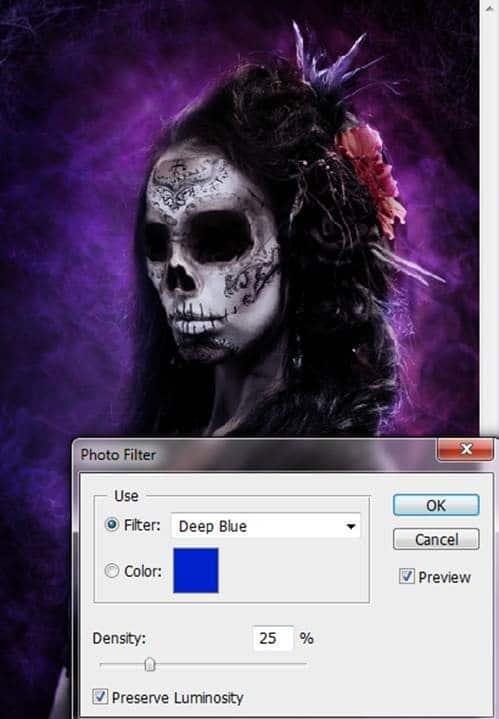
Step 40 – Hue/ Saturation
Go once again to the layer menu and press the icon “Create New Fill or Adjustment Layer”. Then press the option Hue/ saturation.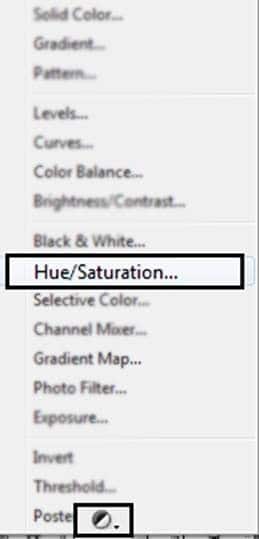
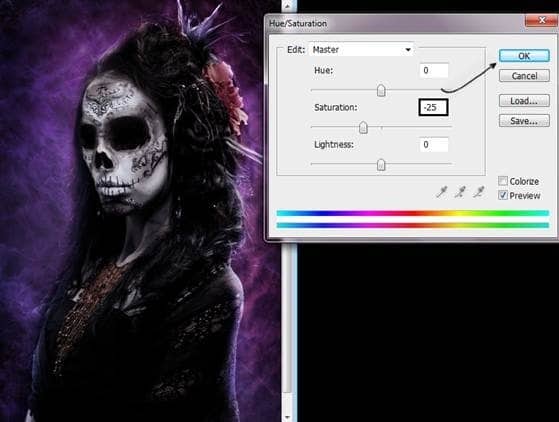
Step 41- Elliptical Marquee Tool.
Create a new layer (Shift + Ctrl + N)Pick the Elliptical Marquee Tool and make an oval around the image.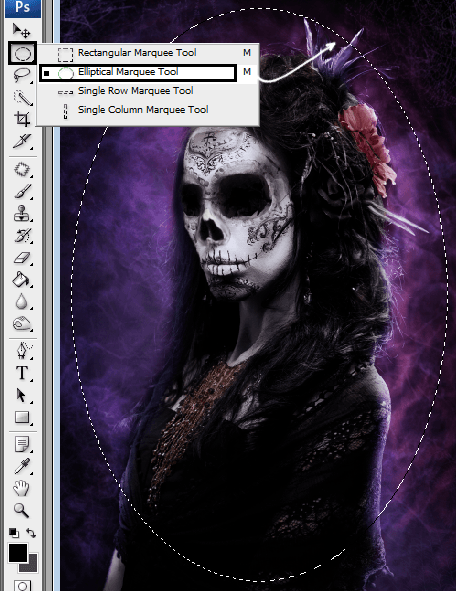
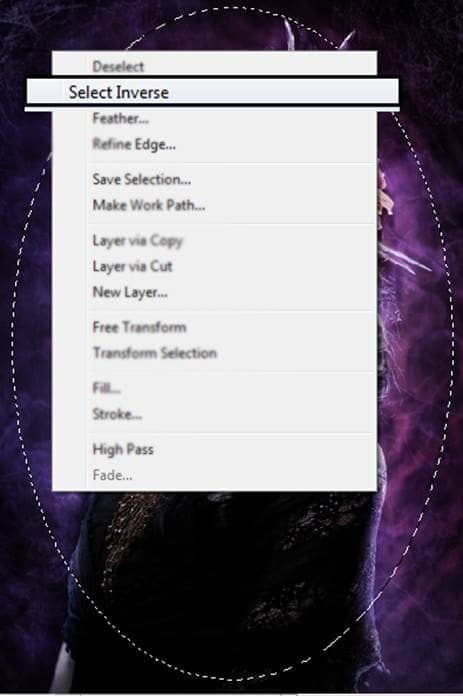
Step 42- A bucket of paint…
Now Choose the Paint Bucket Tool and paint in the selection.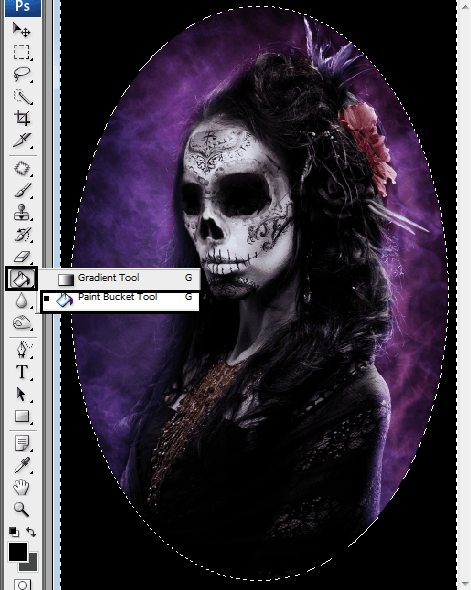
Step 43 – Fading
Used Gaussian blur to fade the selection. Go to filter – blur – Gaussian Blur. Put 150 of radius.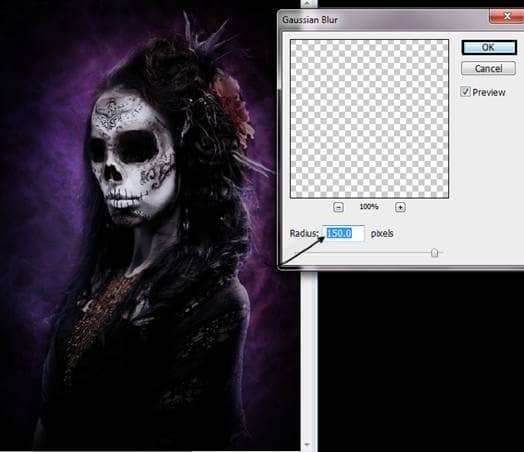
Step 44 – The final touch.
If you think the image is looking way to dark. Press (Ctrl + T) To change the size of the layer. Make it Bigger until you get the desired result.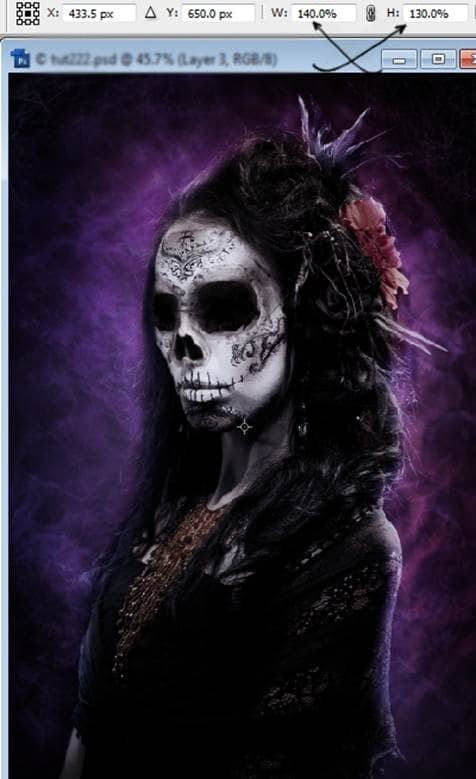
Yay!!! That’s it, Hope you enjoy following this tutorial!!
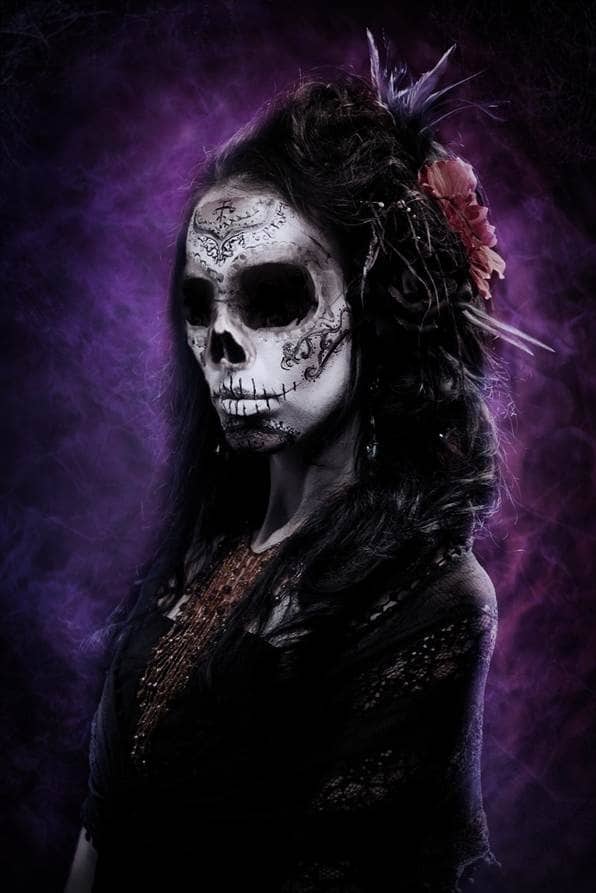
Final Results

Author : Andrea Garcia
Hello! My name is Tommy. Im a blogger, I love graphics design and now i went to Architechture Technical Senior High School. | Facebook |
Subscribe to:
Post Comments (Atom)


0 comments:
Post a Comment