Photoshop Tutorials

- cracked soil texture
- cloud images
STEP 1
Create a new document (CTRL + N) with a size of 830 x 470 PX and give a black color background
STEP 2
Duplicate the background layer by pressing CTRL + J, make sure your Foreground color black and white background by default is already so, then go to Filter - Render - Clouds
STEP 3
Duplicate the background layer by pressing CTRL + J, make sure your Foreground color black and white background by default is already so, then go to Filter - Render - Clouds
 |
| Klik Untuk Perbesar |
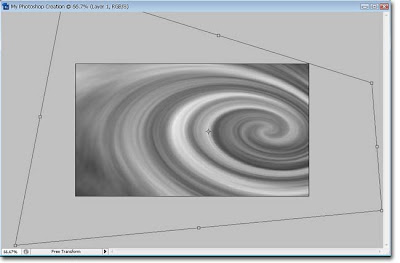
Furthermore, go to Filter - Distort - Twirl and give the value of 660 for the Angle.
Next open the Edit menu - Transform - Distort and drag the corners dots as shown below
STEP 4
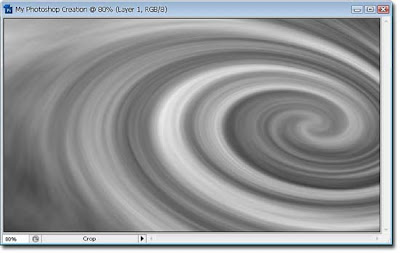
The results for the above steps do not need the same essential pattern of his images (tilt / rotation) is considered its course, now the results of my edits look like the picture below
STEP 5
STEP 5
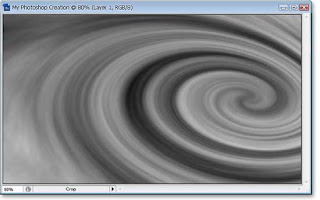
Next open the menu Image - Adjustments - Invert (CTRL + I)
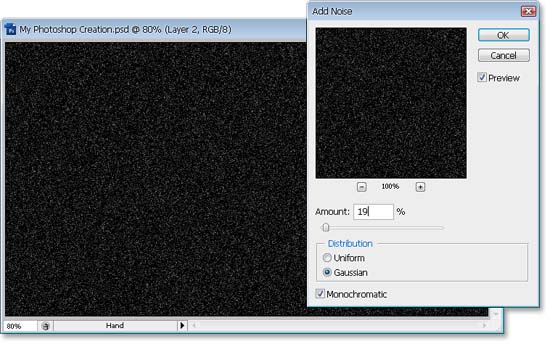
Next create a new layer then using the Paint Bucket Tool to paint the black layer next go to Filter - Noise - Add Noise set the properties as shown below and click OK
STEP 7
STEP 7
Further on, by using the Paint Bucket Tool and set the foreground color black click on the document area 5 times so that the effect of noise was reduced as shown below, and change the layer blending mode into screen
STEP 9
 |
| Click To Enlarge |
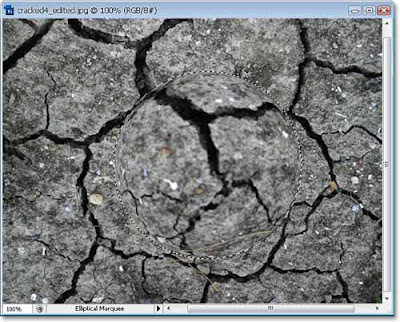
STEP 8
The next open soil texture donlod above you can then open the application into Photoshop. Enable Eliptical Marquee Tool and create a circle as shown below so that the circle is good and drag while holding down the shift key
then open the menu filter - distort - spherize input 100 to the value of the Amount and Normal Mode then do again open the filter menu - Distort - spherize then input 50 for the Amount and Normal Mode then the result will look like the image below
STEP 9
subsequently created using the Move Tool to move the circle (still in a state selected) to the main document we had had enough by dragging it. If necessary you may be able to change the size and position by pressing CTRL + T
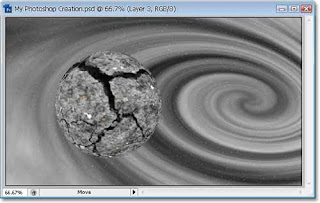
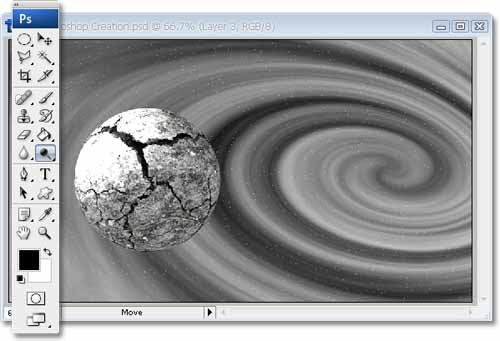
STEP 10
STEP 10
and activate the Dodge Tool then rub on the upper left side of the ball then the ball will be white colored as shown below
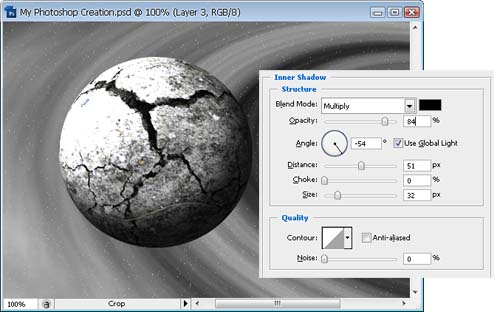
STEP 11
STEP 11
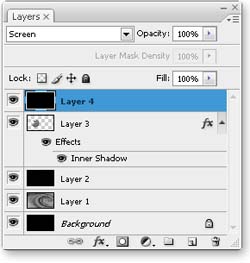
then open the Layer menu - Layer Style-Inner Shadow and set the properties as shown below and press OK
STEP 12
STEP 12
create a layer (Shift + Ctrl + N) and then using the Paint Bucket Tool to paint the black layer and change its blend mode into a black screen then the layer will not be visible in our document
STEP 13
STEP 13
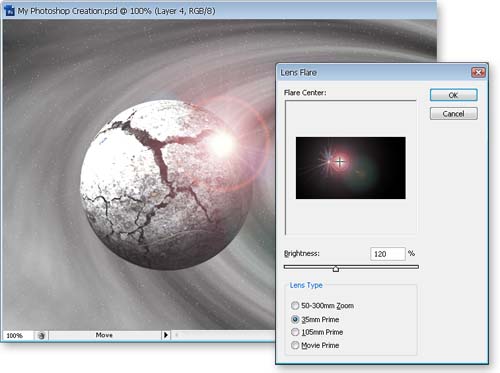
further open the menu filter - render - lens flare set properties such as image
STEP 14
STEP 14
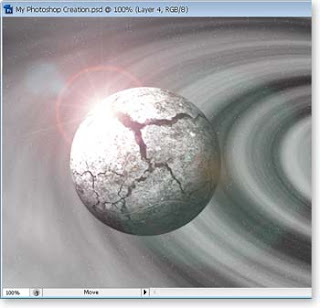
by using the Move Tool slide the light to the left side of the ball, as pictured below just enough drag
STEP 15
STEP 15
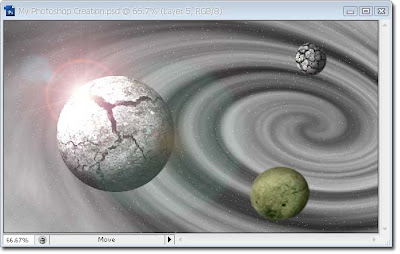
further by using the same way as making planetary ball was add a few more planets just simply use another texture to be more varied and you can resize it using free transform menu or press ctrl + T
STEP 16
STEP 16
The next open cloud image and insert it into a document we had (how: after drawing in the open clouds activate the move tool and drag the image to the document we had) and change the image to black and white by pressing shift + ctrl + U and change the blending mode of the layer becomes soft light
STEP 17
 |
| Click To Enlarge |
open the menu layer - new adjustment layer - brightness / contrast dialog box will appear press OK and a dialog box appears again fill Brightness = -95; contrast = 100 and press OK
STEP 18
 |
| Click To Enlarge |
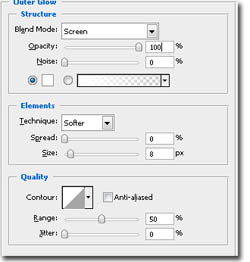
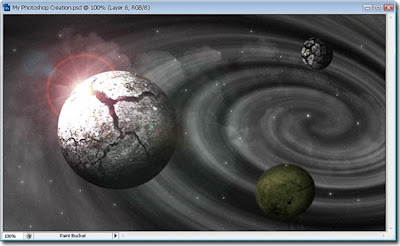
create a new layer and using the brush size for the 3 and 2 px white dots like the picture then give the glow effect from the menu layer - layer style - outer glow setting properties see the image below
STEP 19
STEP 19
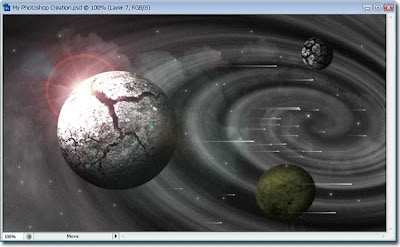
create again a new layer with a brush 3 px then made the same points as the position only way above the more dense the dots where you want to put up the points, then go to the menu Filter - Stylize - wind then click OK then the points you have had tails then press ctrl + f in order to further its long tail that resembles a meteor
STEP 20
STEP 20
press ctrl + T then its rotation so meteor2 tilted as shown below

STEP 21
STEP 21
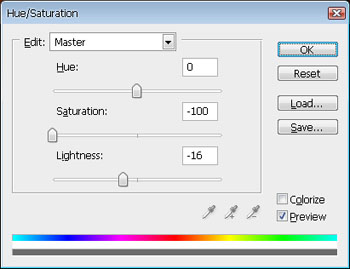
continue to open the menu layer - new adjustment layer - Hue / Saturation adjustment properties see in the picture below
STEP 22
STEP 22
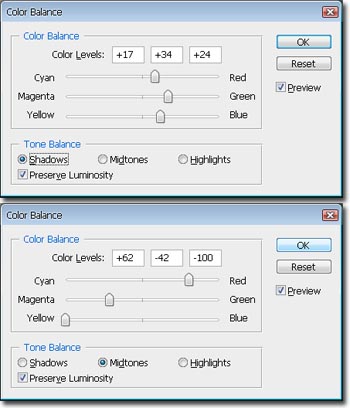
continue to open the menu layer - new adjustment layer - Color Balance setting properties see in the picture below
STEP 23
STEP 23
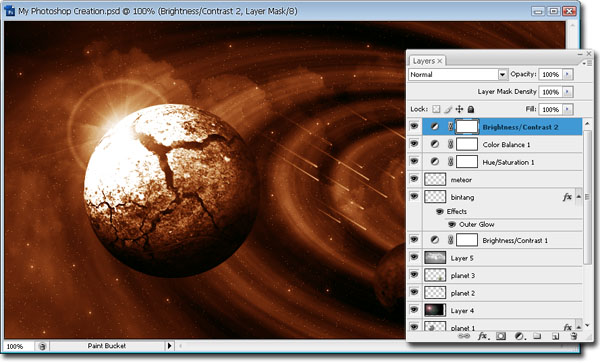
continue to open the menu layer - new adjustment layer - Brightness / contrast setting properties see in the picture below

then the result will look like the image below
last to beautify the picture (according to me / do you think? :)) create a new layer continuously activate the brush tool with a size of 200 px and the hardness of 0% Love dark upper side and lower right of the image then the result will look like the image below
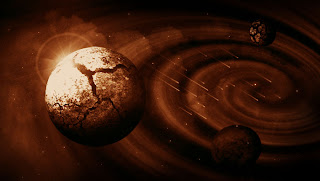
Subscribe to:
Post Comments (Atom)


0 comments:
Post a Comment