
Resources Used In This Tutorial
- Cloud
- Statue
- Halloween Brushes
- Axe
- Smoke
- Hat
- Pumpkin
- Texture
Step 1
Firstly, we will manipulate a demon from the liberty stock picture. So, just open the image in photoshop. The image will be a new document with name of background in the layer panel.Right click on the background layer to unlock and make it an ordinary layer with name of layer 0:

Now, we will clean out the blue background of the image. To do this purpose, we will use magic wand tool to select the background. activate the tool. Please refer to the screenshot to see the setting of it. Click on the blue background:

Here is the result after clicking the blue background. The entire blue background is selected now:

Hit Del on the keyboard to clean the blue. There is still part unneeded part of the background left. With eraser tool, clean the part.

Here is the result:

Step 2
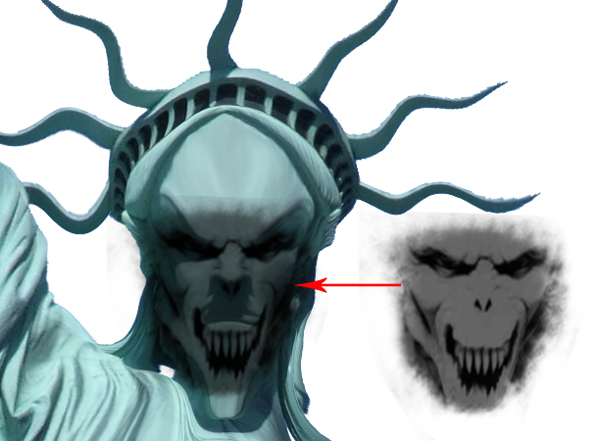
From this step on, we will alter the face of the liberty statue. With the liberty layer still selected, hit Shift+Ctrl+X to go to liquify filter. Set the setting of the filter as shown in the screenshot:
Make sure to activate Foward Warp Tool by clicking its icon in the liquify tool panel. Place the cursor on the one of the eyebrow. Then, click and drag the cursor up a bit:

Here is the effect of liquify tool on the eyebrow should be:

Procceed to alter the different parts of the face by warping them. Try to vary the size of the brush according to the widths of the parts to be warped.

Here is the result I created:

Step 3
After altering the shape of the face, we still have to repair the shape of its nose:
To repair the nose, we just simply cut out the other part of the nose:

Then, flip the cut out and place on the part of the nose to be repair:

Finally, mask the unneeded part of the cut out to make it well blended. Here is the result:

Step 4
In this step, we will start painting over the face. Activate the brush tool and choose one of the halloween brushes after we have downloaded and installed in photoshop:
Create a new layer (Shift+Ctrl+N). Set the foreground color to black. On this new layer, paint the brush right on the altered face :
Cut out the the mouth into a new single layer:

Take pen tool in the tool panel. Zoom in the bird picture. Start tracing each bird by clicking the pen tool on the edge of each until the path is closed. When the path is closed, right click on the path to show the path option ccommand box. Choose make path selection. Hit Ctrl+J to duplicate the selection into a single layer.
Then, place the cut out layer on the face. Mask parts of this layer to make it well blended:

Select all the face layers previously made and group them (Ctrl+G). mask the parts overlapping on the forehead. Finally, go to Layer > New Adjustment Layers > Hue/saturation. Create a clipping mask to this adjustment layer so that it just effect the face layer to which it is clipped.

Step 5
Create a new layer. On this layer, paint over the fangs to make them brighter. Use brush with small size about 10-20pxl at 50-70% hardness.
Step 6
Create another new layer. set this layer’s blending to color in the layer panel. On this layer we will paint over parts on the face. Activate brush tool. Choose round brush. Set the hardness of the brush varied to 30-60%. Paint over the cheek and chin with colors combined among #a1c4c6, #6e9092 and #314547.
Proceed to create two more layers. Set the first layer to color blending and the second one to soft light at 50% opacity. In this step, we will still paint over the face to define more details. With brush tool selected, paint over the cheek and forehead area with color of #012123 on the first layer. Then, select the second layer on which we will paint over the face with color of #afd7d4.

Create one more layer. Again, set the color of foreground to #034f52. With round brush tool set to 20-30% hardness at 30-40% opacity, paint over the forehead area:

We are almost done with the face. In this step we will give highlight and shadow on the face. To do this purpose, firstly create another layer and fill (Shift+F5) the new layer with 50% grey color. Set this layer to overlay at 100% opacity. Activate brush tool. Choose a very soft round brush at 15-25% opacity. On the new layer, stoke white color to some area on cheek, fangs and foreground to give them highlight. On the contrary, paint black color to the areas to be given shadow or shading. Here is the result I created:

Step 7
Create again a new layer. On this layer we will paint eyes. Select bright orange color as the color of the foreground. Paint an eye shape with the color (1). Then duplicate the eye layer and set the duplication layer to color dodge blending at 40-50% opacity (2).Select the eye layer and hit Ctrl+G to group them.

Duplicate the group and flip it horizontally. Then, place the the group on the other eye:

Create another new layer above the two eye groups. Paint white spots on this layer right in the middle of the eyes. Then go to Layer > Layer Styles > Outer Glow:

Result::

Step 8
Here is the result should look like so far. Next, we will replace the outfit of the demon with the original one.
Firstly, go to the original layer of the liberty image. Crop out the outfit of it into a new single layer:

Then, just simply add the cut out to the modified liberty we have created:

Step 9
In this step, we will add a halloween icon to the scene. We will replace the manuscript held by the statue with the halloween pumpkin. Open the pumpkin stock image. Crop out the pumpkin:
Add the cropped pumpkin to the scene. Activate free transform tool (T). Warp the pumpkin to alter its shape:

Place the pumpkin above the manuscript. Mask the pumpkin to reveal the fingers:

Step 10
We will add a hat to the pumpkin. Open the hat stock image. Crop the hat out into a single layer:
Paint over the hat with black to alter its color. Then, add the hat on the pumpkin:

Step 11
In this step, we will proceed to dramatize the lool of the demon by adding an axe as the replacement of the torch. Open the axe stock image and crop the axe out into a single layer:
We need to repair the axe by hidding the rest of the fingers. Cut out the wood part of the axe stick into a new single layer:

Then, place the cut out on the fingers to cover them. Mask the edges of it to make it well blended.

Do the same to the other left fingers. Here is the result should be:

Step 12
Add the axe to the scene. Place it on the torch.
Mask the axe to reveal the fingers of the demon. Finally, mask the torch and manuscript to hide them. Here is the result:

step 13
What to do next is creating nails to the fingers. Create a new layer. activate pen tool to create a triangle shape on one of the fingers. Fill the shape with grey:
Now activate burn tool. Choose a very soft brush of the burn tool. Set its range to highlight at 66% exposure. Stoke on the area to be burn:

Apply more burn effect to the finger:

Do the same to add more nail to the other fingers:

Step 14
We will add some textures on the face and hands of the demon. Open the texture stock image. Hit Ctrl+I to invert the image:
Step 15
Add the texture to the demon. Place it on the face:
Set the texture layer to overlay:
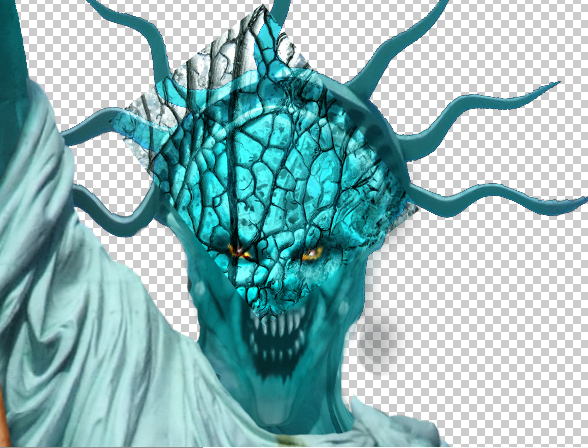
Mask the unneeded part of the texture. Then, reduce the opacity of this layer to 50-60%:

Duplicate the texture as many as needed and add the duplication to the other parts of the face. Vary the sizes and the opacities of the duplication layers accordingly:

Do the same to add textures on the arm and fingers:

We are done with the demon. Merge all the demon layers into a single layer. We are done with the demon. Here is the result:

Step 16
Create a new document (Ctrl+N) with size of 1024 pixel wide and 1229 pixel high:
Activate gradient tool. Choose linier gradient. Set the foreground to #626a71 and backfround to #d8d8d8. Click the top of the document, hold and drag down to fill it with gradient:

Duplicate the gradient background into a new single layer. Set the duplication to multiply blending at 100% opacity, then, mask some part of it (Marked in red). Use a very soft round brush at 20-40% opacity to mask the layer:

Step 17
Now we will add cloud texture to the scene. We will manipulate the texture from the other stock image provided. Open the image in the document. Hit T on the keyboard to activate free transform tool. Scale up the size of the image by dragging one of the transform point. Make sure to hit Shift key while dragging it.
Here is the result should be:

Then, mask the lower part of the image to hide the unneeded part and just the cloud part is revealed. Use a very soft round brush to mask it.

Go to layer > new adjustment layers > gradient map. Make sure to create a clipping mask to this adjustment layer. Refer to the screenshot to see the setting of the gradient:

Step 18
We still need to add more cloud to the scene. To do this perpose, duplicate the previously made cloud. Re-scale the size of the duplication accordingly and place it where needed. See screenshot below for your inspiration:.
Mask the unneeded parts of the duplication image:

With the duplication layer still selected, go to layer > new adjustment layers > curve. Make sure to create a clipping mask to this adjustment layer:

Step 19
Finally, give the two cloud layers some surface blur by going to filter > blur > surface blur:
Here is the result will look like:

Step 20
In this step we will add a city as the background of the scene. Open the city stock image. Scale up the size and arrange its position where needed: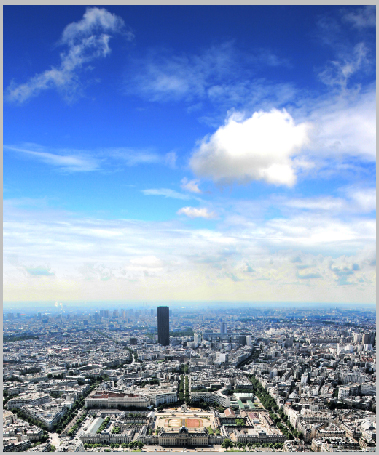
Hide the cloud part of the image by masking it.

Set the blending of this city layer to multiply at 15% opacity:

With the city layer selected, go to filter > brush strokes > spatter:

Here is the result:

Step 21
Next, we will give adjustment layers to the scene. Firstly, go again to layer > new adjustment layer > gradient map. Please see the screenshot for the setting of this gradient. Set the gradient layer to normal blending at 100% opacity. Then, duplicate this gradient layer and set the blending of this duplication to soft light at 100% opacity. Mask some part of the duplication gradient ( marked in red in the screenshot):
Give another new adjustment layer: photo filter. After applying the photo filter, mask some part of it as marked in red in the screenshot. Finally, set its blending to multiply at 100% opacity.

This is the result should look like:

Step 22
Add the demon we have previously made to the main document. This demon image will de the top most layer in the layer panel so far.
Step 23
Next, create a new layer above the demon layer. On this layer we will paint white color which is supposed to be ray of light. The red mark in the screenshot is the place where we should paint the light:
Set the foreground color to white. Activate a very soft round brush with opacity of about 15-25%. Then, paint light to the area where needed:
Step 24
Create a new layer again above all the other layer. On this layer we will paint shading on the edges and lower part of the scene. To do this, firstly set black as the foreground color. Then, with a very soft round brush at low opacity of about 10%, paint the area to be given shading (marked in red)
Here is the result will be:

Create another new layer filled with black. Set this new layer to soft light. Mask some part marked in red. This layer will give more shading to the scene:

Step 25
In this step, we will add more new adjustment layers to set the overall mood of the scene. Go again to layer > new adjustment layer > color balance:
Then, add another adjustment layer: vibrance. Set this vibrance later to normal at 40% opacity.

Next, more new adjustment layer. This time, we will add curve adjustment layer. Mask the red marked area of the curve to hide the effect of it. Set its blending to normal at 75% opacity.

Finally, add the last adjustment layer: photo filter. Hide the effect of this adjustment layer by masking the red marked part. Set its blending to normal and reduce its opacity to 30%.

Step 26
After setting the mood of the scene, we need to retouch the appearance of the demon. Select the demon layer again and give the layer a layer mask. Mask the lower part of it to make it look transparent. After finding the desire result, hit Ctrl+G to make the demon layer in a group. Name this group: Demon.
Step 27
Within the demon group, duplicate the demon layer. Create a clipping mask to this duplication layer. Now, go to filter > others > high pass. The filter will change the color of the demon into grey. Activate brush tool and choose a very soft round brush. Then, paint white color to some area where needed to define highlight. Here is the normal blending of the high passed duplication layer will look like after being painted with white color:
Here the result will look like in overlay blending:

Step 28
Next, add a new adjustment layer to the demon. This time we will add curve adjustment layer. Make sure to give a clipping mask to this curve layer so that it will just effect the layers below to which it clipped.
Step 29
Again create another new layer within the demon group. On this layer, paint some shadow to the areas shown by the red arrows.
Step 30
Next, select the demon layer in the group. With the demon layer selected, go to layer > layer styles > inner shadow. Follow the setting of this layer style as shown in the screenshot. Then, right click the eye icon of inner shadow in the layer panel to show layer style’s command option. Choose create layer. This option will change the inner shadow style into a single layer clipped to the demon layer. Set the blending of this layer to color dodge at 100% opacity. Place the inner shadow layer on the top most position among the other layers within the demon group. Mask a little bit on the unneeded part of the inner shadow.
The effect of the inner shadow will give more highlight to the demon. Here ia the result should look like:

To make the highlight brighter, duplicate the inner shadow layer one time and set the duplication layer to screen:

Step 31
I decided to paint over more highlight on the neck of the demon by consideration that the area is where the light is strongly being casted:
step 32
In this step we will dramatize the scene by adding fire and smoke from which the demon is being appeared. We will manipulate the fire and smoke from the stock image provided. Open the image. Cut out some of the fire images given into new layers.
Scale the size of the cut outs accordingly and combine them to create a new single shape. Set the blanding of each to screen blending mode with opacities varied to about 35-58%. Mask parts of each cut out where needed to find the desired single shape. The shape I created below may give you inspiration:

Here is the scene will look like after being given smoke:

And here is the one with more gentle smoke:

Step 33
Now we will add more fire effect to the scene. Create a new layer again that is filled with black. Set this new layer to color dodge blending. Activate brush tool. Choose a very soft round brush at opacity of 5-7%. With bright orange color (#fd6e17), stroke the brush repeatedly to the area where the flame and fire should be. Then, switch to bright yellow (#fcd703) to paint more light on some areas of the cloud and the demon outfit. Here is the look of the layer set in normal mode at 100% opacity:
Here is the result when the layer set to overlay at 100% opacity.

Step 34
Create a new layer under the shading layers previously made (step 24). Take rectangular marquee tool. On this layer, create rectangular selection and fill it with black. Next, go to filter > render > lens flare. Choose 105mm prime for the lens type at about 40-50% brightness.
Set the flare layer to screen and place it on the axe and reduce its opacity to 75%.

Step 35
Now duplicate the flare layer. Activate free transform tool. Alter the shape of the flare a bit by warping it:
Place the duplication flare layer near the neck of the demon. Reduce its opacity to 60%.

Finally, duplicate the warped duplication flare layer three times. Place each duplication layer to where needed. The red arrows shown in the screenshot point to the places where each duplication layer is added:

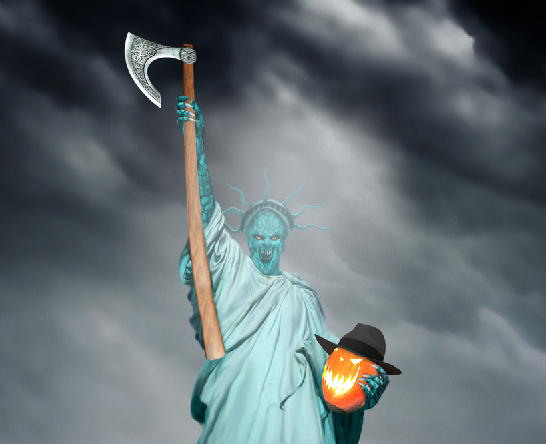
And…here it is the result:

And We’re Done!
You can view the final outcome below. I hope that you enjoyed this tutorial and would love to hear your feedback on the techniques and outcome.Author : Dek Wid
Hello! My name is Tommy. Im a blogger, I love graphics design and now i went to Architechture Technical Senior High School. | Facebook |
Subscribe to:
Post Comments (Atom)


0 comments:
Post a Comment