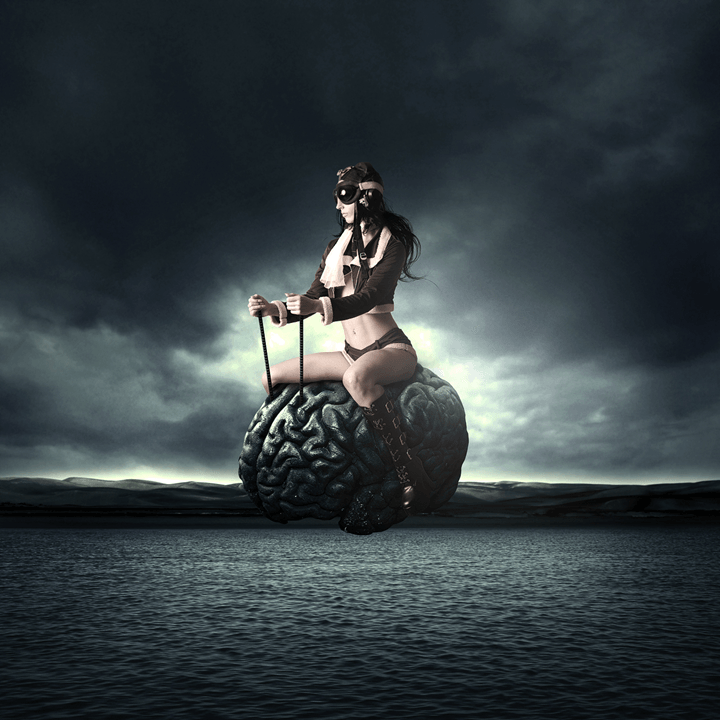
 Tutorial Resources
- Hair by TrissteBrushes
- Sea by BerryBlu
- Sky by CatStock
- Model by MjRanum
- Brain by LotusOnlineDe
Step 1
Create a new file with a width and height of 4000 pixels.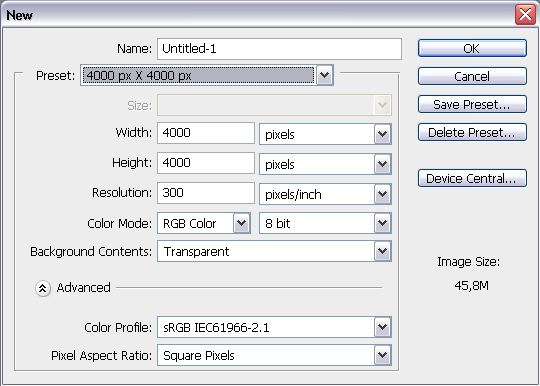
Step 2
Open the Sky image. Copy and paste it it to your main document. To do this, Go to Select > All, copy (Ctrl/Cmd+C), switch back to your main document and paste (Ctrl/Cmd+V). Delete your background laye
r.
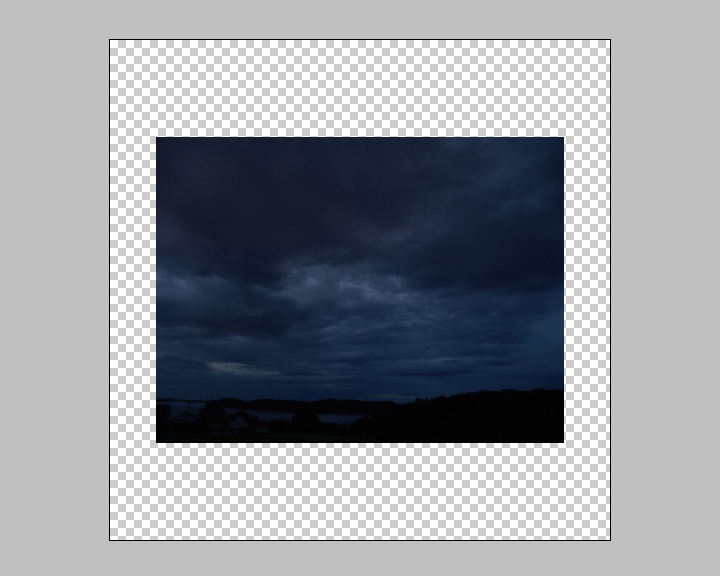
Step 3
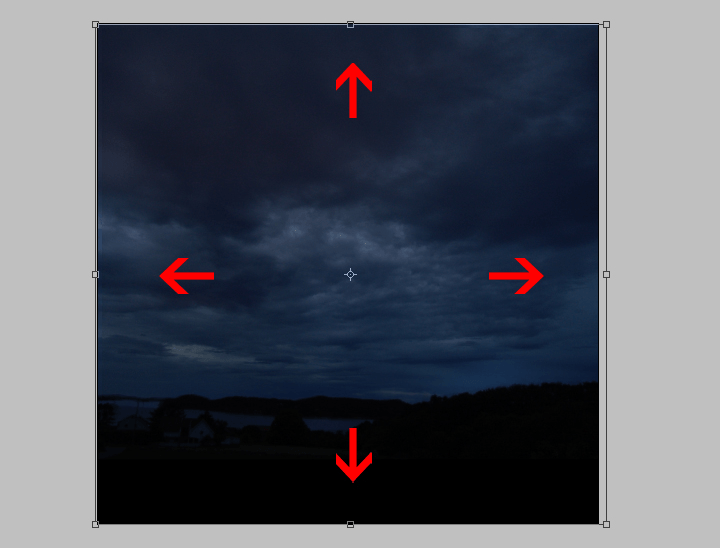
Use the Free Transform tool (Ctrl/Cmd+T or Edit > Free Transform)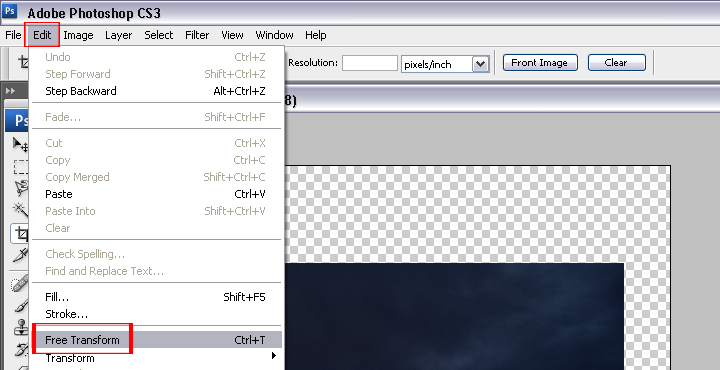
Step 4
Create a new layer above the sky layer (Ctrl/Cmd+Shift+N or Layer > New > Layer).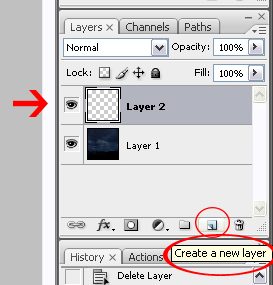
Step 5
First, set your foreground color to white and background to black – you can do this quickly by pressing D then X on your keyboard. Select the Brush tool (B). Using a large and soft brush (1100px, 0 hardness), paint a curve around the sky like shown in the image below.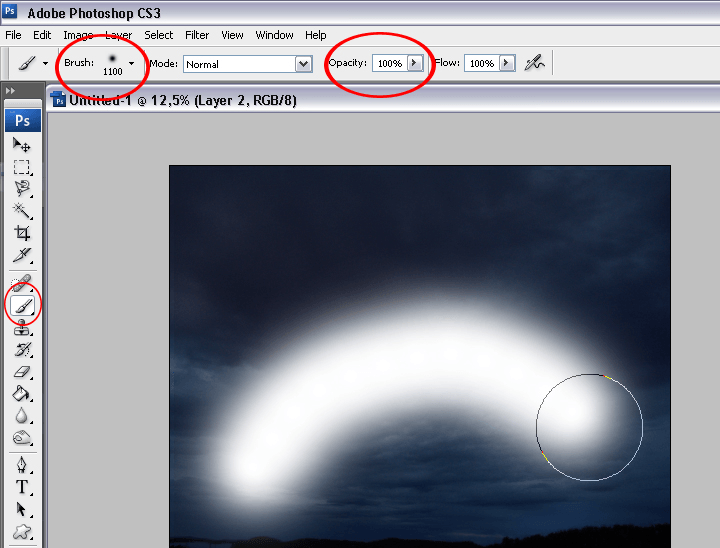
Step 6
Go to Filter > Blur > Gaussian Blur and apply a blur of 250 pixels.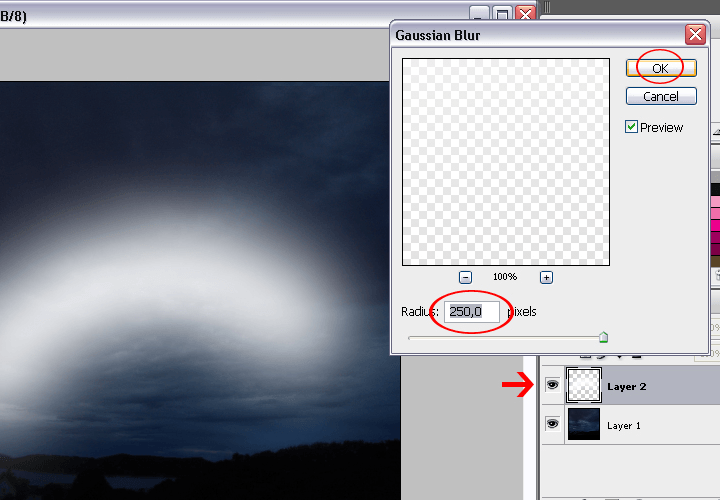
Step 7
Set the blending mode to Overlay. Duplicate the current layer (Ctrl/Cmd+J) then set the opacity of the new layer to 60%.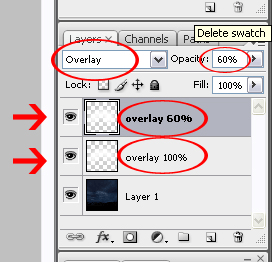
Step 8
Select both layers then right-click and choose “Create Clipping Mask”.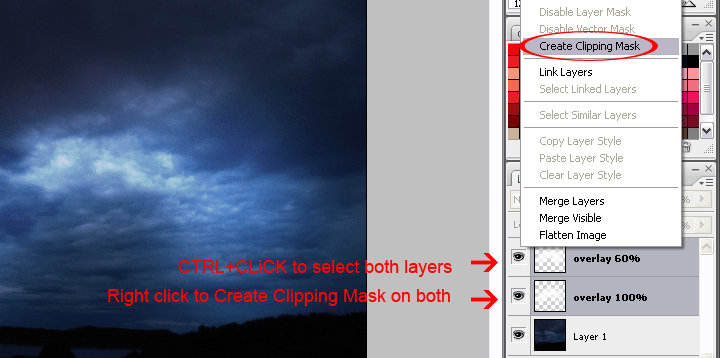
Step 9
Open the Sea image then copy and paste it to your main document. To do this, go to File > Open to open the sea image. Go to Select > All then Edit > Copy. Switch back to your main document and go to Edit > Paste. Position this layer as the top layer.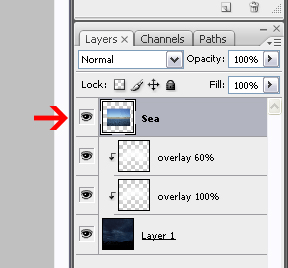
Step 10
Use the Free Transform tool (Ctrl/Cmd+T or Edit > Free Transform) to scale the image like shown in the image below.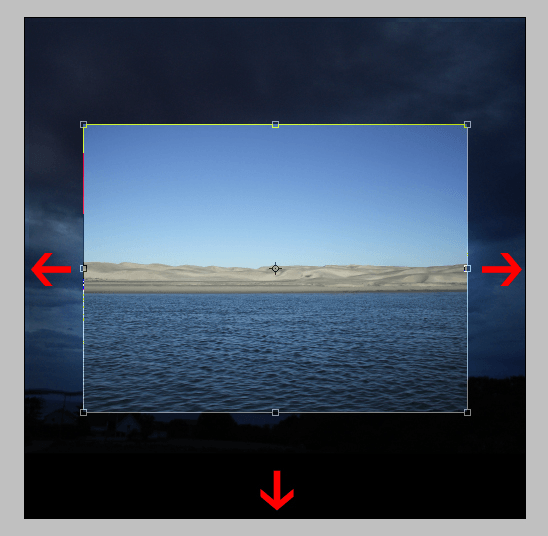
Position the layer to the bottom of your document.
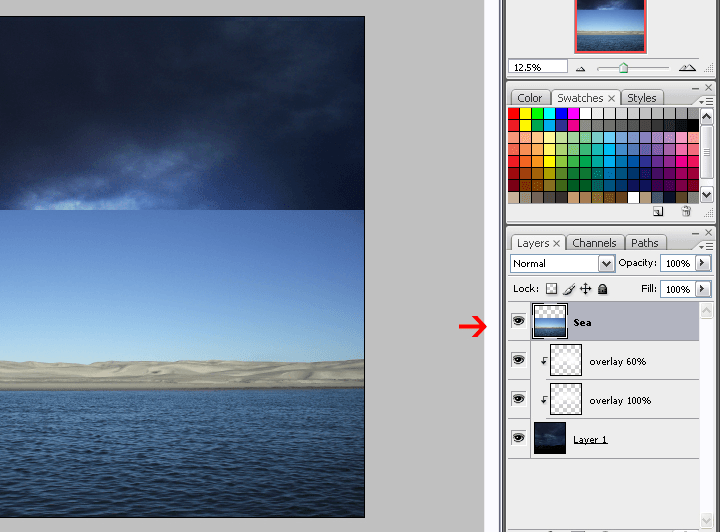
Step 11
Now we’re going to create a selection of the sky. Select the Magic Wand tool (W) then set the tolerance to 50%. Click on the sky then press Delete on your keyboard to delete the selected area.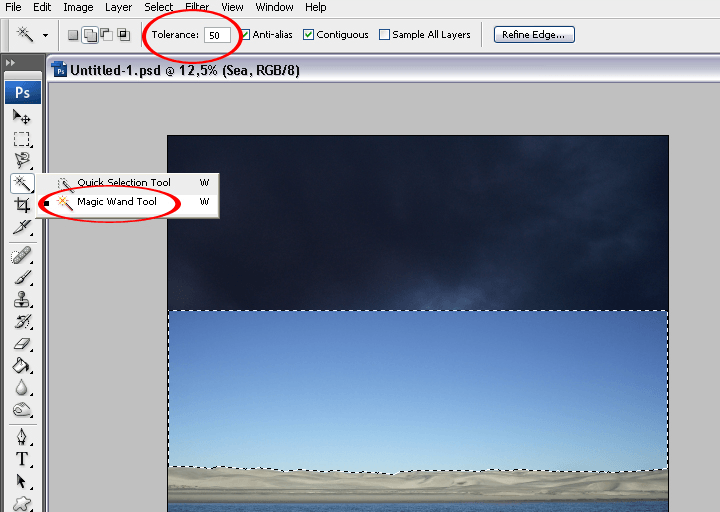
Step 12
Now we’re going to dodge/burn the sky using a nondestructive editing technique. Create a new layer (Ctrl+Shift+N or Layer > New > Layer) and position it as the top layer. Set the foreground color to #808080 (This is 50% gray). Fill the layer with this gray. Change the blending mode of this layer to Overlay then right-click on the layer and choose “Create Clipping Mask”.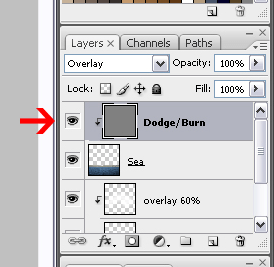
Step 13
Select the Burn tool and make sure that the range is set to Midtones and exposure to 100%. Paint over the mountain to darken it like shown in the image below.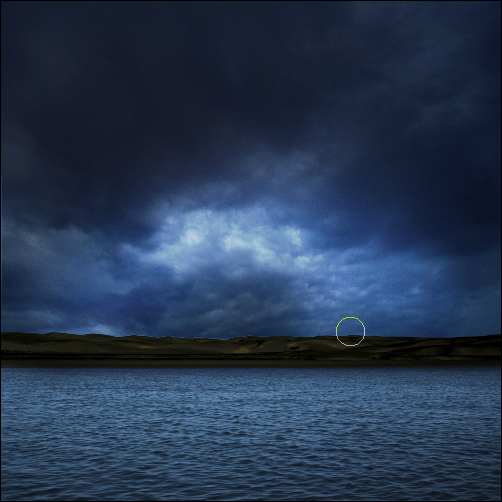
Step 14
Duplicate the layer (Ctrl/Cmd+J) then reduce the opacity of this new layer to 70%. The layer should be clipped to the previous layer as well – if it isn’t, right-click on the layer and choose Create Clipping Mask.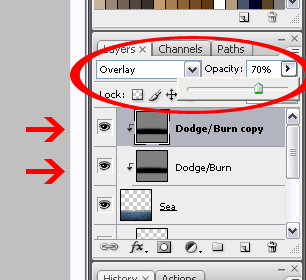
Step 15
Open the Brain image then copy and paste it to your main document. Use the Free Transform tool (Ctrl/Cmd+T or Edit > Free Transform) to scale it like shown in the image below. Hold shift to constrain the proportions.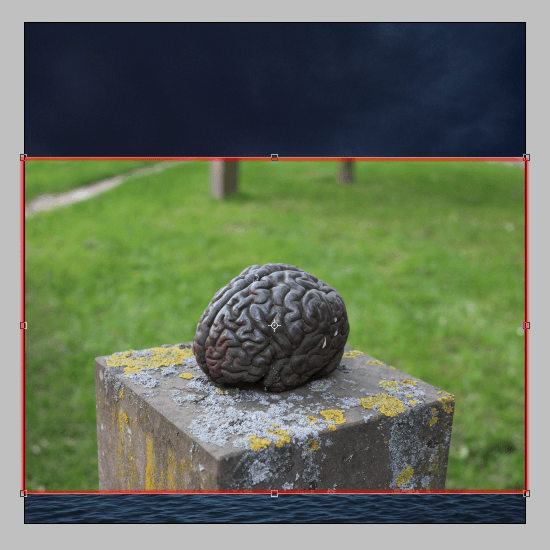
Step 16
Create a cutout of the brain. There are many ways of doing this such as using the Lasso Tool (L).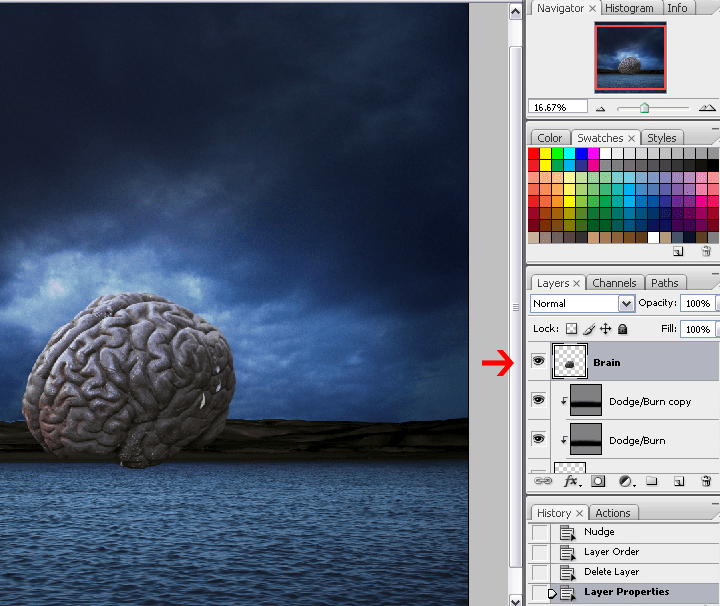
Step 17
Open the image of the model then copy and paste it to your main document. Use the Free Transform tool (Ctrl/Cmd+T or Edit > Free Transform) to scale the image like shown below then go to Edit > Transform > Flip Horizontal.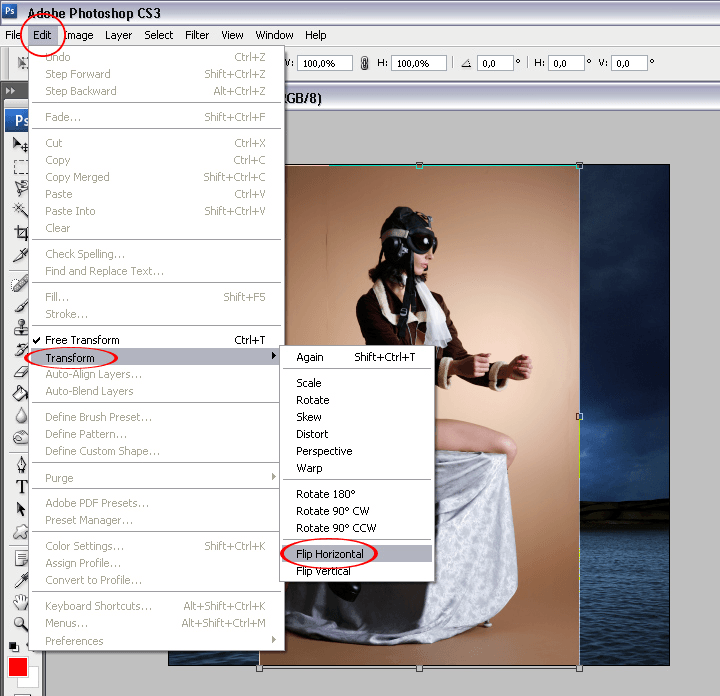
Step 18
Create a cutout of the model like shown in the image below. Erase her right leg to around the knees.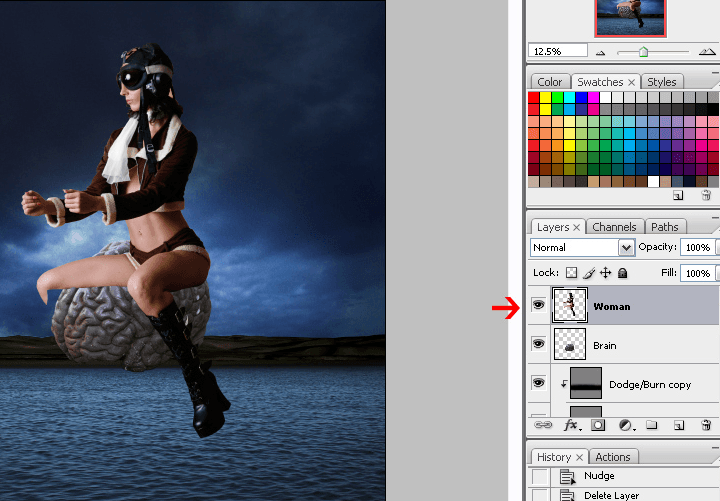
Step 19
Use the Free Transform tool (Ctrl/Cmd+T or Edit > Free Transform) to scale the model so that it looks seated on the brain.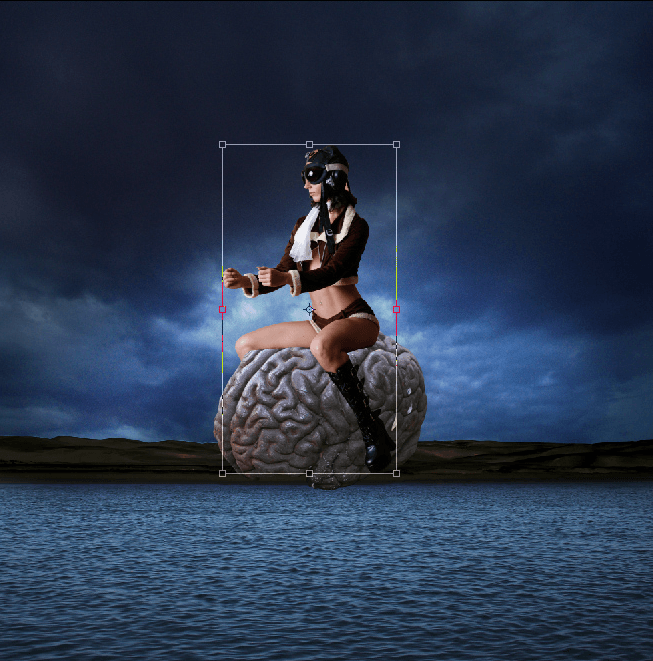
Step 20
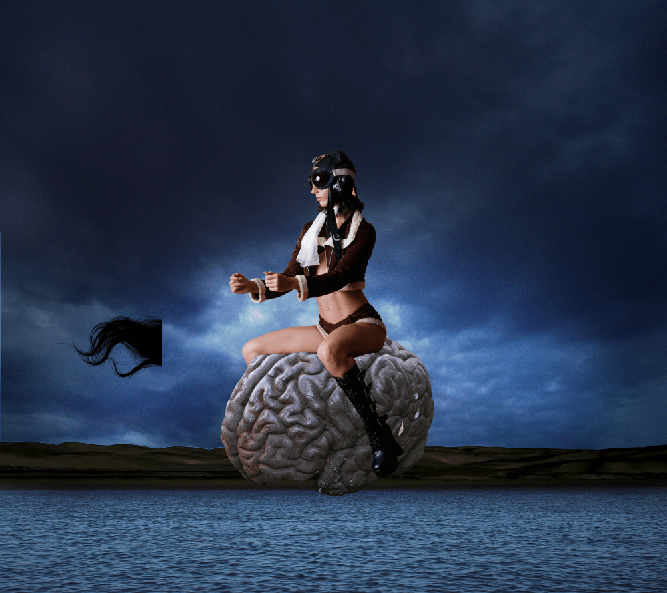
Create a new layer (Ctrl/Cmd+Shift+N or Layer > New > Layer) and position this layer below the layer of the model.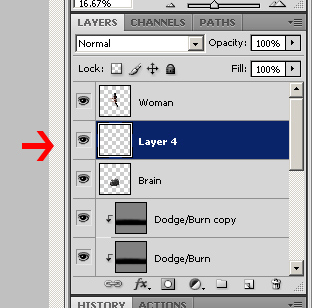
Step 21
Select the Brush tool (B) then load the brush shown in the image below.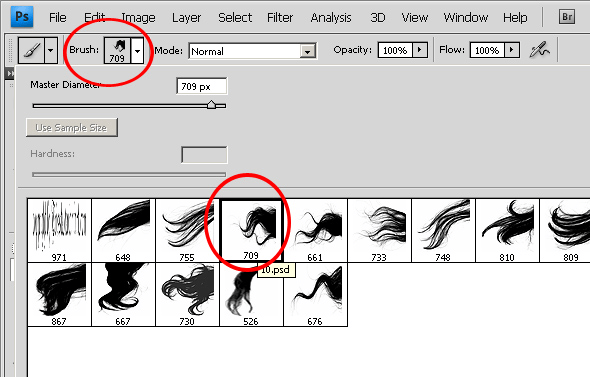
Step 22
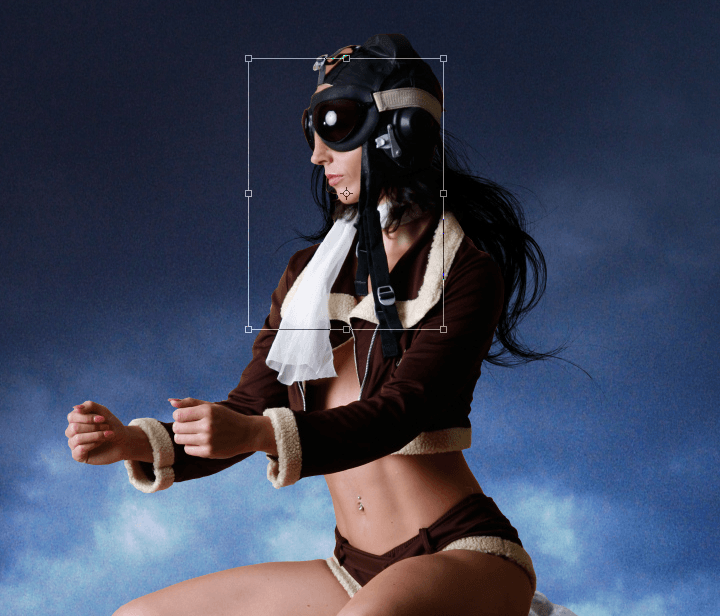
Rename the layer to “Hair” then go to Edit > Transform > Flip Horizontal.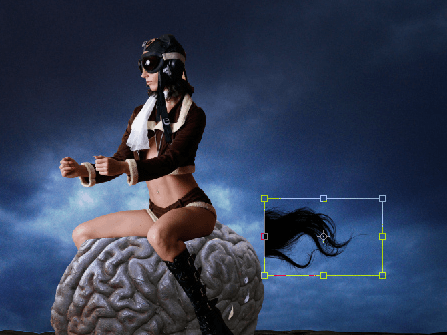
Step 23
Create a new layer below the Sea layer. Set your foreground color to white then select the Brush tool. Using a soft brush (0% feather) with a brush size around 600 pixels, paint around the landscape like shown in the image below.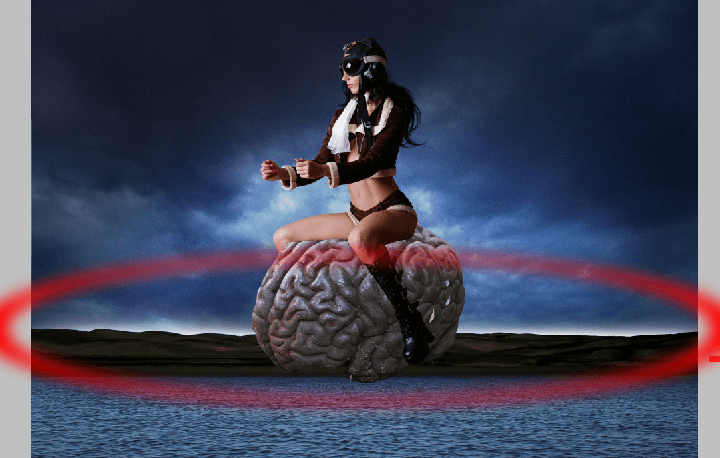
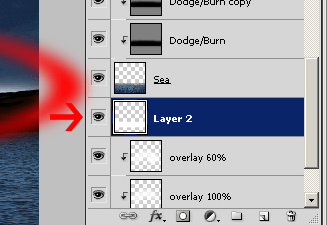
Step 24
Rename this layer to “White Glow” then go to Filter > Blur > Gaussian Blur. Set the radius to 43 pixels then click OK.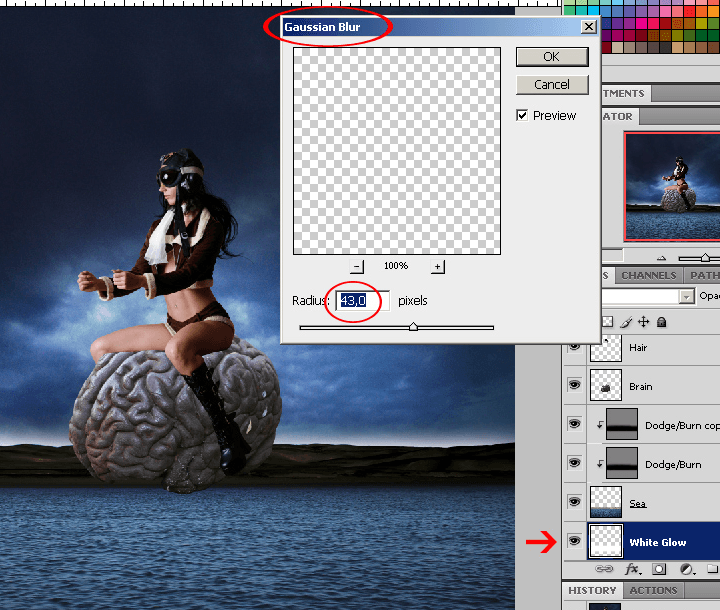
Step 25
Duplicate this layer then drag the new layer above the Sea layer. Make sure it is clipped to the layer below – if it isn’t, right-click and select Create Clipping Mask. Set the blending mode to Soft Light.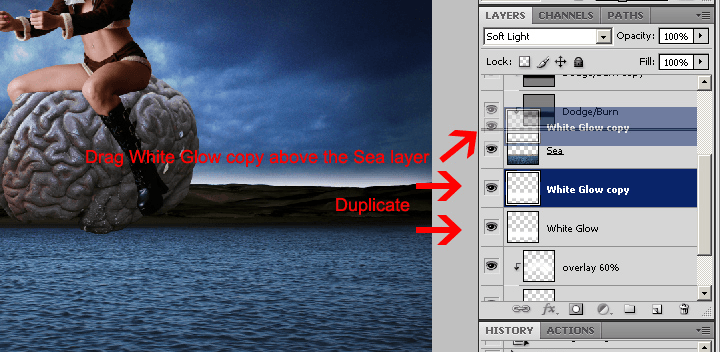
Step 26
Activate the Free Transform tool (Ctrl/Cmd+T or Edit > Free Transform). Scale the image like shown below.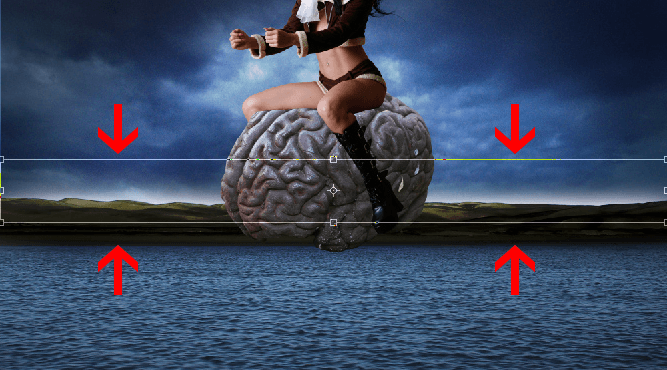
Step 27
Select the first Dodge/Burn layer.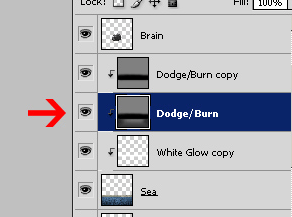
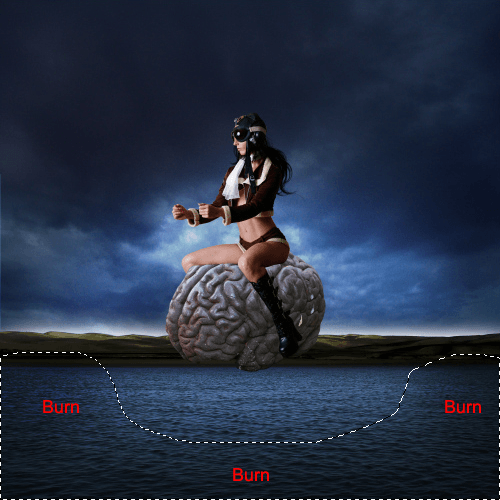
Step 28
Select the layer with the model. Go to Layer > New Adjustment Layer > Vibrance. Apply the settings as shown below.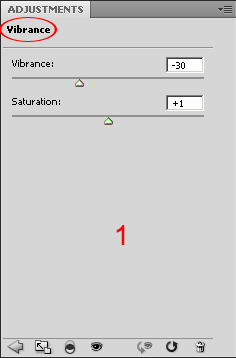
Step 29
Go to Layer > New Adjustment Layer > Hue/Saturation. Apply the settings as shown below.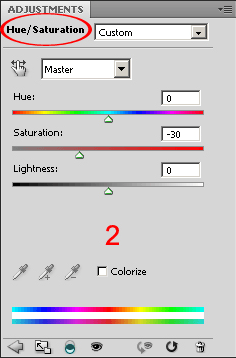
Step 30
Go to Layer > New Adjustment Layer > Photo Filter. Apply the settings as shown below.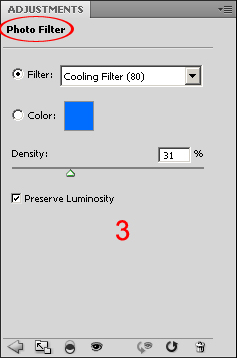
Step 31
Go to Layer > New Adjustment Layer > Brightness/Contrast. Apply the settings as shown below.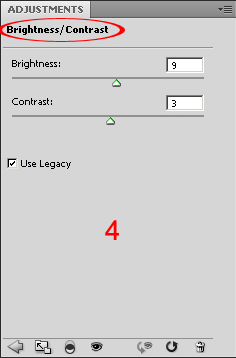
Step 32
Select the four adjustment layers (Hold Ctrl/Cmd to select more than one layer) then right-click and choose Create Clipping Mask.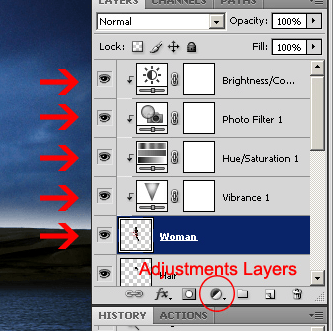
Step 33
Go to the Brain layer then press Ctrl/Cmd+J to duplicate the layer. Change the blending mode of the new layer to Multiply.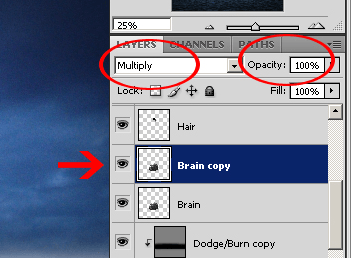
Step 34
Select the Dodge tool then set the range to Highlights and brush size to around 1000 pixels. Paint the front of the brain to brighten it up.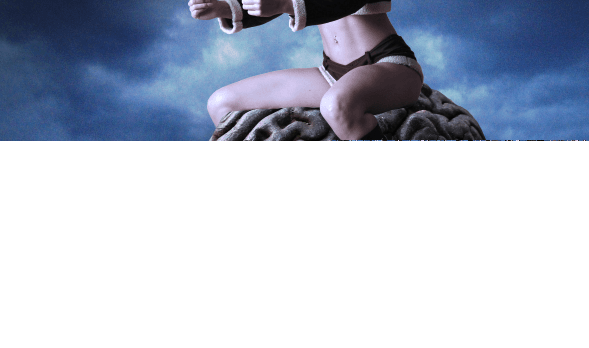
Step 35
Select the Brain Copy and Brain layer (Hold Ctrl or Cmd to select multiple layers) then merge the layers (Ctrl/Cmd+E).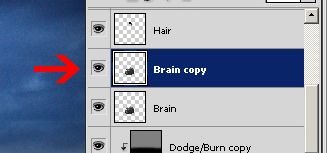
Step 36
Now we’re going to create two iron bars for the handle. Create a new layer then move it to the top. Name this layer “Iron”.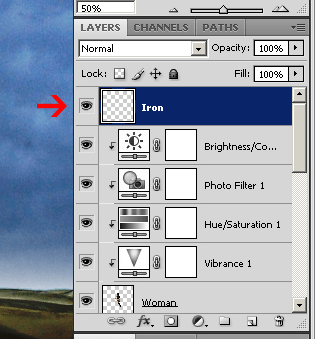
Step 37
Select the Rectangular Marquee tool then create a selection like shown in the image below.
Step 38
Select the Paint Bucket Tool (G) then fill it with black. Press Ctrl+D to deselect.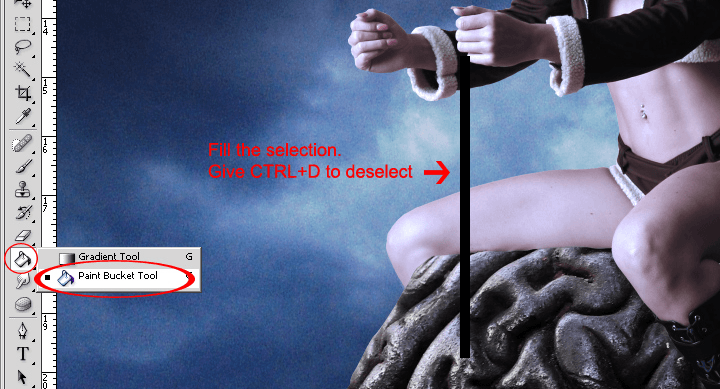
Step 39
Now we’re going to apply some effects to the iron with layer styles. Go to Layer > Layer Style > Bevel & Emboss. Apply the settings as shown below.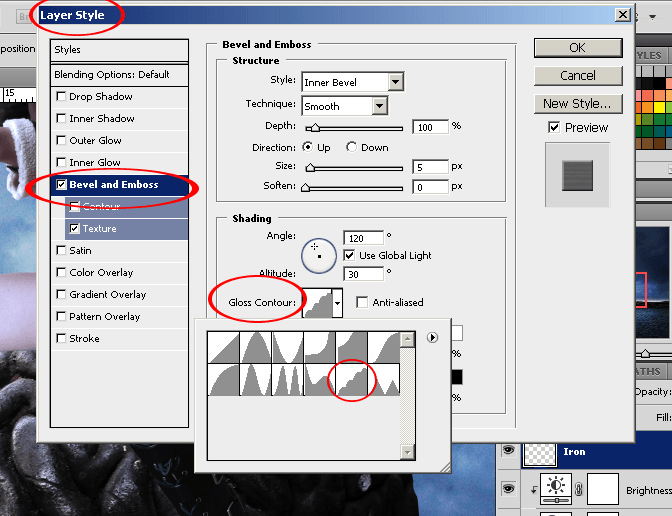
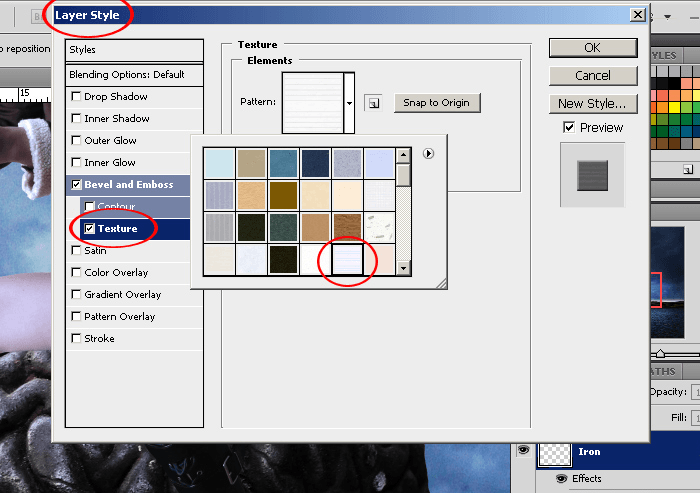
Step 40
Create a new layer under the Iron layer. Select the original Iron layer then press Ctrl/Cmd+E to merge this Iron layer to the empty layer. We have only one layer again.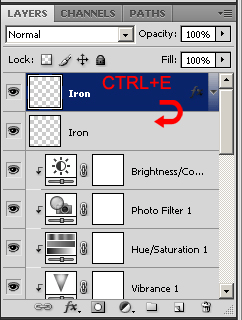
Step 41
Select the Eraser tool then with a hard brush (7-0100% feather), delete the bottom and top areas of the iron so that it looks like it fits in the models hands.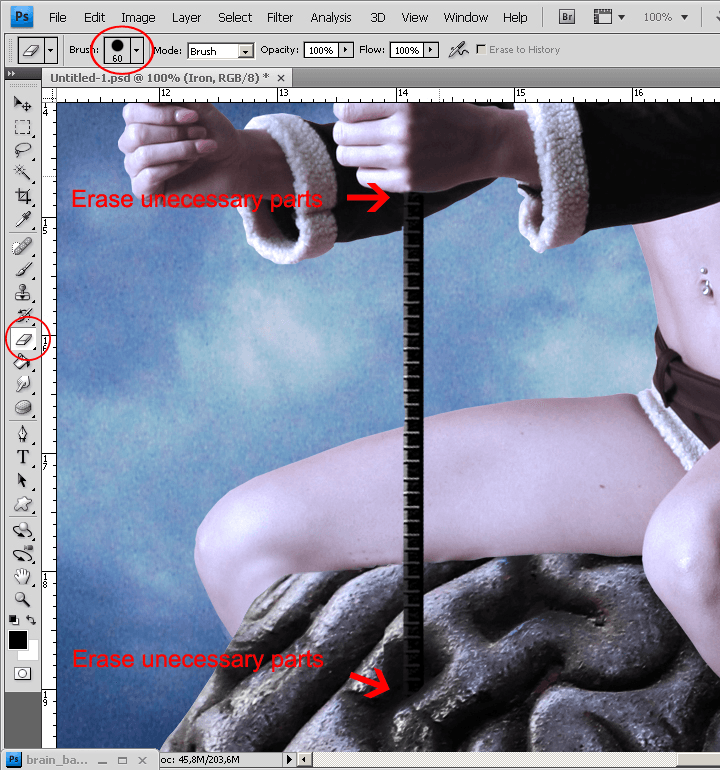
Step 42
Dodge and burn the layer a bit. Burn the part next to the hand and hole of the brain and dodge the middle of the iron to lighten it a bit.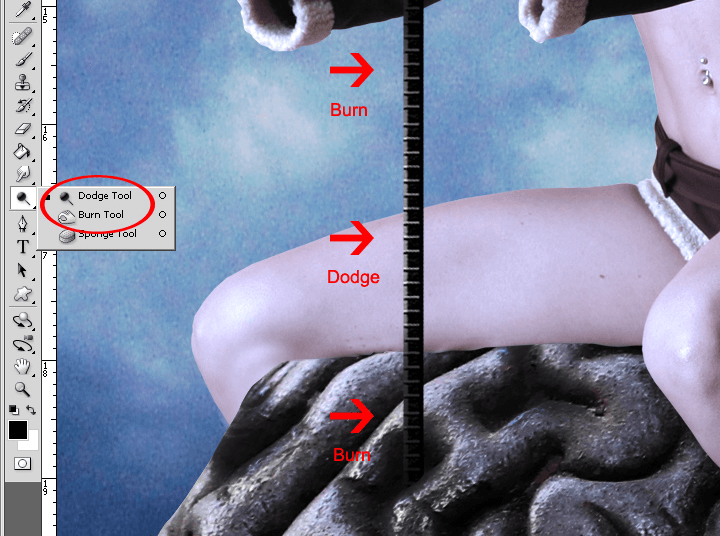
Step 43
Press Ctrl/Cmd+J to duplicate the Iron layer. Now we have two bars. Use the Free Transform tool (Ctrl/Cmd+T) to scale and position the iron rod like shown below. Delete the unnecessary parts of the iron just like what you did earlier with the other iron bar.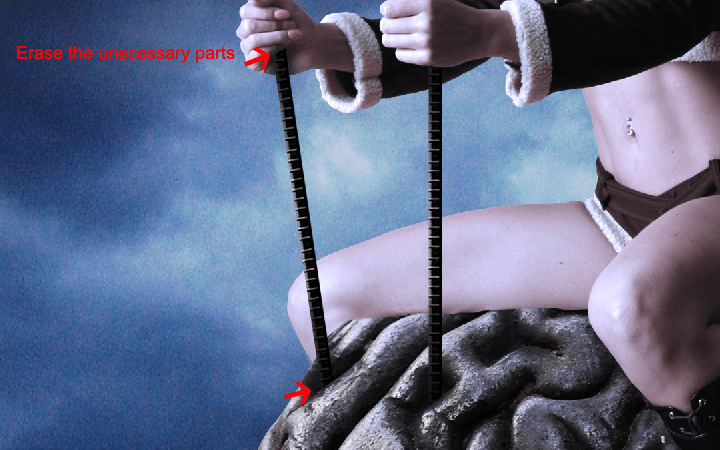
Step 44
Create a new layer above the Brain layer and name it “Shadow”.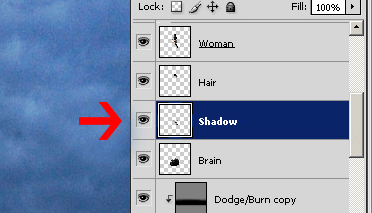
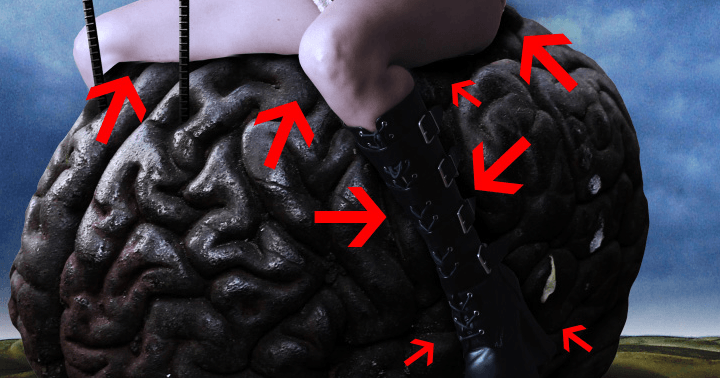
Step 45
We’re almost done! Let’s apply some more adjustment layers for the whole image. Select the Brain layer then apply the adjustment layers in the order shown in the image below.
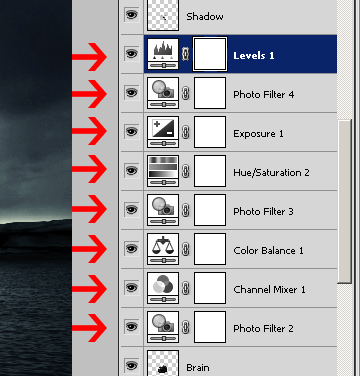
Step 46
Select the Sea layer then use the Blur tool at 50% strength to blur the top of the mountain.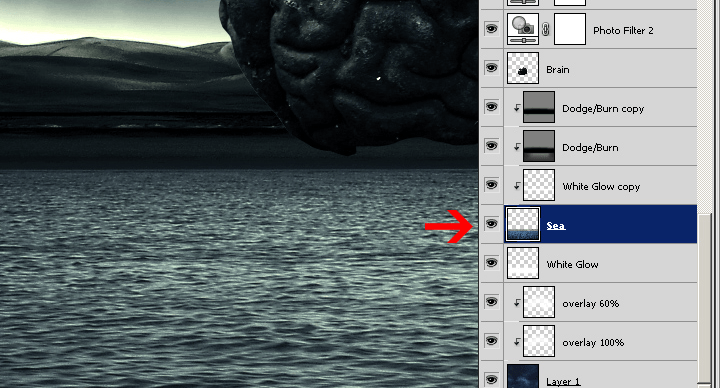
Step 47
Now go to Layer > Flatten Image.Editors Note: This tutorial suggests to flatten the image which will merge all of your layers into one. Instead of flattening the image, you can convert all the layers into a Smart Object. To do this, select all of the layers then right-click on the layer and choose Convert to Smart Object.
Step 48
Press Ctrl+J to duplicate the layer. Go to Filter > Sharpen > Unsharp Mask. Apply the settings shown below.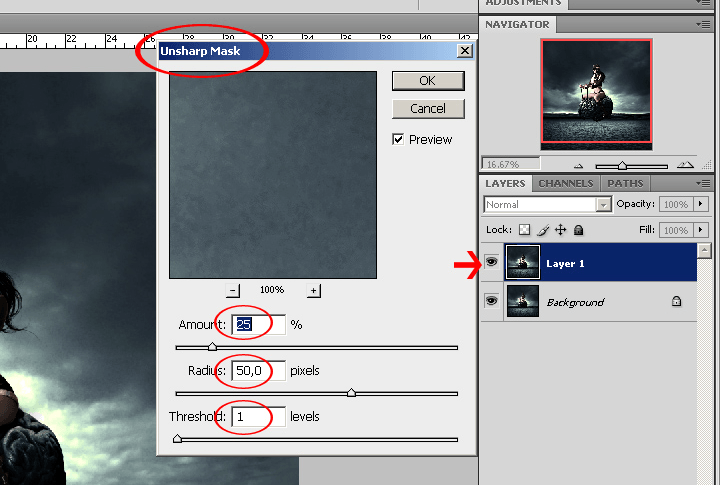
Step 49
Reduce the opacity of the new layer to 55%. Select the background layer then press Ctrl+J to duplicate it. Select the top layer then press Ctrl+E to merge it.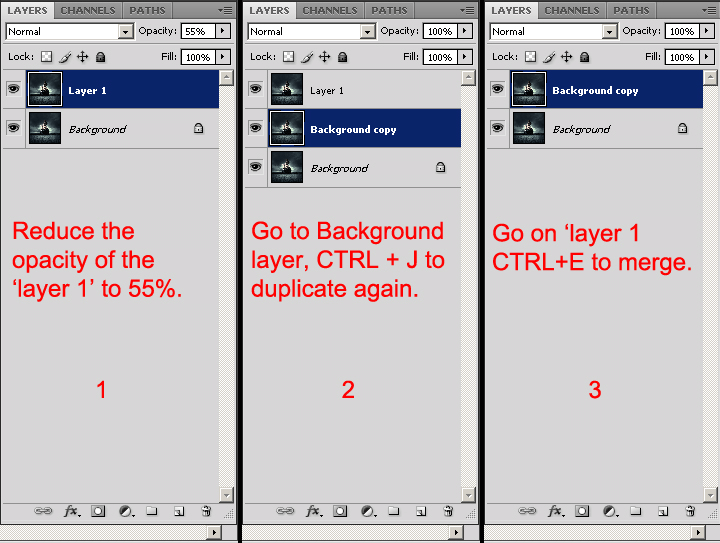
Step 50
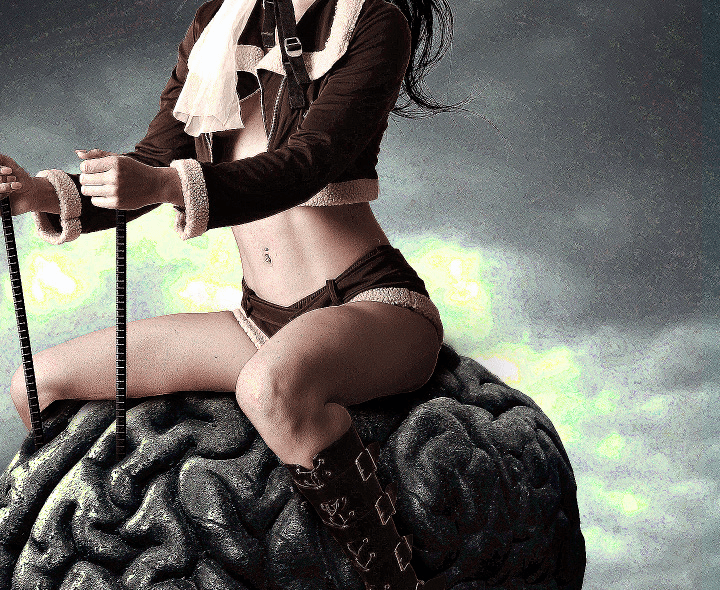
Press Ctrl/Cmd+J to duplicate the background layer. Go to Filter > Other > Custom. Do not change anything – just click OK. Lower the opacity to 20%.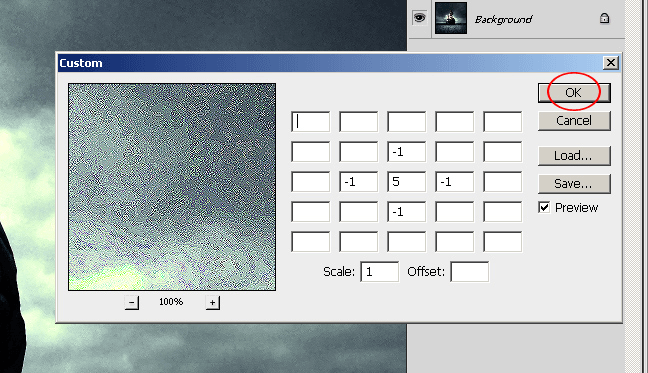
Step 51
Create a new layer then fill the layer with black.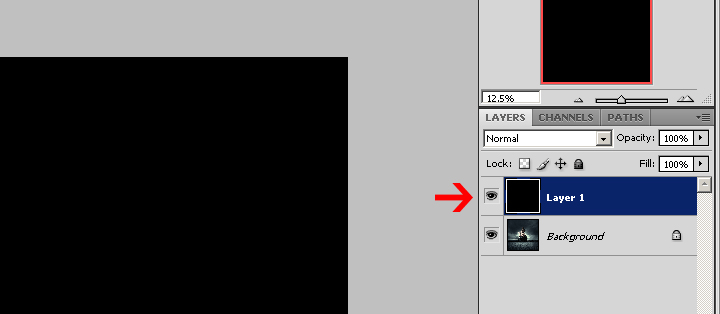
Step 52
Go to Filter > Render > Lens Flare. Apply the lens flare shown in the image below.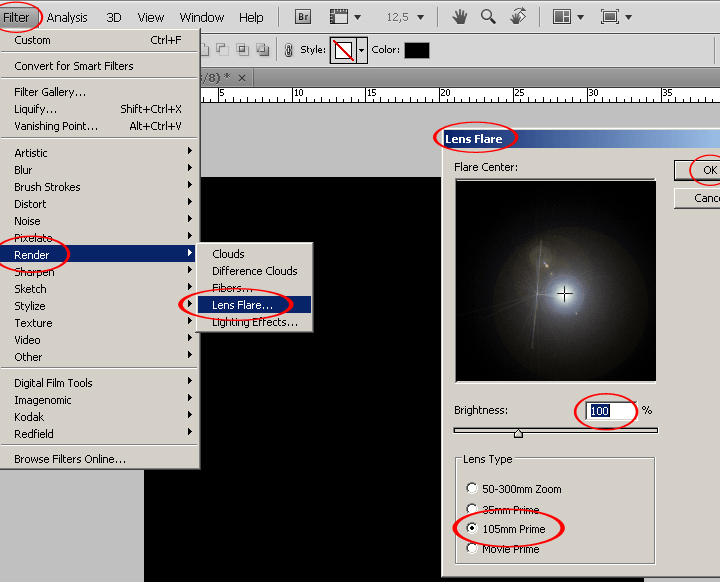
Step 53
Change the blending mode to Screen then position the light behind the model. You can use the Free Transform tool (Ctrl/Cmd+T) to see the bounding box of your layer which may help you see where it is moving but this isn’t necessary.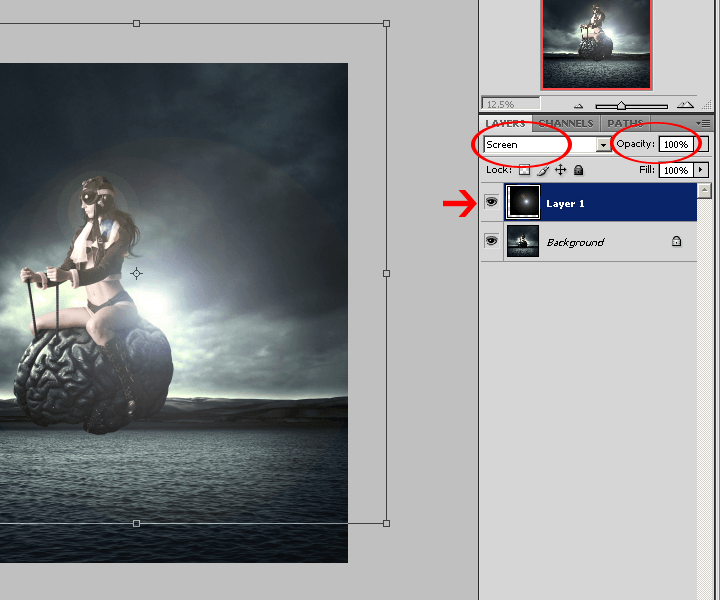
Step 54
Go to Filter > Blur > Gaussian Blur. Set the Radius to 43 pixels then click OK.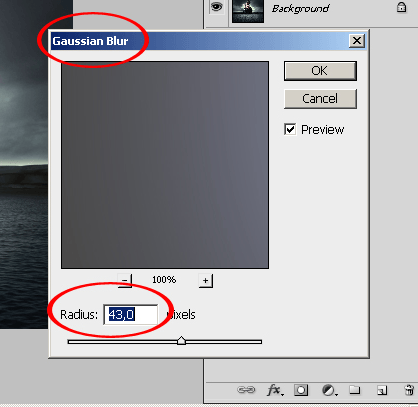
Step 55
Press Ctrl/Cmd+Shift+U to desaturate the lens flare. Use the Free Transform tool (Ctrl/Cmd+T) to scale down the lens flare. You can also reduce the opacity to 60% if you’d like.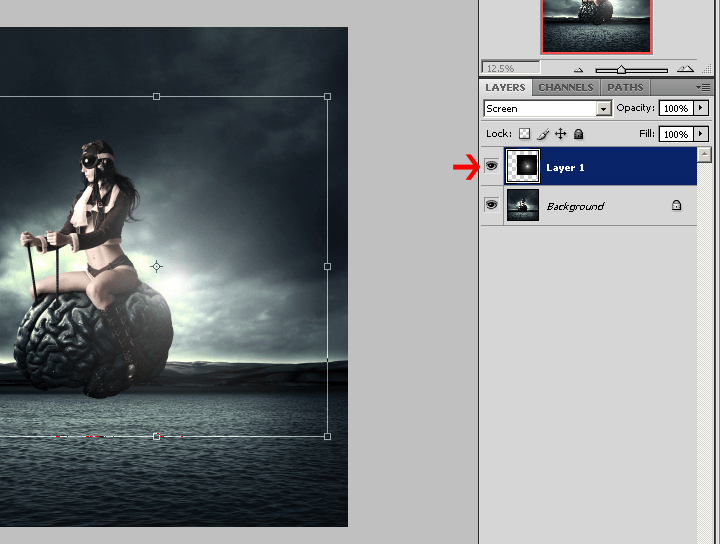
Final Results

Author : Dany Owergoor
Hello! My name is Tommy. Im a blogger, I love graphics design and now i went to Architechture Technical Senior High School. | Facebook |
Subscribe to:
Post Comments (Atom)


0 comments:
Post a Comment